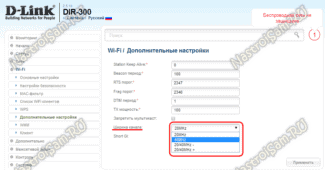
This is the mode responsible for the sequence of information packets are sent. That is, WMM assigns each packet a priority and a time to send it. This is an important feature that requires configuration the first time the router is connected to a desktop or laptop computer.
SSID Broadcasting: What is it and how do I enable Broadcast on my router?

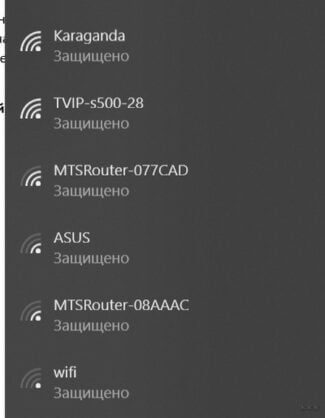
Hi friends, today we have a common topic, as always about the Wi-Fi network. To be more precise, about its name – SSID. This is the identifier, which is used for the wireless connection to the Internet. It is displayed everywhere – on your laptop, tablet, smartphone, TV, in general, on any device.
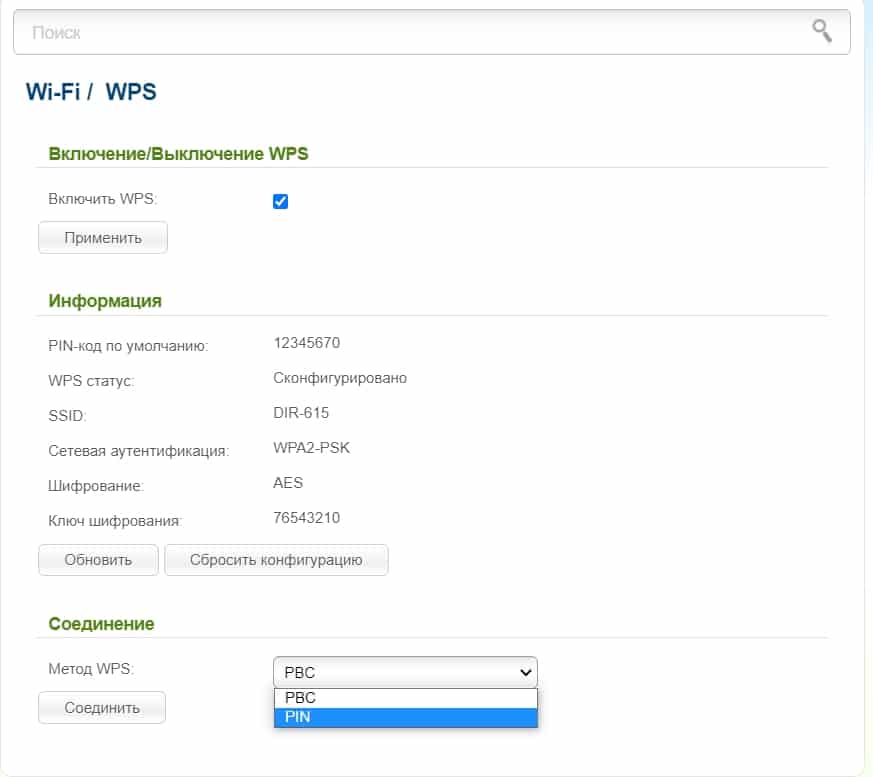
Usually the SSID is the factory setting on the router, the standard name. Most often the same name as the router. For example, I have a D-Link, and the Wi-Fi is called DIR-615. The standard name can be changed to any other name in the router's settings.
A network can be hidden or open – that is, its name can be seen or not seen in the list of available connections. That's what we're going to talk about today. Our topic is Broadcast SSID, or, in Russian, broadcast SSID (translated as Service Set Identifier). Are you ready for this? Let's go!
Guys, the topic is easy, you'll see for yourself! But if there will be questions or something unclear, be sure to let me know! For you always working comments and online chat!
Where do I find the name of the network and make it open?

This item is in the WEB-interface of any router, in the settings of the wireless connection. Let me tell you how to change the network name to a unique one and enable SSID broadcasting, that is, make it open (visible).
Dual-band routers broadcast two networks, at 2.4 and 5 GHz. All settings are made for each one separately.
How do I make a network invisible? Find instructions here:
TP-Link
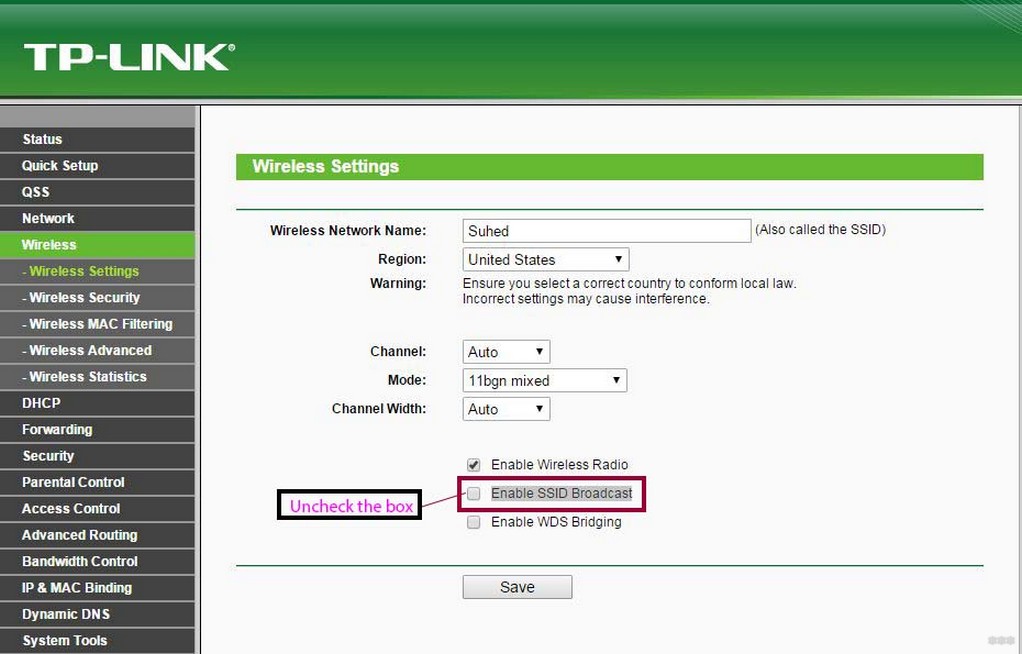
In the menu on the left, select "Wireless mode" and go to "Wireless settings". Next, fill in the fields:
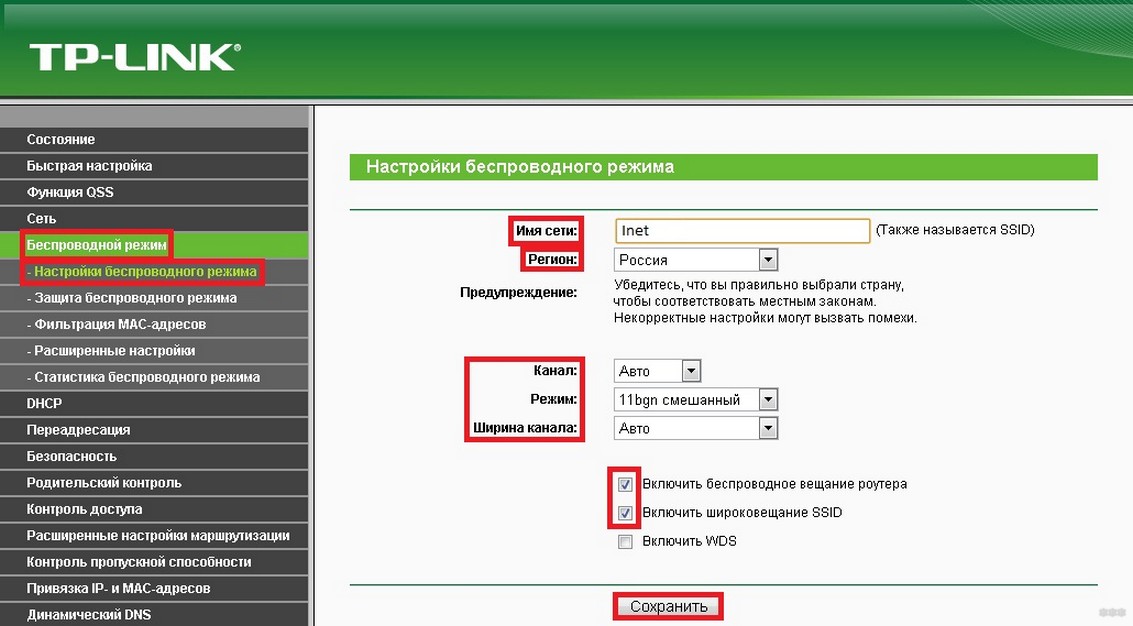
- Network name – think of an identifier made up of Latin letters and/or numbers. You will see it in the list of available connections. If you will have two SSIDs with the same name, you will get an authentication error when you try to connect.
- Region – choose your country of residence.
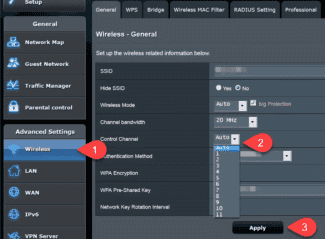
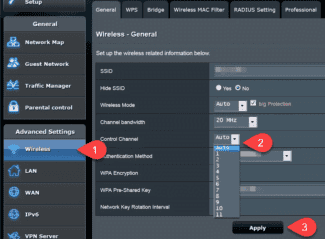
- Channel – we recommend "Auto".
- Mode – 11bgn (mixed).
- Be sure to check the box next to "Enable wireless streaming…". This is how we activate the access point.
- In the line "Enable SSID broadcasting" we also put a tick, if you want the network to be visible, that is, it will be displayed in the list of available on all devices. In fact, here it is – this item that we are discussing today.
In older interfaces, not russified, the item may be called "Enable SSID Broadcast".
Full Wi-Fi configuration
So, all the Wi-Fi settings are in a separate section, which is called that. D-Link has several firmware versions, but they have approximately the same functionality. The classic firmware has a more convenient interface, and all the subsections are located at once.

In the dark (new firmware) full configuration is in "Advanced Settings" in the same section. In order to view all the subsections, you need to click on the right arrow.

Let's go through all the items and configurations. I almost forgot to mention that some models have two wi-fi frequencies: 2.4 and 5 GHz, which are two different networks. Each has its own pros and cons. I suggest reading more about these frequencies here.

WARNING! After each change, be sure to click "Apply" in the appropriate section. Also at the very end, when you have configured everything, you will need to click on "System" and select the "Save" button from the list – it is necessary to apply the settings.


Basic settings

- Enable wireless network – if unchecked, wi-fi will stop working at all.
- Broadcast wireless network – If you uncheck this box, there will be no internet when you connect via wi-fi. It will be only when connecting by wire.
- BSSID – MAC address of the wireless network. An ordinary user does not really need this item.
- Hide Access Point – if unchecked, it will exist, but will be invisible, and you will only be able to connect to it if you enter the name manually.
- SSID – Wi-Fi network name.
- Country – In different regions and countries, there is a limit to the signal strength. This restriction is regulated by the law of the country. Therefore, it is better to choose your region. It is said that Japan has the minimum limit, so you can try this country.
- Channel – 2.4 and 5 GHz frequencies have their own channels on which the dedicated router works. This is to ensure that your neighbor's routers do not interfere with you. You can select a channel by load, but it is better to set the mode "Auto", in this case the device will choose the most unloaded channel automatically when you turn on the router.

- Wireless mode – this setting is needed in order to choose what standards of wi-fi will be used. For 2.4 GHz it is B, G, N, and for 5 GHz it is usually N, AC and in rare cases AX. If you don't have older devices manufactured before 2009, you can choose N at 2.4 GHz. You can read about the standards here.
- The minimum number of clients – everything is quite clear here. This parameter shows the limit for connections to wi-fi. You can decrease or increase this figure depending on the load of the router.
Signal interval: fine tuning of the router
The process of setting the basic settings related to the signal interval on the Wi-Fi router was described above. Similar procedures can be performed on many routers, and in particular on TP-Link, Asus, Mikrotik. In general, the signal Wi-Fi interval is configured according to the following scheme:

- Go into the settings of your router according to the above algorithm.
- In the "Advanced parameters" section, find the "DTIM" line and set the value to "1".
- Check the value of the RTS threshold of wifi. The default setting should be 2346.
- Go to the tab of wireless network parameters and activate WMM mode, if it is off.
- In the same subsection activate the Short GI add-on.
- Save the changes and restart the router for the values to be finally applied. Now it is easy to understand what Wi-Fi beacon interval to set.
Recommendations for Wi-Fi signal interval setting
Experienced experts give some simple tips to help avoid mistakes when performing the task:
- Check the exact values of the signal interval parameters for a particular router model on the router manufacturer's official website.
- Do not set values higher than the declared values to avoid incorrect operation of the router.
- Return the data to the original version, if the setting has not worked.
Thus, the interval of the Wi-Fi beacon allows you to stabilize the router and increase the speed of information transfer. The main thing is to follow the above recommendations when setting the signal interval parameters. Now you can understand what Wi-Fi beacon interval is and why it is needed.
Read More:
