Please note! The update will stop if the power is suspended. Instead of checking, you may get a damaged router. Wireless access can only be restored by the service center.
- Setting the channel in the Wi-Fi router, how to choose a free: or why frequent Wi-Fi breaks, low speeds, poor quality coverage
- Choosing and setting up the channel in your Wi-Fi router
- What affects a router's signal range and wifi adapter reception range?
- Factors that affect WiFi signal range
- Place wifi router
- Interference from Household Appliances
- How to find out the free wifi channel
- Changing the channel on the router
- TP-Link
- D-Link
- iOS
- How to change the automatic channel selection on the router
Setting the channel in the Wi-Fi router, how to choose a free: or why frequent Wi-Fi breaks, low speeds, poor quality coverage
I think that many of our users have faced the problem of "poor" Wi-Fi network operation more than once: the speed is low, the connection is interrupted, the quality of coverage is poor, or something else.
All these "woes", by the way, can occur due to the fact that you have "incorrectly" selected in the router settings channel .
Many people underestimate this option, and very rarely pay attention to it (for good reason!). If you live in a large apartment building (where the neighbors have their own Wi-Fi routers), then when you overlap the channels – the quality of communication can significantly deteriorate!
Actually, in this article I wanted to tell a little more about the channels: how you can find a free one, how to set it in the settings of Wi-Fi router. I believe that checking this point – will not take so much of your time (but if the reason was that – you will significantly improve the quality of your Wi-Fi network!). 😉
Choosing and setting up the channel in your Wi-Fi router
Nowadays most routers work on 2.4 GHz frequency (5 GHz frequency is much less) . For this frequency in our country it is allowed to use from channel 1 to 13 – i.e. every Wi-Fi network works in this range (I note that in other countries other channels may be allowed and used. For example, in America, channels 1 to 11 are allowed).
By the wayIf your Wi-Fi network will use channel 13, then the device localized to work in the U.S., simply will not be able to work with this network.
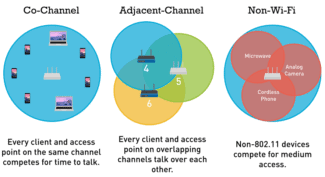
As I said above, the problem may arise when several routers (located not so far from each other) start working on the same channel. This is especially common in large apartment buildings. Because of this there can be a decrease in speed, frequent breaks, poor coverage.
Generally, by default, in most routers there is an option of auto-choice of channel: i.e. when turning on the device, other Wi-Fi networks should be "analyzed" and either a free channel or the least "loaded" one should be set. But it should be noted that it does not always happen this way: both the "stuffing" of the routers fails, and not very often they are rebooted.
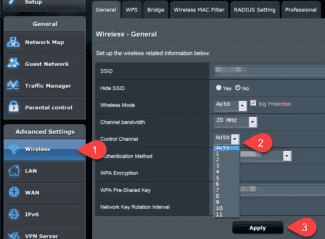
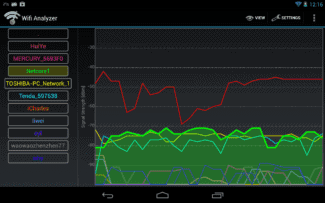
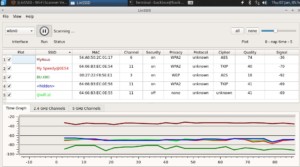
To correct the situation in this case can be "manual" adjustment. With the help of special utilities you can find out what Wi-Fi networks are around and on what channels they work. After that, open the router settings, and set a specific channel (for example, the 5th).
Note! By the way, poor Wi-Fi coverage can be not only because of the wrong channel – but also because of the wrong location for the router installation (see the diagram below 👇). In general, on how you can boost your Wi-Fi signal, I recommend 👉 this post.
What affects a router's signal range and wifi adapter reception range?
For a stable network in a standard city apartment, the simplest router and a built-in laptop adapter are enough. However, there are many side factors that make it necessary to amplify the signal to increase the range of the wifi signal at home. I talked about the main reasons that can affect wifi speed in the article at the link.
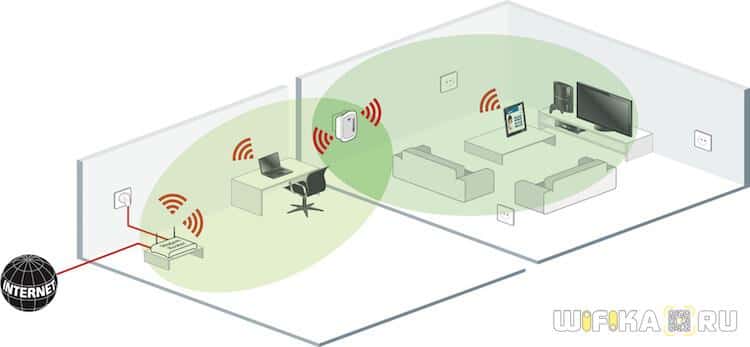
Let's not repeat ourselves, but let's imagine that we have ideal conditions for wireless radio signal propagation in our home. That is, there is no interference from neighboring routers and other active frequency emitters such as microwave ovens. In these conditions, the distance and obstacles on the way from the source to the receiver take on the main function of signal absorption.
| Obstacle | Additional loss (dB) | Effective distance |
| Open space | 0 | 100% |
| Window without tinting (no metalized coating) | 3 | 70% |
| Window with tinting (metalized coating) | 5-8 | 50% |
| Wooden wall | 10 | 30% |
| Interroom wall (15.2 cm) | 15-20 | 15% |
| Bearing wall (30.5 cm) | 20-25 | 10% |
| Concrete floor/ceiling | 15-25 | 10-15% |
| Monolithic reinforced concrete slab | 20-25 | 10% |
This table clearly shows how much signal quality will be lost depending on the types of obstacles in its path. For example, let's take an abstract router that in the best conditions and without interference or obstacles will actually give out a WiFi signal at 100 meters. It is under these conditions that manufacturers indicate the "shooting range" of their devices on beautiful boxes and in advertising brochures.
Factors that affect WiFi signal range
There are several popular ways to increase a router's wifi signal to extend the reception area and improve connection quality that can be used independently in any apartment or private house. And it does not matter what manufacturer the router will be – TP-Link, Asus, D-Link, Zyxel, Keenetic, Tenda, Netgear, Xiaomi, Rostelecom, Beeline, MGTS and so on.

The first category is the elimination of external influences on the radio waves, as well as the use of additional devices.
Place wifi router
Many during the repair in the apartment determine the place of installation of the router somewhere in a special server room, or in the dressing room, or in the electrical switchboard. In a word, out of sight. But the configuration of the apartment layout is often such that the wireless signal from the router does not reach the rooms remote from the installation site. As a result, the range of the wifi is not enough to get any acceptable speed on it.

The way out – to use the advice from Asus FAQ – move the router closer to the "geographical" center of the apartment to the signal from it in a circle evenly distributed throughout the rooms. You can hide it somewhere behind a cabinet if you don't like the look of it, as long as there is an outlet for it.
Interference from Household Appliances
You should also avoid placing your router near appliances that emit strong electromagnetic waves. For example, near a microwave oven. The interference created will greatly affect the correct and uniform amplitude of the wifi signal propagation through the rooms.
How to find out the free wifi channel
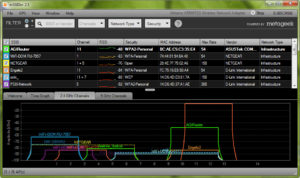
To find a free channel and change it, you need to use software tools. The best known of these is inSSIDer. The application is free only for the Home version. It is recommended to download it from the website and then run it. The precondition for the work of the program is the presence of a wi-fi adapter at the workstation. In laptops it is built-in, and for PCs you need to buy it additionally.
- After launching the software, go to the Network tab. All available wi-fi connections will be displayed there. The connection used by the client is marked with an asterisk.
- The Channel column shows the numbers used by each wireless device. Look through them carefully and select a rarely encountered number.
- Next, go into the router's configuration. In the "Wireless network" section, set the value manually to the desired channel.
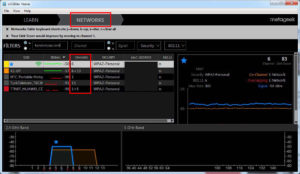
If the Channel column has values such as 1+5, it means that the user changed one of them manually, and the other was selected automatically by the network device.
Separately, it is worth noting that routers never use three digits: 1, 6, 11. They are always free.
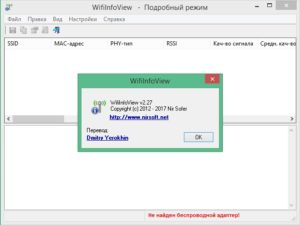
An alternative to the above program is the WifiInfoView utility, which is an archive. After unpacking it, run the program.
The principle of action is similar to InSSIDer. Except that WifiInfoView displays detailed information about each wireless network. Once it starts, it will scan your surroundings and display a list of available connections with the distance to each of them. Thus, it is quite realistic to find the least busy wi-fi network to connect to.
Changing the channel on the router
Now let's look at how to change the home router channel from different manufacturers of network devices. There are several main ones: TP-Link, D-Link, Asus, Zyxel and Huawei.
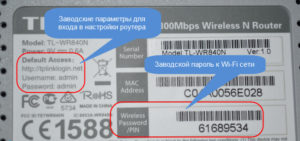
In order to change the parameter you have to enter the web interface of the equipment via your browser. The router usually has its IP address and login and password. If for some reason they are not there, it is recommended to visit the official site and find the model in question. The instructions on the portal will tell you in detail how to enter the router's administration panel and change the value in the Channel field.
TP-Link
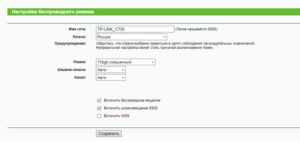
To change the wi-fi channel on the tp-link router, you need to go through the web interface to the Wireless section, or in Russian – "Wireless network":
By default, the value in the Channel field is "Auto". Using the above program, you must find the currently free number. After that change the status "Auto" to the found value, press "Save" button. Then you need to restart the equipment for the changes to apply.
D-Link
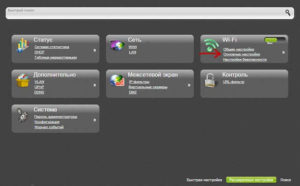
To change the channel on the router from the manufacturer D-Link, you need to enter the menu Wi-Fi – "Basic settings". The item "Advanced settings" should be green at the bottom:
Then select the field "Channel", change the value based on the program InSSIDer. Press the "Save" button to remember the configuration change. You will need to reboot the device to switch the wireless module to the new settings.
iOS
There are a lot of network tools developed for iOS phones, such as IP Scanner, WIFI Analyzer, iNetTools and others. The principle of their action on the iphone is the same. Diagnosis of the Wi-Fi network is carried out in the same way as the programs on Android, Mac OS and other systems.
First you need to understand which channel is not currently loaded. That's the one you need to select. How do you know that it is not busy? For the computer – use InSSIDer, and for the phone – Wi-Fi Analyzer or Home Wi-Fi Alert. These programs will indicate the total number of connected signals. By eye, you should determine where the fewest connected points are. This is the fastest method of choosing the best channel. The only thing to keep in mind is that many channels have overlaps in the frequency range and can cause additional interference.
Note! Non-intersecting channels are those that go under the numbers 1, 6 or 11. You should not set the 12th and 13th channels, as some devices do not detect them.
How to change the automatic channel selection on the router
After selecting a free channel, you need to configure the router by changing the signal frequency. This is an uncomplicated procedure, as well as wifi diagnostics. It is impossible to give an exact algorithm for changing the automatic selection. Below is a basic scheme of work in such a situation:
- Log in to the settings. Find out the login address with login and password on the surface of the router or check with the manufacturer.
- Enter the wireless mode of the Wi-Fi network. With a dual-band router, make separate settings for each parameter.
- Find the channel parameter, click on it, save the settings and reboot.
You can replace the selected channel in the same way. To enter the settings you have to use 192.168.0.1 or 192.168.1.1 address, login and password – "admin" in English.
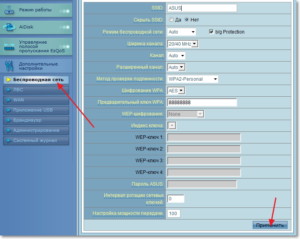
As a result, the Wi-Fi-network channel is something without which a stable Internet connection is impossible. It can be found through the programs InSSIDer, WirelessNetView, Free Wi-Fi Scanner, LinSSID, iwScanner, Mac OS Scanner WIFISCANNER. You can change the automatic channel selection on the router by following the above instructions, as well as carry out such a procedure as a wifi network check.

Podgornov Ilya Vladimirovich All articles on our site are audited by a technical consultant. If you still have questions, you can always ask them on his page.
Read More:
