WiFi channels (channel) – certain subfrequencies, in which the router connects to the network. Many characteristics of the Internet, namely the amount of interference, speed, stability of the connection and others, depend on their correct choice. The question is which Wifi channel is better to choose, and how to change it in routers of different models.
Wifi 5 GHz channels – increase the speed of the Internet with the right channel
Wireless networks have come a long way in the last 15 years. But the stable speed of the Wi-Fi connection is still a source of our bad mood in many situations. There are many reasons responsible for the appearance of this problem. For example, how your router is configured, whether there is a source of interference nearby, whether you live in a private area or in an apartment building, how far apart your device and the router are. Fortunately, there is always a way to improve slow data speeds.
If you've ever dealt with your Wi-Fi router settings, you've probably noticed the word "channel" (or "channel"). Most routers have "Auto" in their default channel settings, but it's safe to say that most of us have looked at this list of about a dozen or more channels and wondered what exactly they mean and, more importantly, which of those channels are faster than the others.
But let's go over everything in order. Some channels are indeed much faster, but that doesn't mean you should immediately change your settings. Better have patience and read the article to the end to learn more about IEEE 802.11 channels (the set of communication standards for wireless LAN communication, better known as Wi-Fi), interference, and the enormous difference between the 2.4 GHz and 5 GHz Wi-Fi frequency bands.
How to find a free WiFi channel
To find a free WiFi channel among the neighborhood networks in use, you'll have to use third-party software. Very often, on various Internet forums they advise to use wireless analyzer: program inSSIDer.

The program must be downloaded (inSSIDer for XP, inSSIDer for Windows 7 and Windows 8), installed and run. You will be shown all the available active WiFi networks. We will look at the Channel column. It shows the radio channels used.
There are currently 13 approved WiFi channels in Russia. Of these, 3 channels are non-overlapping – channels 1, 6, and 11. If one of these channels is not busy – great. If all of them are busy – just look for a free one and take it.
Note: There is no doubt that inSSIDer is an excellent and functional product, but it is a bit heavy in my opinion. If you want a lighter and simpler program, you can use WiFiInfoView.

It is a pretty basic freeware tool that shows all the info you need and works with most WiFi adapters.
Setting the "Bandwidth"
What does a router's WiFi bandwidth mean for 5, 20, or 40 MHz – a question that is easier to figure out with a comparison.
When distributing traffic, the router uses a signal of a certain frequency: the user chooses between 2.4 and 5 GHz – the difference in signal strength and range. This figure is usually compared to traffic on the highway – the driver can choose which of the two roads he will use to get to his destination. It is worth paying attention to the standards that are supported by the router and the receiving devices: 5 GHz are available for 802.11 networks of standards "a" , "n" , "n" as well as "ac".
Band width (and 2.4 and 5 GHz) is fixed, it can be represented as a paved road. According to Russian standards, each band is allocated 13 channels – lanes, but they partially overlap each other. The user can adjust how wide his WiFi bandwidth – 20 or 40 – which is better, you have to choose by the situation, the difference in speed can be significant.
Another question that inevitably arises for the user is what does the WiFi bandwidth of 20 or 40 affect? With this indicator you can increase the speed of the Internet through the router, but the problem must be approached thoughtfully.
What is the difference in practice?
The first thing to do is to find out if the WiFi router has a channel width option in its settings, because there are models that only support 20 MHz. Possible choices are 5, 20, 20/40, 40, 80 MHz.
- The number of neighboring wireless networks. The longer the list of networks you can connect to, the less sense it makes to use 40 MHz – noise can reduce throughput.
- Wireless devices that are used at home – Bluetooth headphones and bracelets (Xiaomi), cordless landline phone, etc. Wide bandwidth will interfere with home gadgets, so 20 MHz is preferable.
When choosing bandwidth, there is no difference what wireless standard is used. So when asked which WiFi ace bandwidth is better to choose 20 or 40, the answer is standard – the one with the higher speed.
As a rule, users check the available modes one by one (usually there are 2-3) and measure the speed in those places in the house where the Internet is most often used. Because it's faster and easier to feel the difference in practice, rather than calculate the signal level and figure out the graphs of analytical programs.
How to choose the best channel
After the analysis it takes less time to decide how to choose the best channel for a WiFi network. As a rule, it is enough to specify the least busy channel. In doing so, start with non-overlapping subfrequencies, namely 1, 6 or 11. If they are busy, select other options. Be careful with numbers 12 or 13, because if they are set, some devices may not connect to WiFi at all due to lack of support.
Instructions for different models to change
With the help of special programs, we have figured out which WiFi channel is better to use to protect against interference and improve the speed of the connection. If the user has not previously changed the settings, the default setting is automatic detection of the desired subfrequency. After each reboot or with a new connection, the router determines a new channel taking into account the current load.
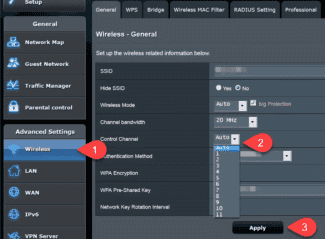
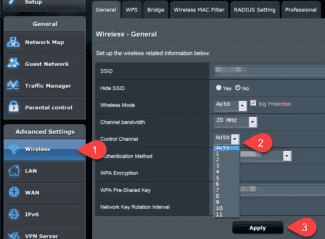
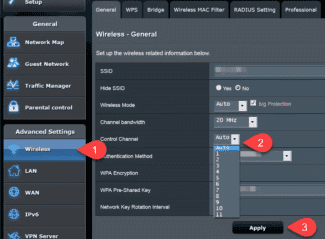
Knowing how to select the correct channel for WiFi, you can manually determine the required parameter and set it in the settings. The general algorithm of actions has the following steps:
- Go to the router settings to make changes. You can find the necessary login information on the bottom of the router or on its box.
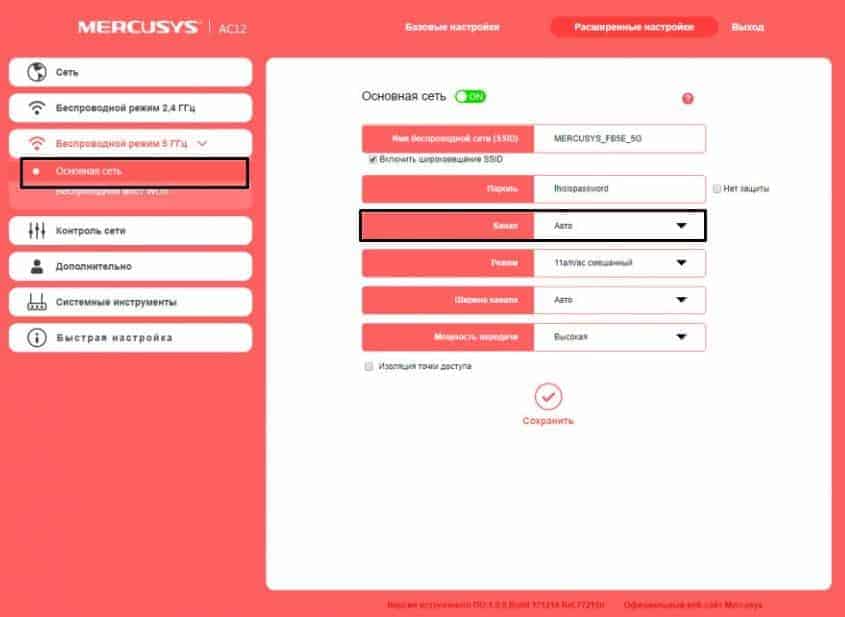
- In the settings section, enter the WiFi settings. If the router operates with two frequencies at 2.4 GHz and 5.0 GHz, you may need separate settings.
- In the settings, look for the number you want and select it.
- Save your changes and restart your router.
Most devices use IP addresses 192.168.0.1 or 192.168.1.1 to enter setup mode. As for authorization data, it is sufficient to enter the word admin in the login and password section. In some situations, the second field is left blank. Also in the settings you can select the width of the WiFi channel on the router and make other changes.
Approaches to channel configuration are individual for each router. We will highlight recommendations for several models:
- TP-Link (old interface). To make adjustments, enter Wireless mode, and there in the Main settings. Find the Channel link and set the desired value. Then click the Save button and restart the router.
For the new interface, enter Wireless mode, and then click on Wireless settings. In the main field, there should be a Channel WiFi item with the option to set a new value. As in the previous case, save the data and reboot.
Read More:
