But there is one thing in common: the menu is usually located on the side or top. The basic settings in the menu are also identical, and are set in a similar way. So by looking at how one router is configured, you can configure the other one by analogy.

- How to connect and configure a new Wi-Fi router by yourself – a guide with pictures
- Step-by-step instructions: connecting and setting up a Wi-Fi router
- Connecting the computer to the router
- Method 2: Wireless connection
- Step 2: Using the WPS feature
- TP-Link
- Step 3: Connecting in Windows
- Step 3 – Select the type of connection to the Internet
- Step 7 – Save the changes.
- Connecting
- Problems that may arise when connecting
- No connection between computer and router
- Connecting to the router with a LAN cable
- If there is no Ethernet connector for an Internet cable
- If the network icon has an exclamation mark on it (no Internet access)
- Ways to connect.
- Connection without a wire
- Installing
- Connecting
- Step 1 – Power.
- Step 2 – the provider
- How to configure
- Router
- Frequent problems and their solutions
How to connect and configure a new Wi-Fi router by yourself – a guide with pictures
Many users are intimidated by the self-configuration of Wi-Fi router and when buying it, they at the same time order the service for its connection and configuration.
In my opinion, the price for this service in many stores is too high (sometimes up to half the cost of the router) – especially since many people can cope with this operation on their own (it only takes a little understanding 👌).
I also want to add that if you need to change the password, Internet access settings (or anything else) in the future, you will still have to go into the router settings and figure it out yourself.
That is why I "sketched" this little article with pictures and explanations of each step. I hope the step by step presentation of the material will help you to understand how and what to do.
👉 Addendum!
You can also read another article of mine on how to connect and configure a Tenda FH456 (N301, F3) router from scratch
Step-by-step instructions: connecting and setting up a Wi-Fi router
Many users make one mistake – they do not pay attention to the place where they install the router. No, for testing and initial setup – it is not so important, but for the permanent operation of the device – it is not good in all cases.
The fact is that depending on where you will be placed Wi-Fi router – will greatly depend on the level of reception networks in different corners of your home. The following are significant factors that reduce the Wi-Fi signal: supporting thick walls, mirrors, metal doors, etc.
Therefore, place the router router should be placed so that it was equidistant from all devices that will connect to its network (and so that there were minimal obstacles to the network signal).
An example of both unsuccessful and successful placement of the router in a 2-bedroom apartment is shown in the layout below.
To the question of choosing and placing the router in the apartment
In general, I think the message is clear: depending on the location of the router – will depend on the quality of the network signal, speed, errors, etc.
Connecting the computer to the router
So, try to perform a not very complicated operation – to connect your computer to the router. Even a novice user can easily do it. The sequence of steps and logical approach will help us in solving the problem.
The easiest method to connect a PC to the router is to use a patch cord. In the same way you can pull the wired connection from the router to the laptop. Please note that any manipulation with wires is performed only when the devices are disconnected from the network.
-
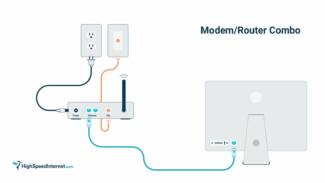
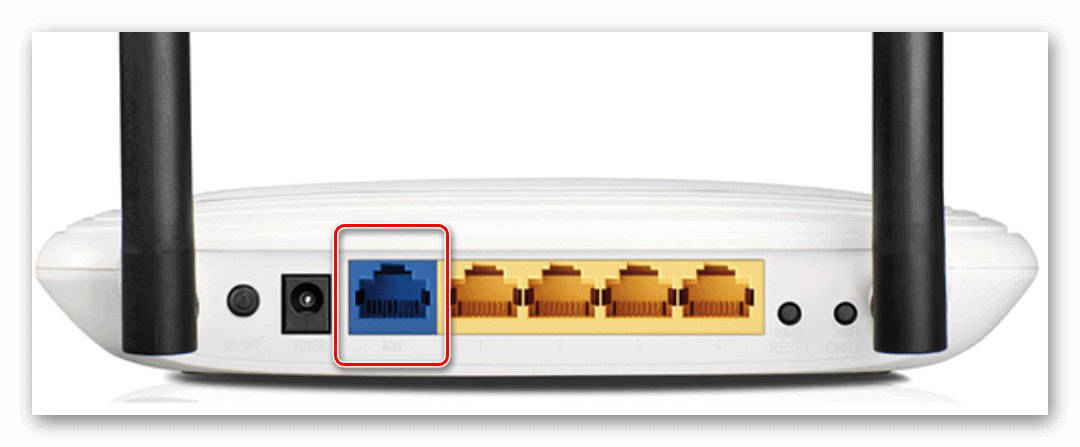
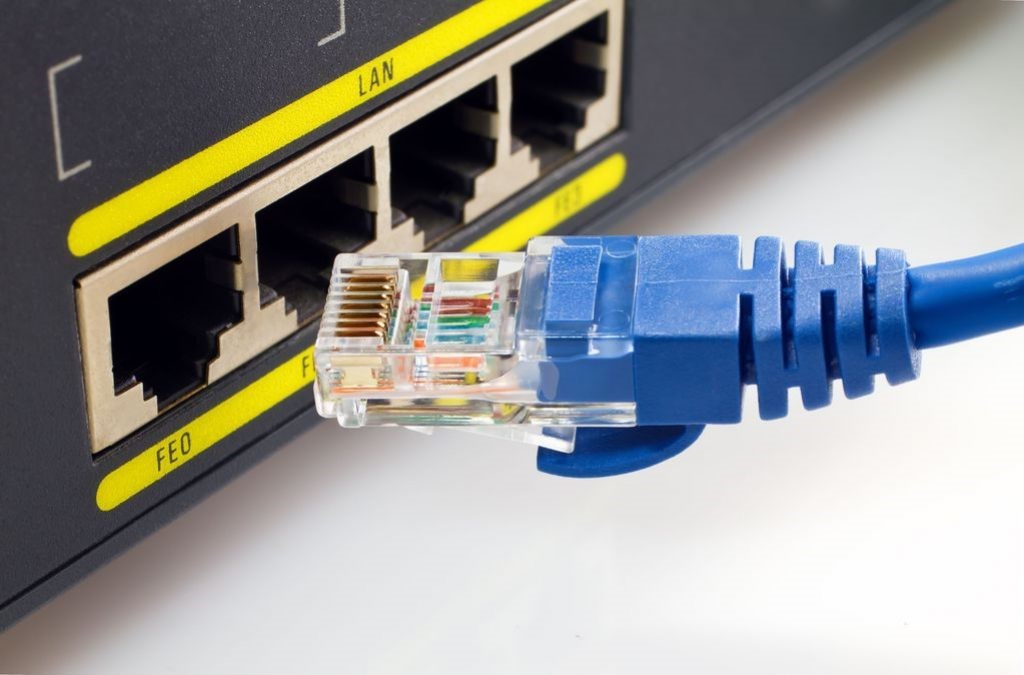
Install the router in a convenient place, on the back of the device find the WAN port, which is usually marked in blue. We plug into it the cable of your Internet service provider's network that is installed in the room. When installing the connector into the socket, you should hear a characteristic clicking sound.

Method 2: Wireless connection
Perhaps you do not want to spoil the appearance of the room with all kinds of wires, then you can use another way to connect the computer to the router – through a Wi-Fi network. Some motherboards are equipped with a wireless module. In other cases, you need to buy and install a special card in the PCI slot of the computer or plug a so-called Wi-Fi modem into any USB port of the PC. Laptops have a Wi-Fi access module by default.
- Install the external or internal Wi-Fi adapter in the computer, switch on the PC and wait for the device drivers to be installed.
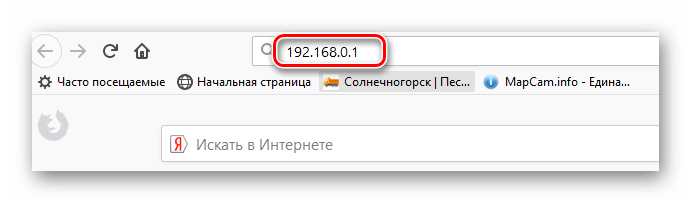
- Now you need to configure the wireless network configuration by entering the router settings. Open any Internet browser, in the address bar write: 192.168.0.1 or 192.168.1.1 (other addresses are possible, see the manual) and press Enter.

Step 2: Using the WPS feature
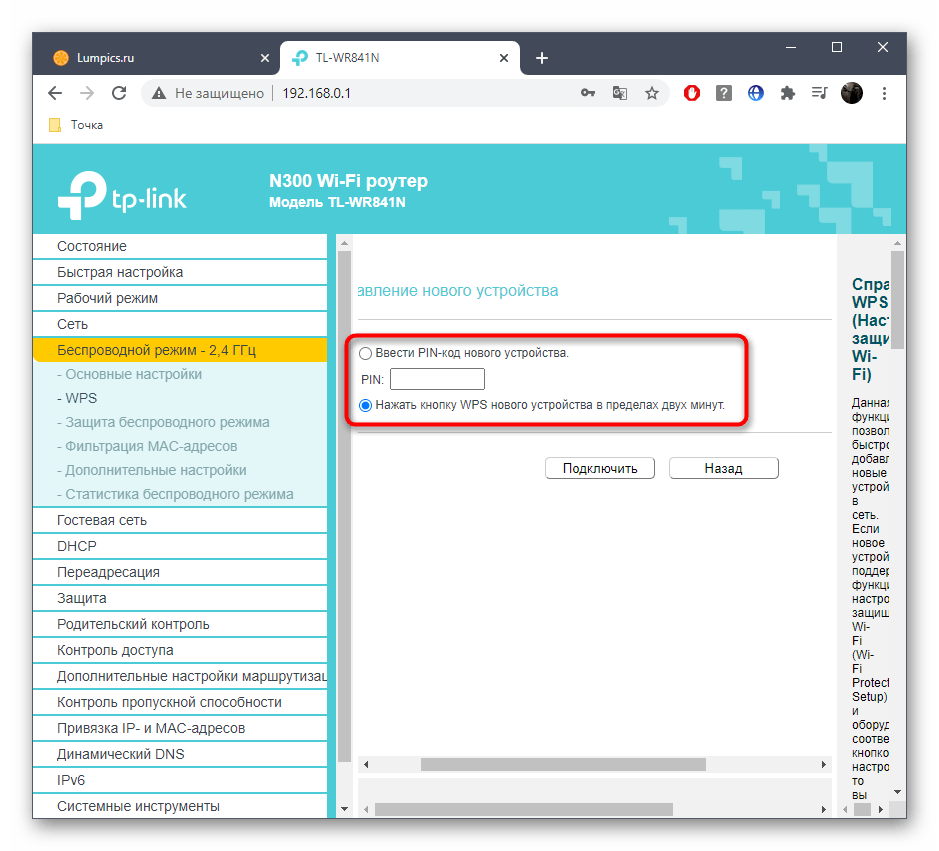
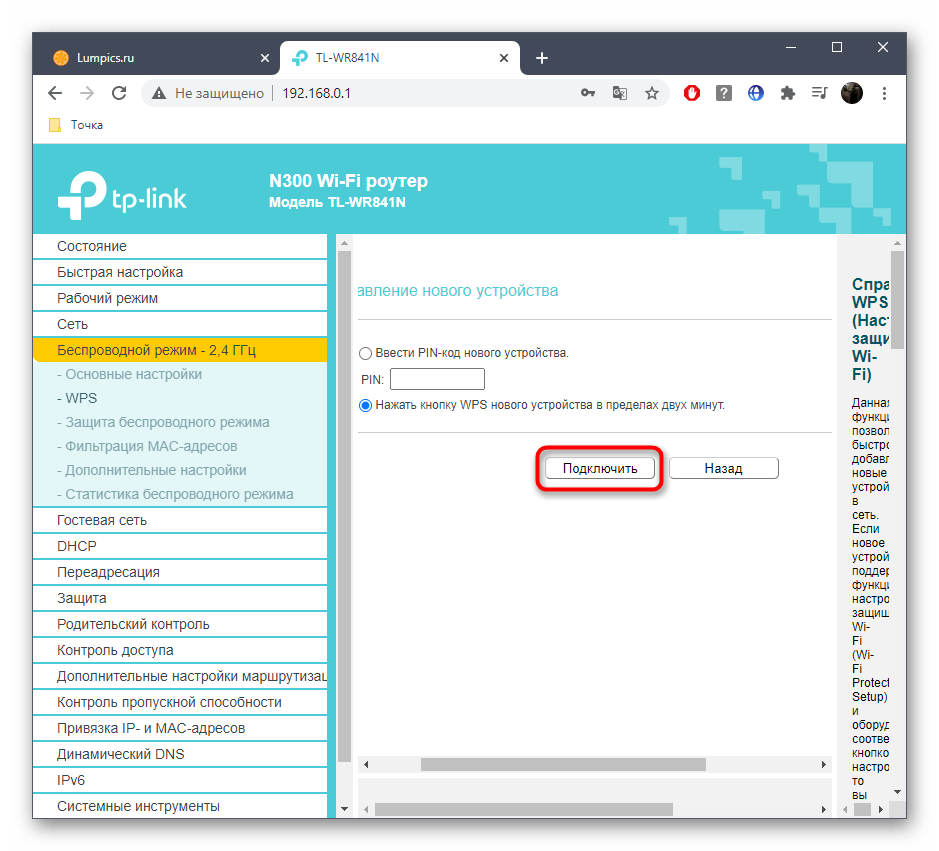
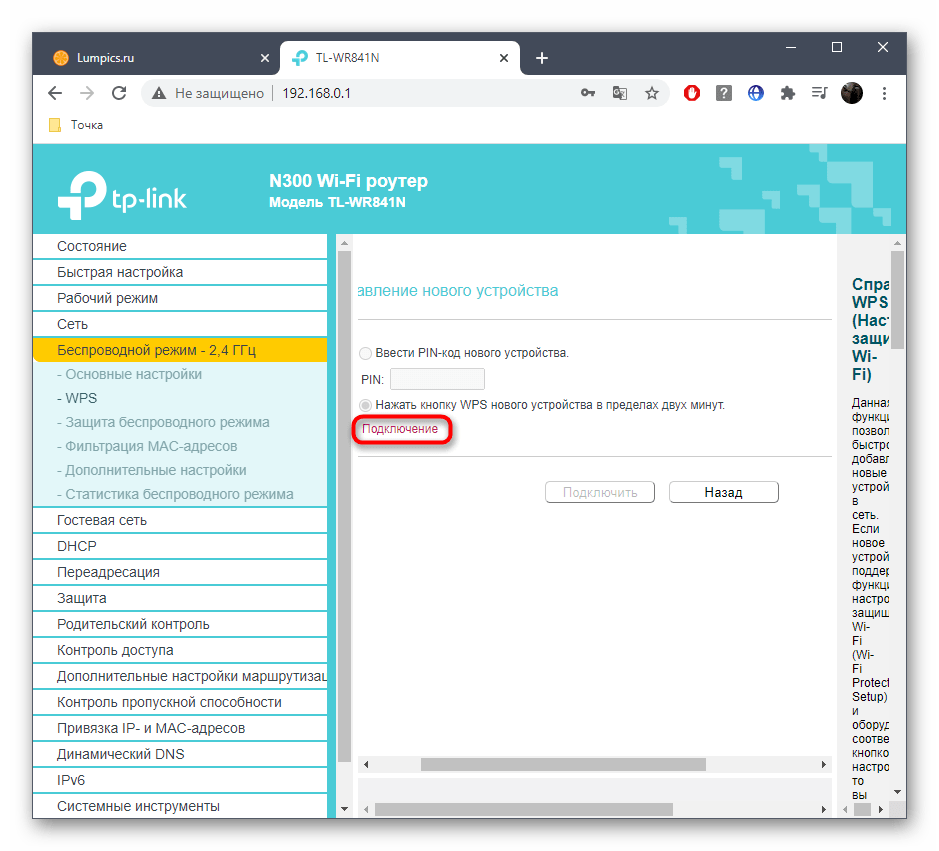
Connecting your device to a wireless network is done using the WPS technology, which is enabled by default on any modern model of network hardware. First you need to activate access directly in the Internet center of the router itself. Let's analyze this operation by the example of two radically different configuration menu views: ASUS and TP-Link.
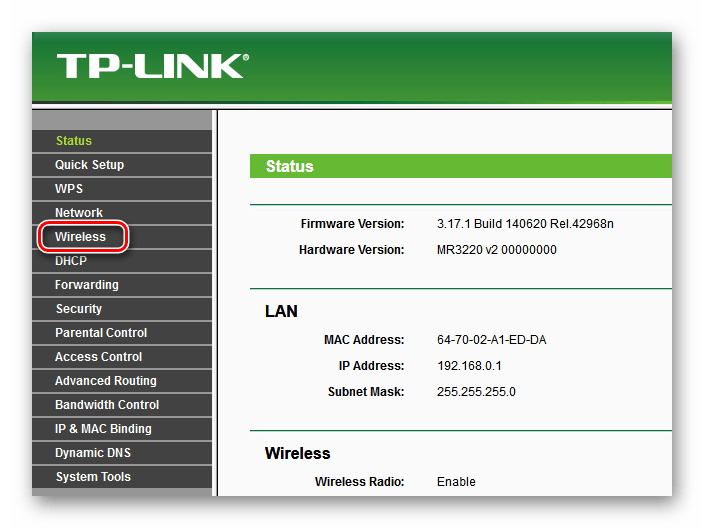
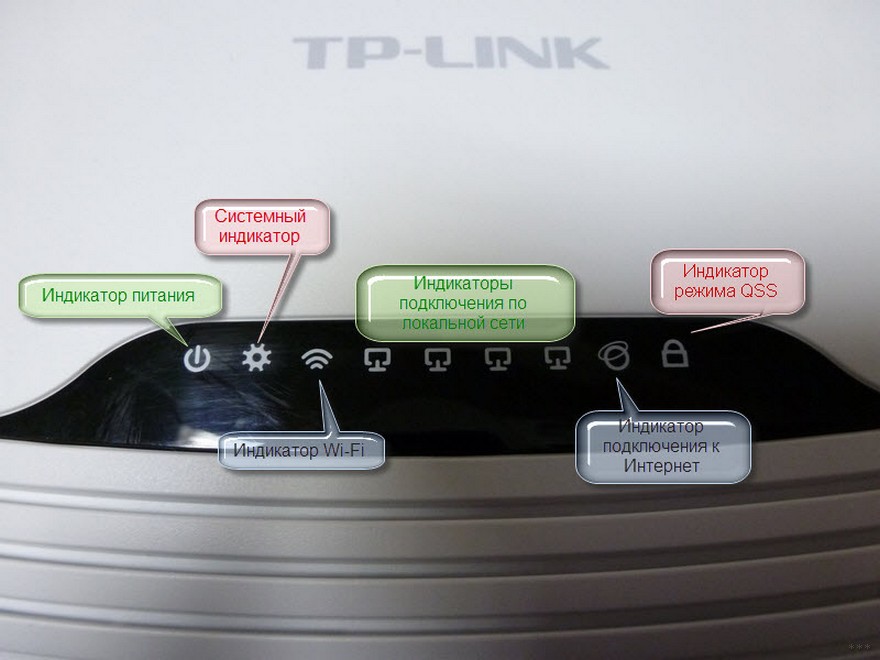
TP-Link
The routers by this company have a practically universal web-interface that is also typical for routers by other manufacturers. That's why even if you have a different network equipment, the following instruction will be just right.
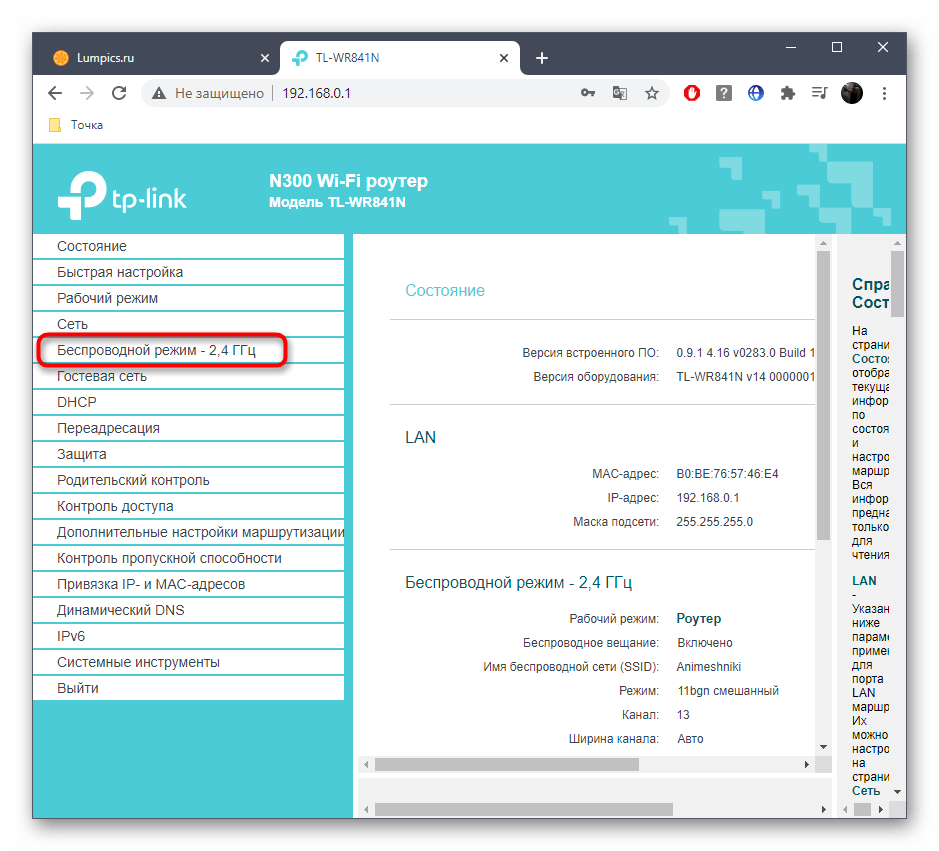
- After successfully logging in to the Internet center, open the "Wireless mode or "Wi-Fi".
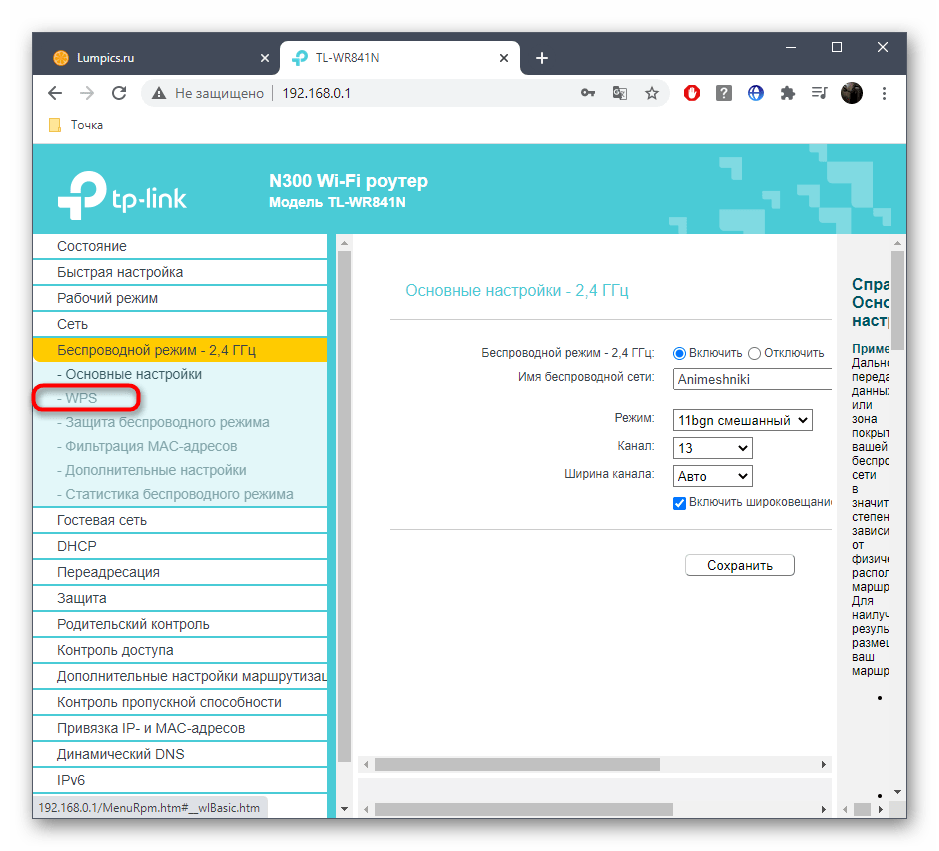
- There, move to the category "WPS".
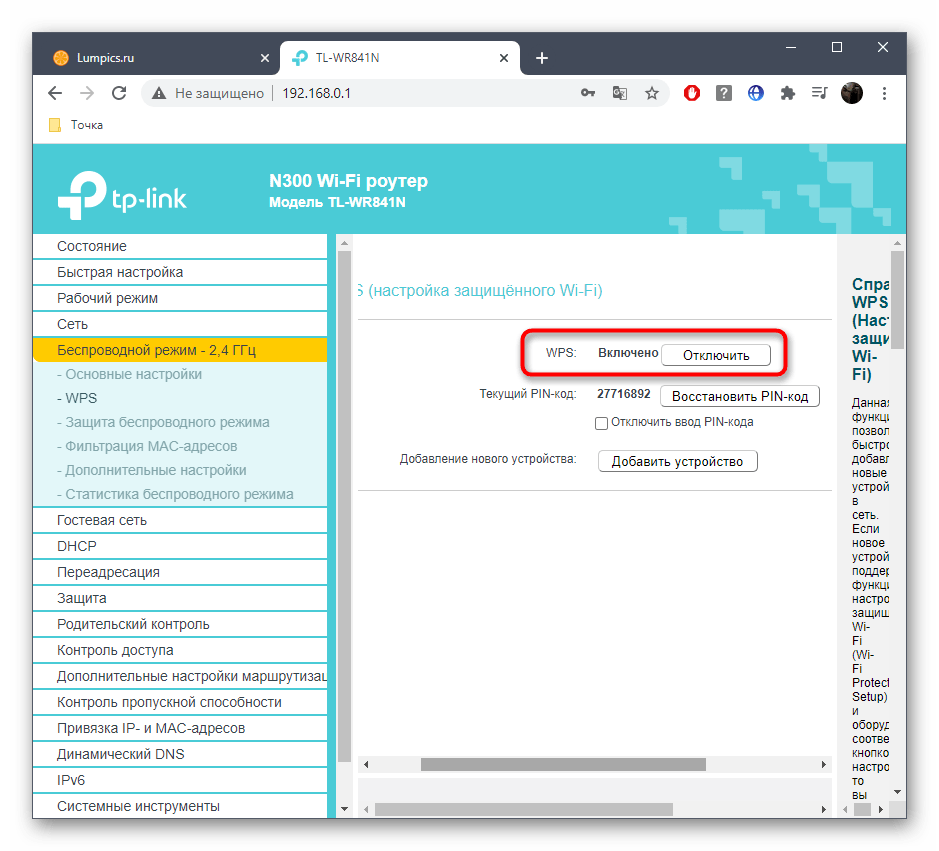
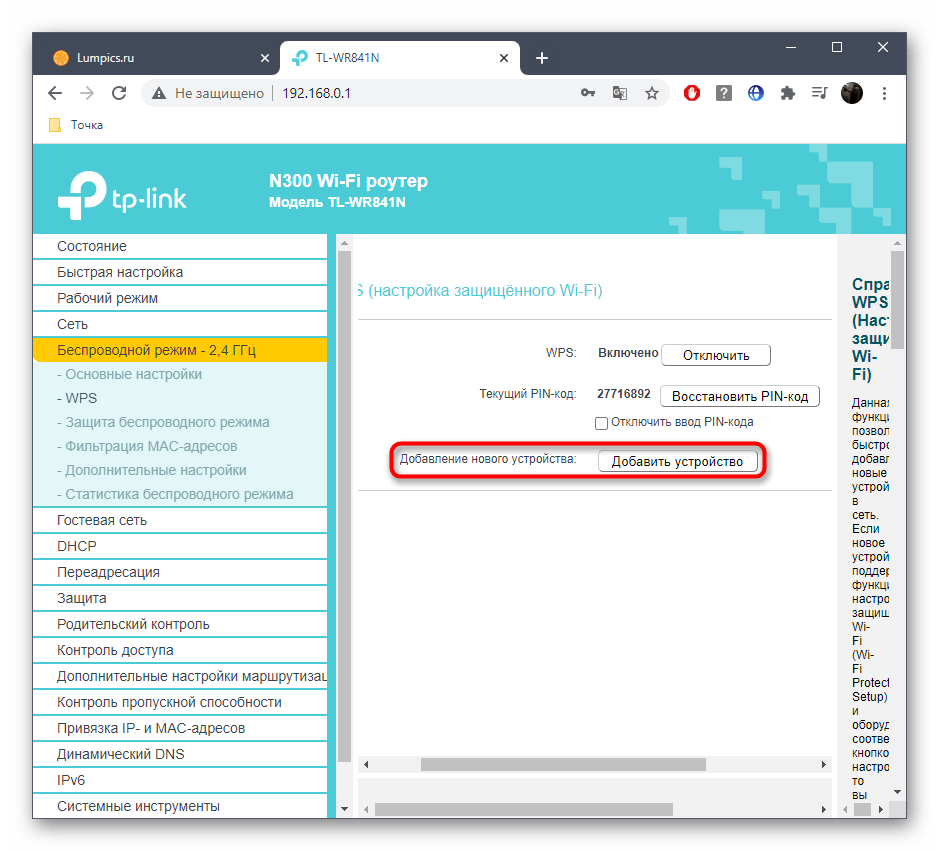
- Make sure that this technology is in the enabled state, and if not, activate it by clicking on the appropriate button.
Step 3: Connecting in Windows
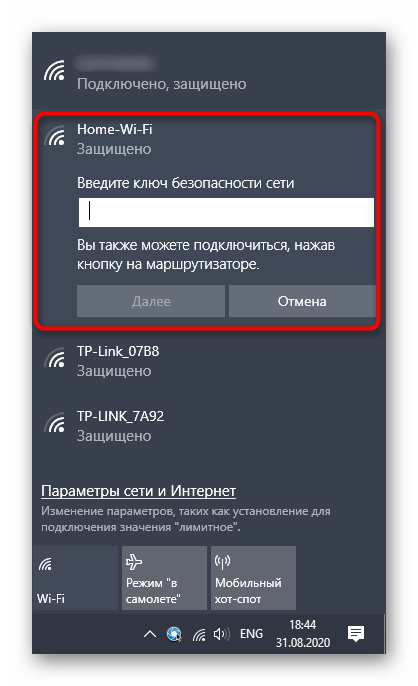
The only thing left to figure out is what to do in the laptop's operating system itself: expand the list of available networks and look for the one you want to connect to. If the WPS is not yet activated, you will be prompted to enter the security key. Immediately after enabling the function, an open connection will become available in the web interface.
If you are faced with a situation where Wi-Fi on your laptop for some reason does not work, ask for help for a separate instruction on our site, where you will find a detailed description of each existing method of solving the problem.
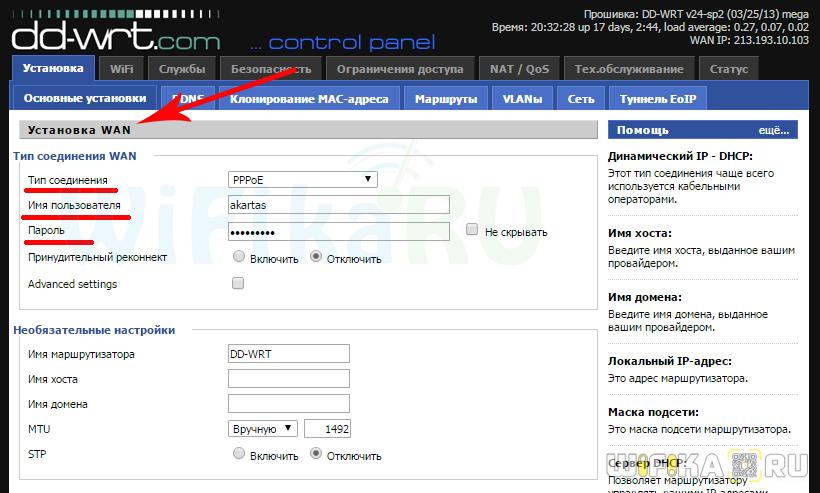
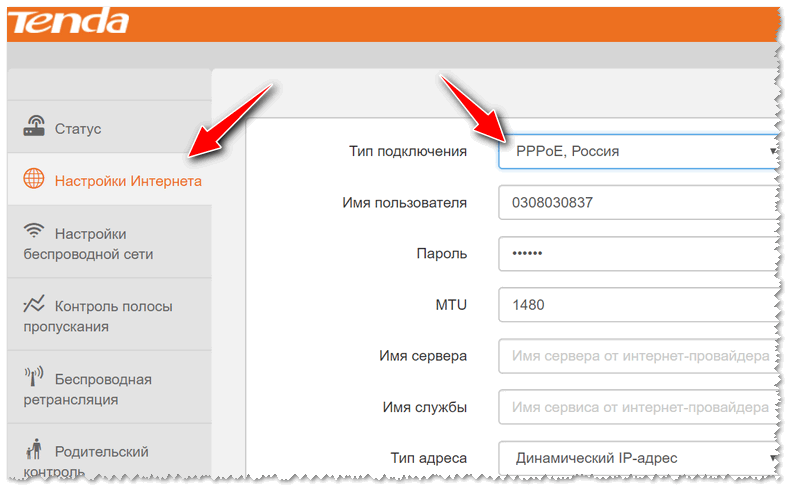
Step 3 – Select the type of connection to the Internet
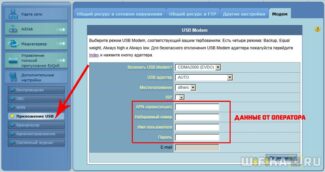
In the settings of the router in the WAN or Internet section select the type of connection, which is either specified in the contract with your provider, or found out by calling technical support, and enter all data for access depending on this type. Again, they are all specified in the contract or accompanying explanatory materials and instructions of the provider.
Step 7 – Save the changes.
Save all the changes and wait for the router to reboot in order to apply the specified parameters.
Now let's move on to configuring WiFi on the laptop. Let's look at the installation using Wndows 7 as an example, although on XP it will be the same – the only difference is the names of the menu items in the system itself. But first of all keep in mind that your laptop must have a WiFi module – either built-in, which you will be informed about on a sticker on the chassis, informing about its presence, or some button to activate it.

If it is not, you must buy and install a WiFi adapter – more about choosing this device here.
Then go to the network connections section by one of the following routes:
- Windows XP: "Start > Control Panel > Switch to Classic View > Network Connections".
- Windows 7: "Start > Control Panel > Network and Internet > Network and Sharing Center > Manage Network Connections > Change Adapter Settings".
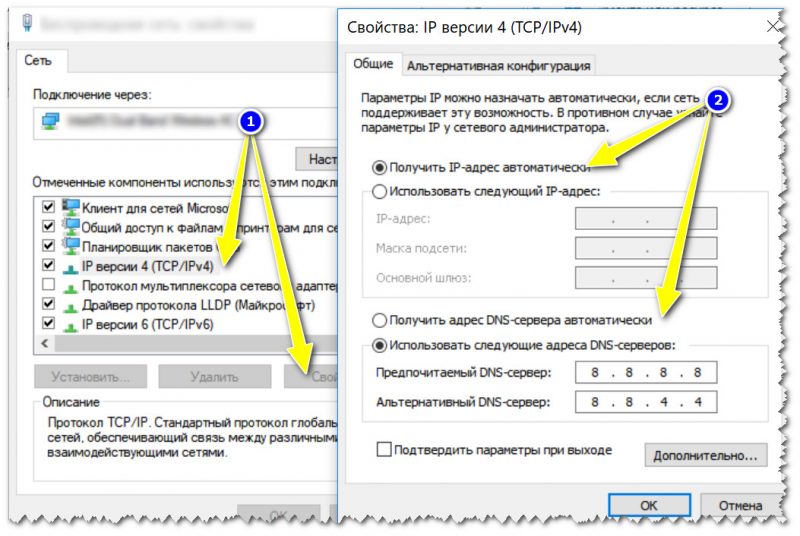
Find our wireless connection, right-click on it and go to "Internet Protocol Version 4" and in the properties of the network adapter check the box to get DNS automatically.

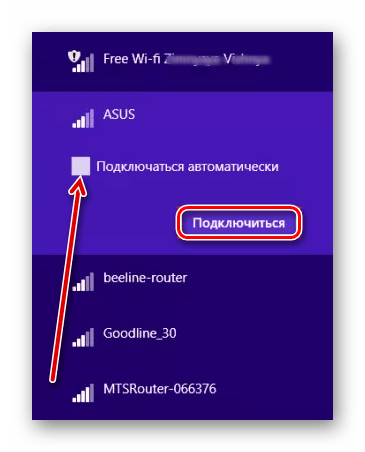
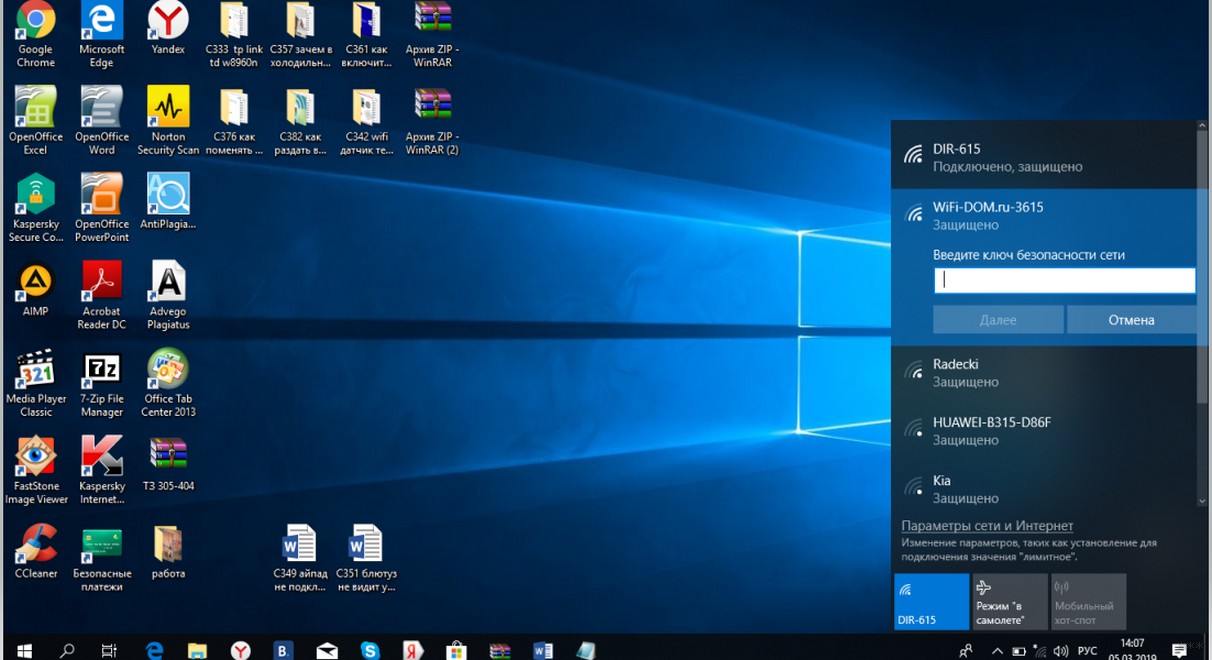
Open your laptop with the wifi module turned on and find the wireless icon in the bottom right corner of the Windows icons panel.

Click on this icon to open a list of available WiFi networks in range. Find ours with the name you have just set on the router and log in with the password you have set.

Connecting
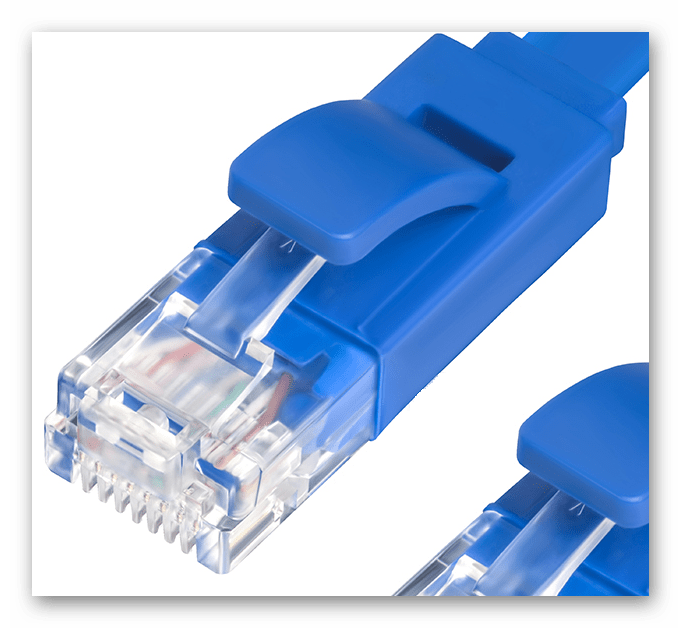
To connect your laptop or PC to the router you will need a cord, also called a patch cord. It is usually supplied with the router. If such a cable is not available or its length is not long enough, you should buy a patch cord in a store.
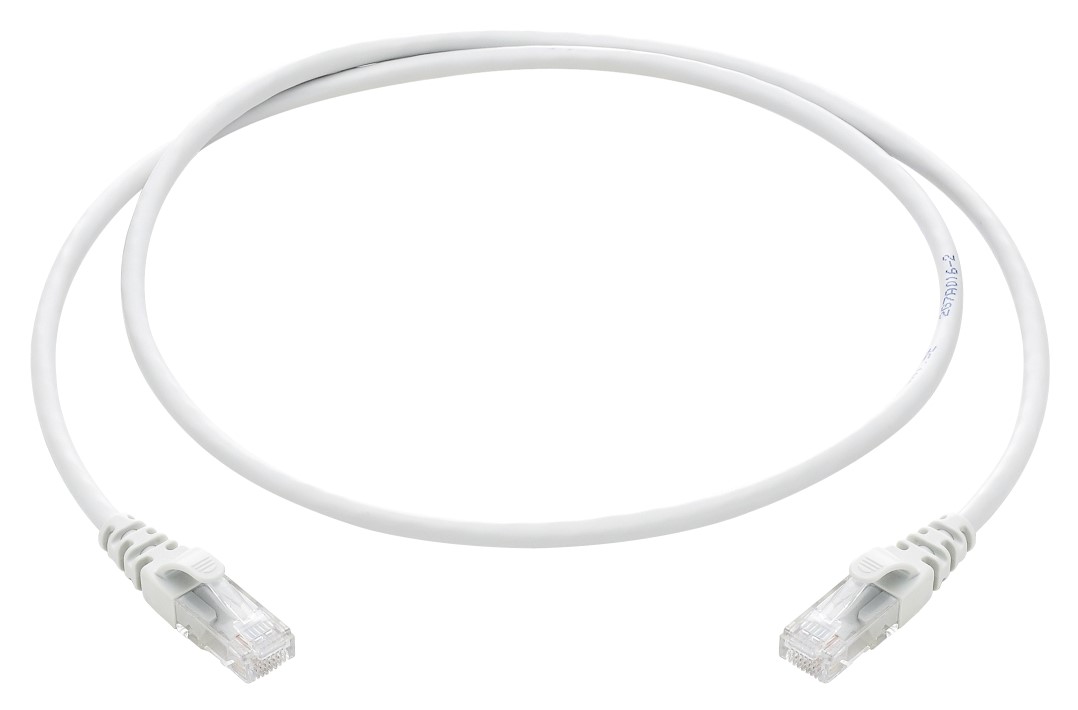
It is better to buy prefabricated cords made by the factory. They are made using a special, non-rigid cable that can be bent many times without fear of damaging the conductor.
Prefabricated patch cords come in lengths up to 10 meters. If the connection is long distance, a computer store or networking company can make a cable of the required length. It is difficult to make such a cable yourself without a special tool.
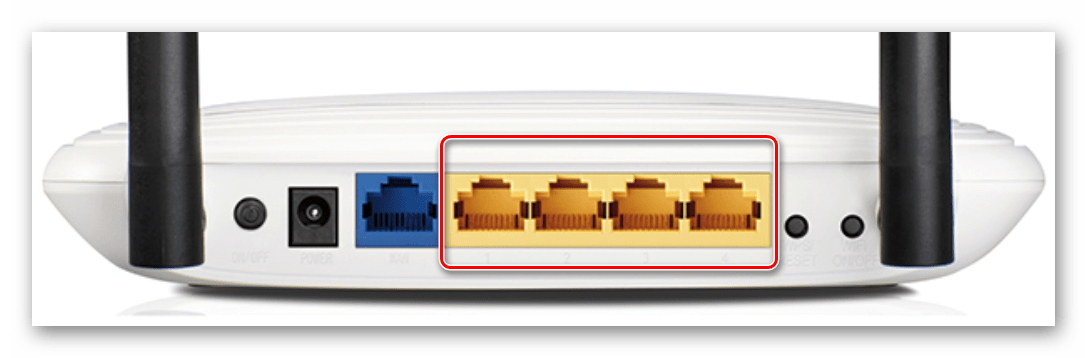
To connect a laptop or PC, connect one end of the network cable to the LAN port on the router. Usually there are four such connectors, but there may be one or more than four. This depends on the router model. You can connect to any available port, not necessarily the first.
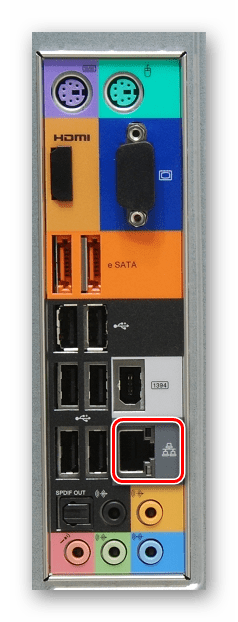
Connect the other end of the patch cord to the network jack in your computer or laptop. While laptops usually have an integrated network connector on the motherboard, not all modern computers do. If there is no connector, you will have to buy a special adapter that connects via USB.
Problems that may arise when connecting
Two types of problems can occur when connecting to a wired router – a lack of physical connection and incorrect hardware settings. Let's take a closer look at how to overcome possible difficulties.
No connection between computer and router
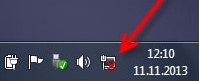
If there is a red cross on the network connection icon in the bottom right corner of the screen, but when you connect the patch cord from the router to the computer, it does not disappear, then it means that you have failed to establish a physical connection.
First you need to make sure that the connectors on the ends of the cord are fully inserted into the connectors on the router and computer. Insert the connectors until you hear a slight click. This ensures that they are firmly seated in the connectors. You can try plugging the cable into another LAN connector on the router or another network connector on the PC, if available.
If the connectors are firmly inserted in the connectors, but there is still no connection, you must check whether the cable is in good condition. It may be kinked or pinched, causing a tear in the conductor under the sheath. The connectors may not be properly crimped.
The easiest way to make sure that the cable is not the problem is to replace it with a known working cord!
If nothing helps and there is no connection, you should check whether the network adapter is connected in the PC operating system. In the Device Manager in Windows you should search for "Network Adapters" and make sure that the device is working properly. If there are any problems, then right-clicking on the mouse brings up a menu. There you should select the desired item – or just turn on the adapter, if it is disabled, or reinstall the driver.
Connecting to the router with a LAN cable
Firstthat we will need (except the router and the computer, of course) is a network cable. In general, such cable is usually supplied with the router (in 99% of cases).
Most often the length of such LAN-cable [from the set] is not more than 1÷2 m. This length is quite enough [in most cases] to connect and configure the router.
Note! If you do not have one, or its length is obviously not enough – you can buy it at any computer store. Moreover, you can also ask there to cut the cable to a specific length.
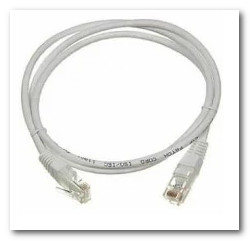
Network cable (1-2 m cable comes with all routers)
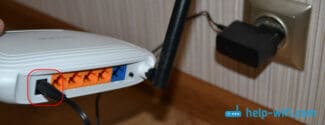
Next Connect the power adapter to the router and turn it on. Then plug in the socket "Internet" cable from your Internet Service Provider.
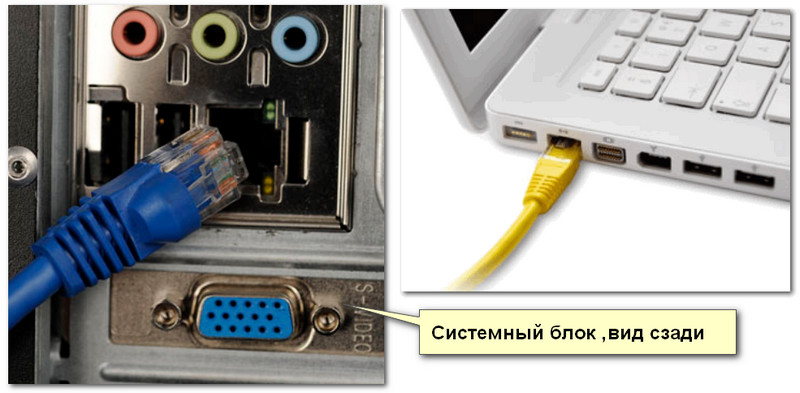
One of the blue (often yellow) port (LAN) must be connected to the network LAN port of your laptop/PC.
If there is no Ethernet connector for an Internet cable
With computers, this is usually not a problem. Most models have at least a network card built into the motherboard, and its port can be easily found on the back of the system unit.
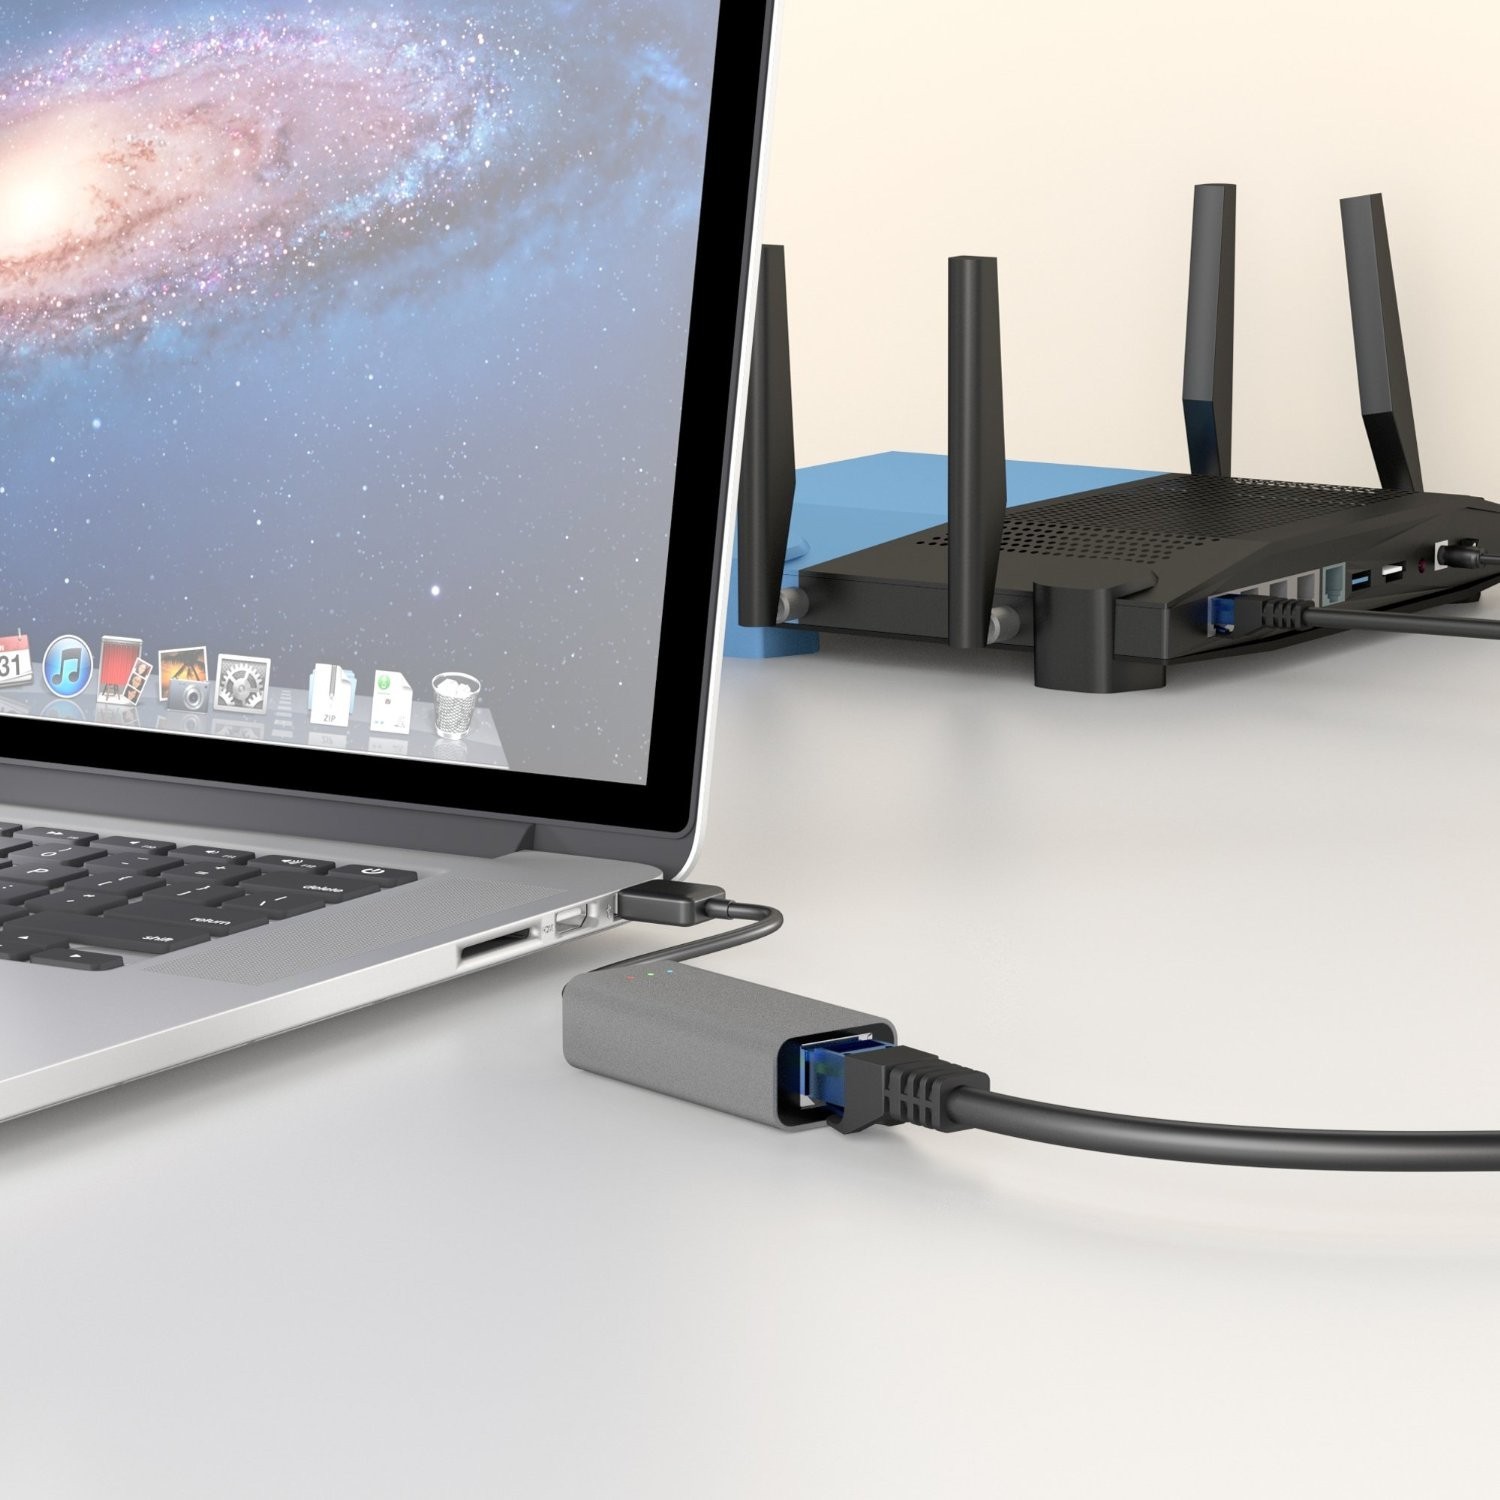
With laptops it may be a little different. The thing is that modern laptops usually connect to the Internet via Wi-Fi, and not all devices have an Ethernet port (especially ultrabooks).
If you do not have a LAN port, you need to buy a special adapter to USB.
If the network icon has an exclamation mark on it (no Internet access)
Perhaps this is the most popular option (especially when first connecting and configuring the router, for example, after changing equipment).
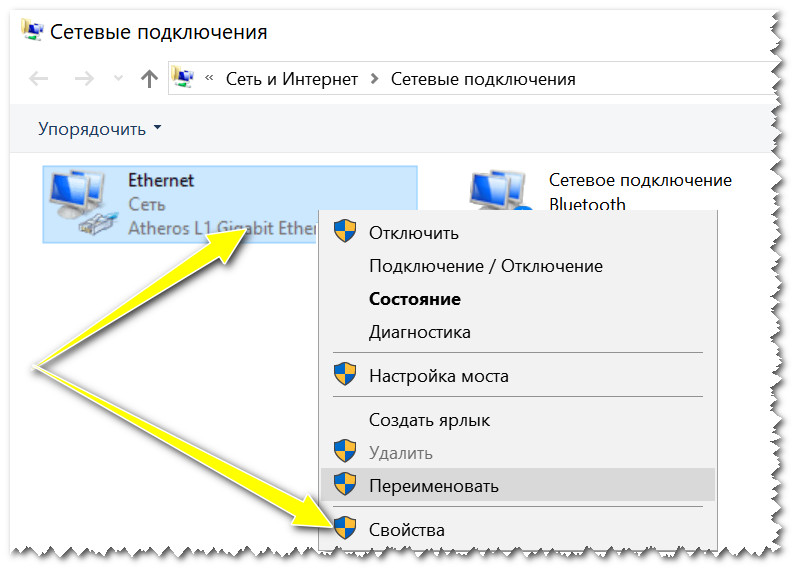
In this case, the first thing I would recommend is to open network connections and check if everything is OK there. To do this press the key combination Win+R and use the command ncpa.cpl (see screenshot below 👇).
How to open network connections / ncpa.cpl command and Win+R
In the network connections window, you need to open the properties of your connection (usually called "Ethernet" (as in my case 👇) or "Local Area Connection").
Then find the line "IP version 4" and open its properties . After that, put the sliders in mode:
The second important point – is to check the settings of the router. If you have not previously configured it – then, in principle, in most cases – the Internet and will not, as long as the connection parameters are not specified.
Different providers have different requirements: as a rule, you can find the necessary logins and passwords, IP-addresses, etc. parameters [to be entered into the router settings] in the contract with the provider, which you signed when connecting to the Internet.
👉 Help!
How to enter the router settings [just where you need to set the connection parameters] (for beginners)
Ways to connect.
There are only two ways to set up a network connection:
- Wireless connection. A convenient solution, as you can connect your laptop to the router via Wi-Fi without using a patch cord (cable to connect the two devices). Especially since most computer models have a communication module installed.
- Using a cable. This is also a working option, because the laptop may not work Wi-Fi, the router may not distribute the Internet, or other problems.
Newer laptops don't have a network cable port and will have to use an adapter.
Connection without a wire
A small digression here – giving out the Internet via cable or without it is possible, regardless of the manufacturer of equipment. However, we are talking about standard models, not mobile. The main thing is that the network device supports connection via Wi-Fi.
The connection process is not complicated. If after connection the Internet does not work, most likely the problem is in the settings. The most common reason is that the driver that supports the Wi-Fi transmitter was not installed, or it is trivial to turn it off.
So, how do the router and laptop connect? The Windows 10 operating system will be used as an example:
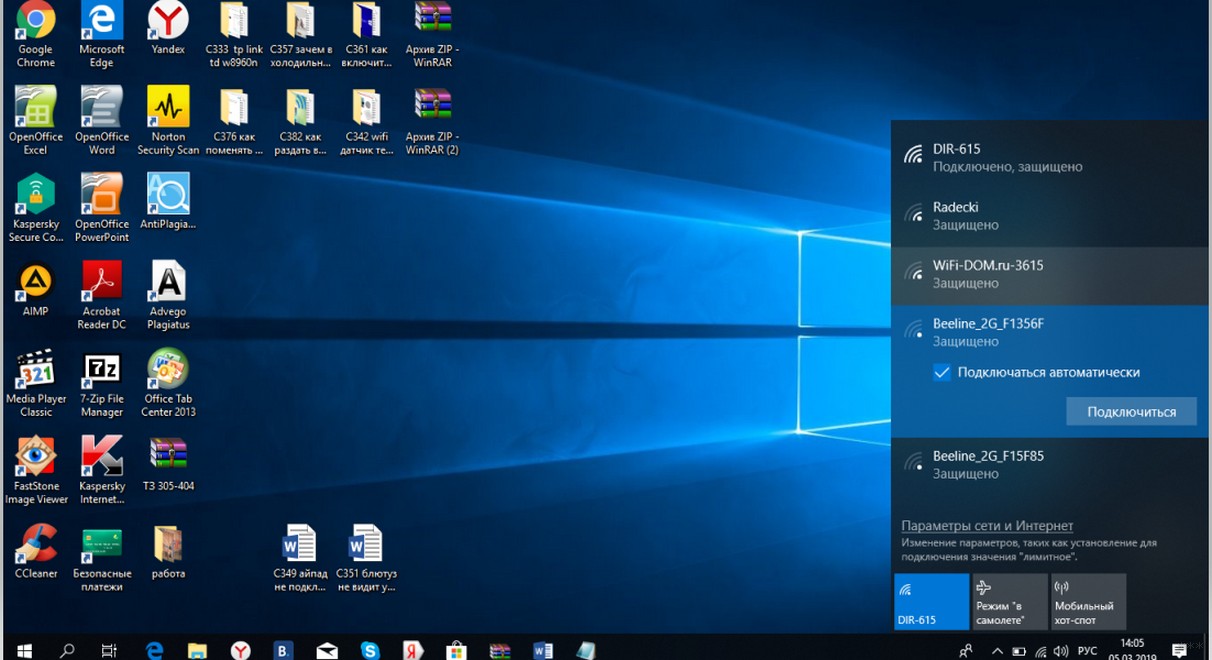
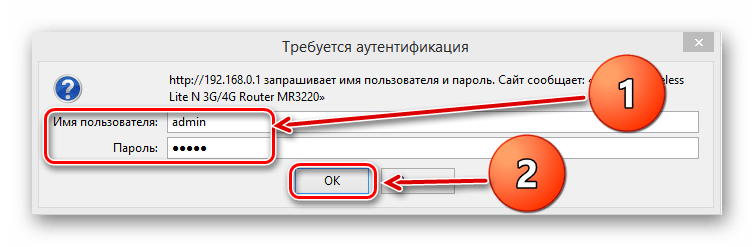
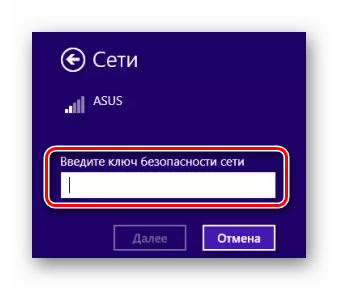
- If there is protection, it is necessary to enter the password. If it has never been changed (setting up a new router), it is worth looking at the sticker on the bottom of the router itself. The router manufacturer often calls it a PIN or Password. It consists of eight characters.
Installing
So, you have unpacked the new router, it is time to define a place for it in the house. Unfortunately, the range of the router is limited, so the best way to install it is to put it in the middle of the apartment:
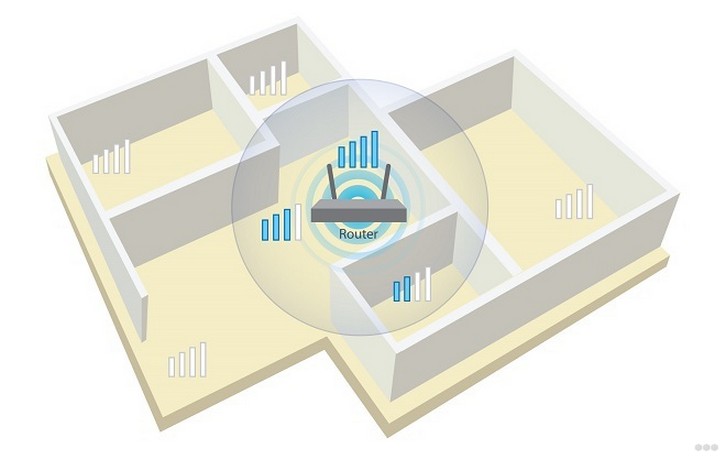
If you have one room – no problem. But if you have many – you put a router and walk around the apartment with your laptop or phone, measuring the signal strength so that there is enough signal everywhere. Choose the best spot, and there will be less hassle later on.
Another problem is to locate so that the ISP cable can reach your router without destroying the apartment. Usually, when laying the Internet master can immediately tell the master where to pull the wire – this is done just for better signal coverage at home. But if it is already there, you will have to adjust to it.
Additionally, you may need at this stage "assembly" of the router – often the antennas are unscrewed, and it would be necessary to screw them in.
Connecting
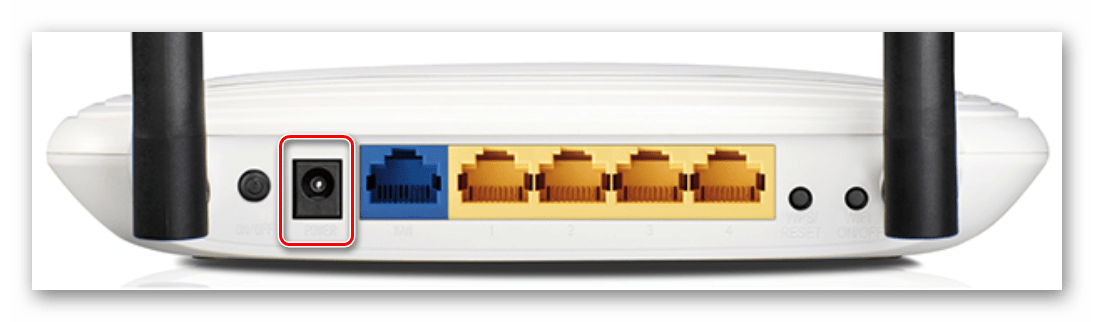
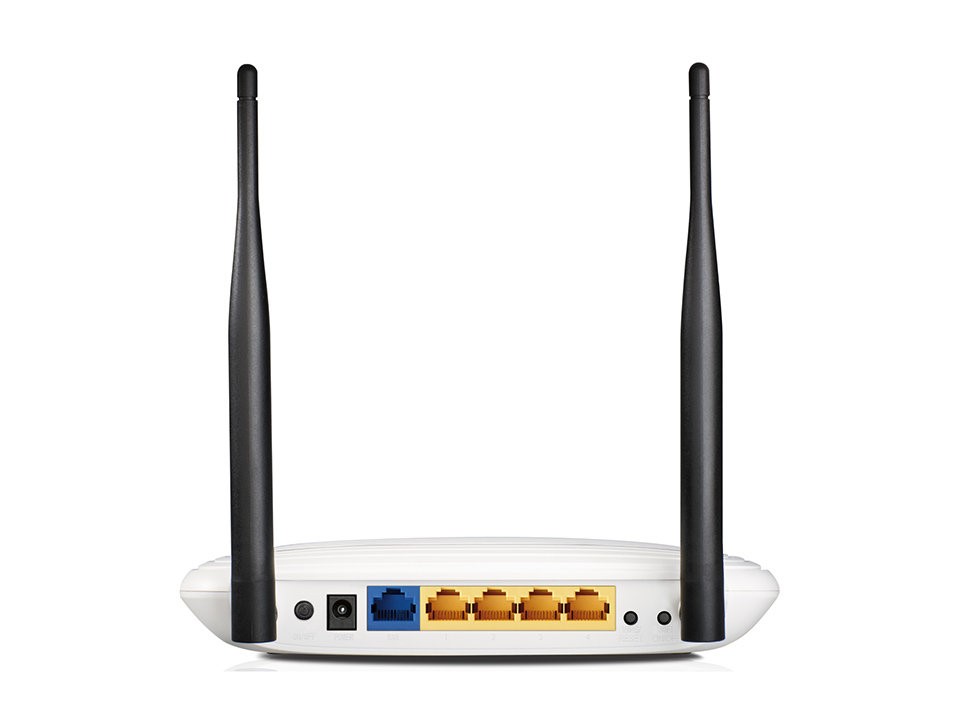
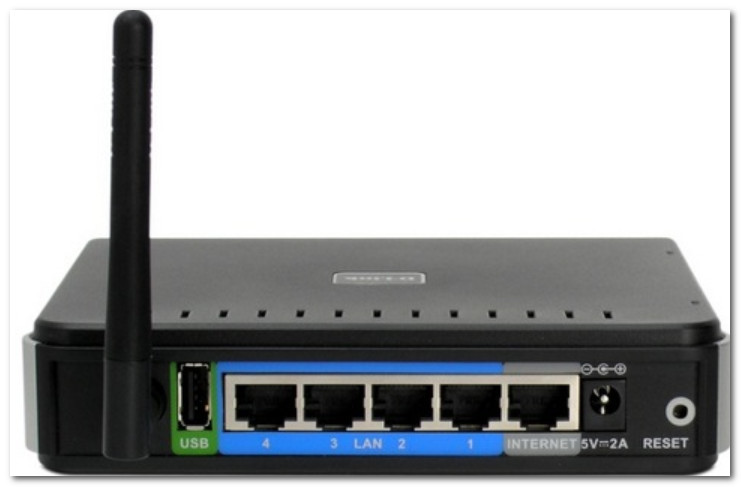
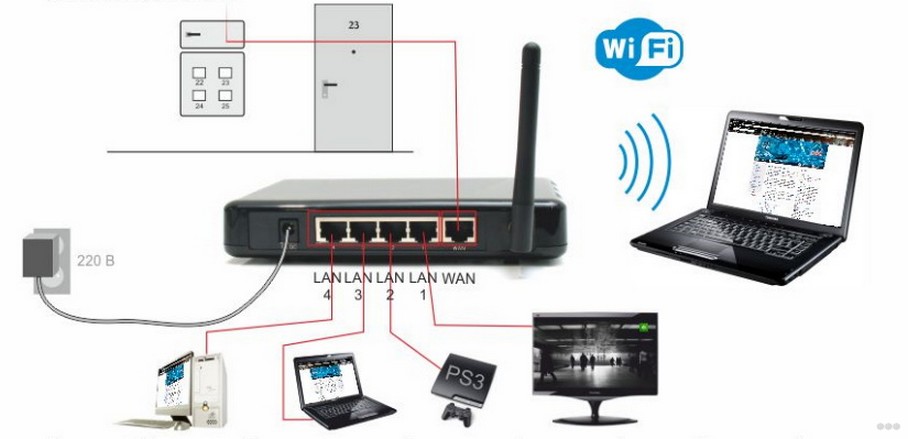
Here we come to the subject of our article. Let's look at the back of the average router in the world:
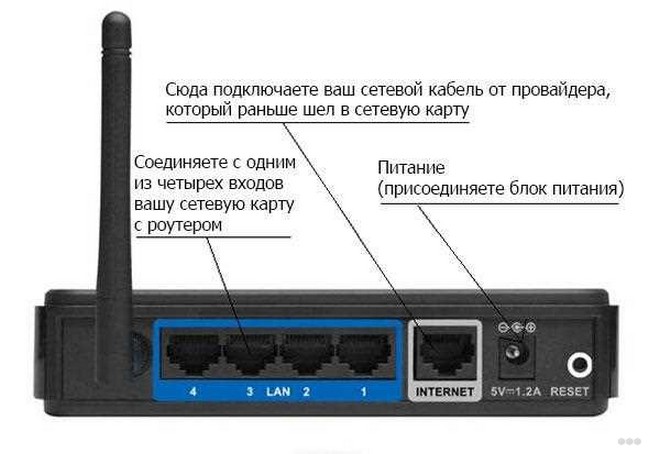
- LAN ports – highlighted in blue, but often also in yellow. The key difference is that they are signed as LAN, and usually there are several of the same color. The ports are used to connect devices on your home LAN – a computer or laptop.
- INTERNET or WAN port – the external network. This is where your ISP's cable comes in. Usually there is only one port and it is marked with a separate color (blue in most cases, the picture is chosen for contrast).
- Power. It can not be confused with anything else, through it connect the router to the power grid. There is also a separate button to turn on, if there is one, also do not forget to turn it on.
Step 1 – Power.
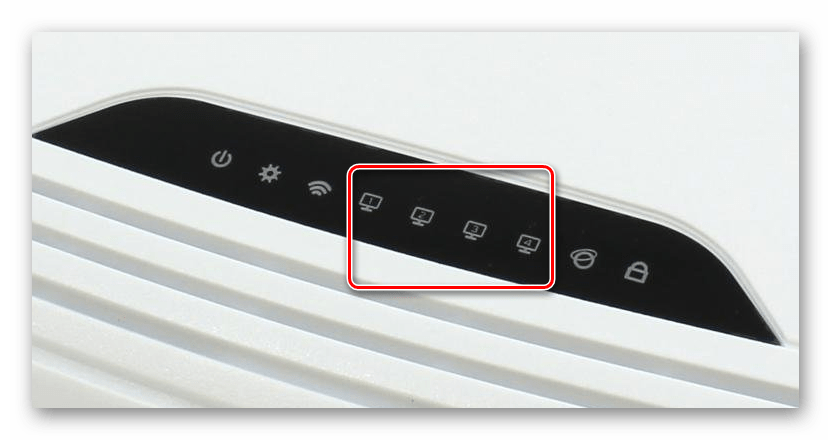
All steps are very simple, this is no exception. Plug the plug into the power jack on the router and plug the adapter itself into the power outlet. The router should have at least some lights on (usually the power and wifi lights blink).
If nothing is lit – check for current. Maybe you did not connect it well? Are you sure it is there? Is the surge protector on, if there is one? And most interestingly, maybe there is also a button on the back of the router? Do not forget to turn it on.
After this step, the router should "come to life". Let us connect it further.
Step 2 – the provider
If you do not need the Internet on the router, you can skip this step. But usually people do need it. Remember that there is a special slot for this – WAN or INTERNET. It is necessary to connect exactly there!
How to configure
Above, we looked at instructions on how to connect the Internet via a WiFi router to your laptop over a wired or wireless network. In both cases, the configuration of the device plays an important role. Below, let's look at what information needs to be entered into the router and PC.
Router
To begin with, let's look at how to connect Wi-Fi on a laptop and configure a router. Let's give instructions on the example of TP-Link. The algorithm of actions is as follows:
- Update the firmware. To do this, download the latest software version from the website and install it on the router. Preliminarily disconnect the cable from the provider, and then enter the system settings and the update line. Then select the file and wait for its download. On the final step, restart the device.
- Enter the settings. To connect to the Internet from a laptop via a WiFi router successfully, specify the type of connection. To do this, go to the Network section, and there WAN. Specify the required parameters (must be in the contract with your provider) and save the data.
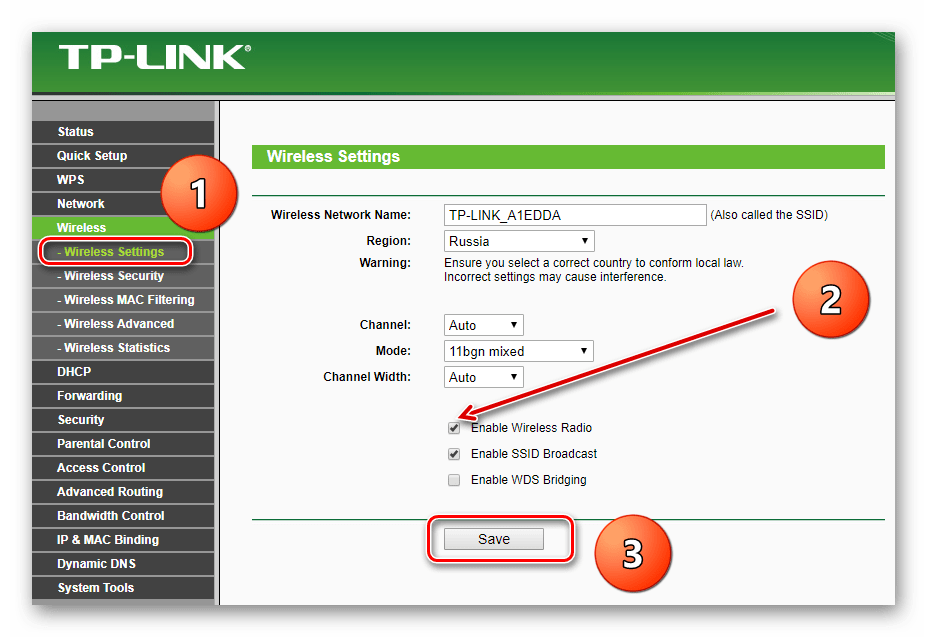
- Set the WiFi settings. Before you connect your laptop to the router via WiFi, set the network name and login password. To do this, go to the Wireless network section, and there the settings. Fill in the fields with the name, specify the region, channel (Auto), mode (11bgn), channel width (Auto). Or you can figure out on your own which channel is better to choose and tune to it.
- Go to the security section, set the security level of WPA2 and enter the password in the special field. Try to make it secure. If you set the same numbers, anyone will be able to connect to your notebook.
After saving the data, restart the router. Now you can connect the Internet via a WiFi router on your laptop and enjoy the opportunities of the global network.
Frequent problems and their solutions
Often there are situations when it is not possible to connect the Internet the first time. In such circumstances, it is necessary to have a step-by-step instruction at hand.
If you can't connect your Wi Fi router to your laptop, it may be due to a misconfiguration or a malfunction in the hardware itself. Do the following:
- Restart the laptop and the router. In the latter case, it is better to remove the voltage for a few minutes and then apply it again.
- Check that the Wi-Fi module is turned on on the laptop.
- Change the wireless mode. Try to connect the Internet after changing the mode to 802.11n. Use different options.
- Change the SSID name. One of the reasons why you can't connect your Wi-Fi router to your laptop wirelessly is duplicate names. Go into the settings and change the SSID.
- Check the fact that you have paid for the service to the ISP. Due to lack of funds in your account, the service may be disconnected.
- Set the network settings to auto-connect, if it has not been done before.
In most cases, if the settings are correct, there should be no problem connecting.