Conventionally, all settings can be divided into five main categories:

How to configure your own Wi-Fi router
There are quite a few subtleties in setting up a wireless router. They are associated with differences in the software used and even in the design, which constitute the know-how of the manufacturer. However, there is a number of basic features that every experienced user should know, regardless of which manufacturer's range the device belongs to.
Due to the peculiarities of the propagation of radio waves, which transmit the signal of the router, there may be problems, conflicts with wi-fi. They are connected with the presence of insurmountable obstacles, such as walls, as well as objects with reflective properties like mirrors. That is why it is especially important to carry out the correct installation.
It is complicated by the fact that the cable carrying the network signal from the provider is often of short length. But you can't skimp on it, because saving a dollar or two on the cable that goes to the router's input, you can significantly lose the quality of the wireless signal within a single apartment or house.
The additional limitation is the proximity of the power supply. For instance, routers are usually installed near the nearest power socket, since the power cable is rarely more than a meter long. And if you own a two-story house, you will probably want to install it closer to the ceiling to provide a quality signal on both floors.
To do this allow special mounting holes on the cases of most models, with which you can fix the device in a hanging position on the screws fixed in the wall.
Another important detail in the placement settings is the position of the antennas that transmit wi-fi. Many users try to redirect them due to the tilt that is usually available in the design of modern antennas. But there is no need to do this.
It is recommended to expose the antennas strictly vertically so that the signal propagates evenly. Additionally, to avoid signal loss from the side of the wall on which the device is mounted, install a proprietary accessory – a reflector, although it can be made yourself if you have free time and the necessary improvised materials.
How to configure the router
Not every router has a functionality that allows you to automatically obtain the necessary settings. In most cases with a router, the user has to prescribe them manually. But now this process is not complicated, thanks to modern software tools, which can be accessed with a browser like Opera, Mozilla, Chrome or Edge in Windows 10.
Such devices – routers – are configured according to the same principle. The user or system administrator enters the coveted combination of numbers into the address bar of the browser. Depending on the router model, these may be the following combinations of numbers:

- 192.168.0.1.
- 192.168.1.1.
It is the one that gives access to the software firmware (similar to the operating system in a computer).
To get to the settings, the user must enter the password (password) and alias (login) when using it for the first time. They are written by the manufacturer on a special sticker that is glued to the bottom of the case. Also on it is important additional information such as MAC codes, IMEI and SN (serial number).
All of this data is inconvenient to look at every time on the bottom of the case, so it is recommended to copy them or take a picture of them on your smartphone. It is better not to remove the sticker, but to keep it on the case, because not all manufacturers duplicate the data on the packaging or in the manual, which is also better not to throw it away.

Interaction with the interface
The software interface is developed independently by each manufacturer, so different manufacturers have significant differences in it in terms of usability and functionality. But at the same time the interface of the firmware within the range of one manufacturer is usually the same and possible differences are minimal.
Module providing functionality and ability to work with the network
Before you start software configuration of your laptop, you'll need to check the activity of a special wi-fi adapter. It is important to understand: any manufacturer of laptops can lay the possibility of controlling the adapter as software, and physically:

In the first case, in order to install this module in the working position, you will need on the included portable device find the key with the symbols "fn"and the button with the antenna symbol in the broadcast mode – usually a small "wand" around which the radiated waves are schematically depicted. By pressing a combination of keys at the same time you can make the wi-fi adapter in the laptop work;
In the second case, if no keys are not detected, before how to configure wi-fi on a laptop, you will need to locate on the side or bottom of the case a special hardware switch. If the key will not contain indicators, then try to move it from position to position, until the task bar does not appear all the familiar icon indicating that the device can connect.
Why does the laptop does not work wi-fi? If the attempt to bring the laptop in a state in which it will be able to contact the network, failed, then you can try to take the following measures:
- Reinstall the drivers – the software for the module that communicates with the network;
- Check the system for crashes or critical errors;
- Scan the media for viruses.
Let's move on to the consideration of the main question: how to set up wi-fi on a laptop.
Once the problem with the adapter is solved, and it is active, you can move directly to the configuration. Depending on the installed, on your laptop operating system, the process will be slightly different. As an example let's consider in detail how to setup wi fi on the laptop with pre-installed operating system Windows XP (for the following versions the same procedure, the only difference is the name of some menu items and options):
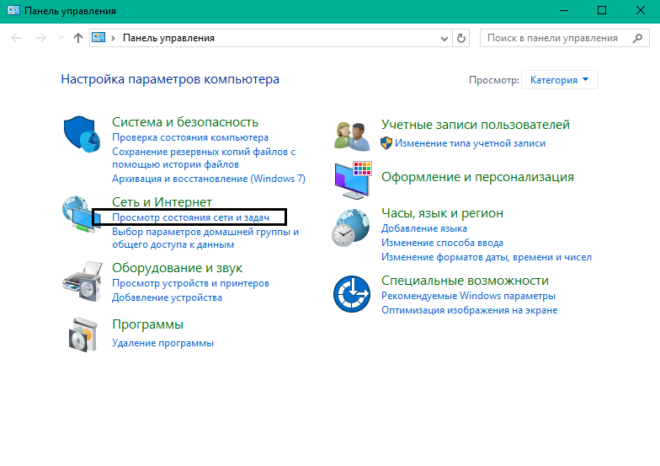
Open "control panel", go to the section "network connections":

- Type on your keyboard the combination Win (Start) + R
- Enter in the "Open" field the command ncpa.cpl


- You will see the "wireless connection" icon;

- Selecting the properties of the wireless connection, the tab "general", in the field "components" set the value "TCP/IPv4", then select its properties by clicking on the right mouse button;
- Then set the automatic obtaining of IP and DNS addresses or enter the required values. These values will depend on the settings on the router;
- Next, we turn to the tab "wireless networks";
- Selecting the field of networks that may be available, set the value to "wireless";
- After updating the list of available networks, the wi-fi on the laptop will be available.


