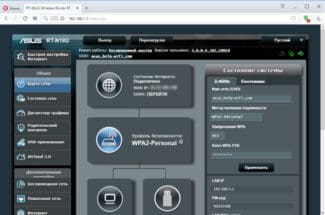
Even the most budget modern smartphone is equipped with a Wi-Fi module. It is used to connect your phone to the network and log into the router interface. Read how to connect your phone to the TV.
- Setting up and connecting a Wi-Fi access point from a router
- How do I connect and install?
- How do I set up my router as a WiFi hotspot?
- Asus router as a wireless access point (AP, Access Point)
- Configuring Some Settings
- Connecting to the Internet
- Wireless connection security settings
- Wi-Fi Setup
- What mistakes can be made when connecting and configuring
- Getting Ready: Connecting the Router
- Let's start setting up the router from your tablet.
- Configure the router through the browser on the tablet
Setting up and connecting a Wi-Fi access point from a router

Before answering the question – "How do I set up a hotspot?" – let's briefly answer the question – why do we need it at all. Generally, the access point is a device connected to a modem or the main router, which already has the Internet and all the basic settings.
But you want somewhere else to distribute the same Internet via Wi-Fi. To do this, take a secondary router, which will act as an "access point" and set it in the right place. For example, on another floor of your country house or even in the neighboring building if you want. But the connection of two Internet centers goes directly over the wire.
How do I connect and install?
Here we come to the solution to the question – "How do I connect an access point?" The connection goes through the standard LAN ports.
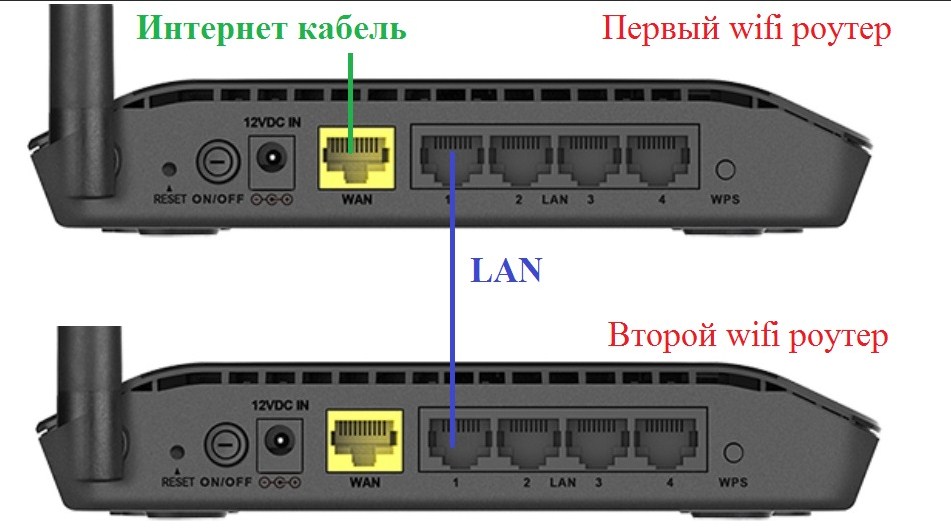
The upper device on the picture will be the main one and the lower one will work as an access point and just distribute Wi-Fi and the related routing settings from the first one. We will connect via cable. If the cable goes through the street – make sure that it meets the standards of a street tight cable with an extra braid. By the way, you can plug the cable into any port – it doesn't matter. Now let's move on to configuring the router.
How do I set up my router as a WiFi hotspot?
To set up a wifi router as an access point, you need to do the following steps, universal for all models and manufacturers:
- Plug the router into an outlet
- Plug a cable into the LAN port on the secondary device and into the same LAN port on the primary device that is already distributing the signal
- Connect to the second router via WiFi, enter its settings and turn it on as an access point
- Configure the wireless network and save the settings

But menu settings in routers of different brands are different, therefore we will dwell on the most popular ones
Asus router as a wireless access point (AP, Access Point)
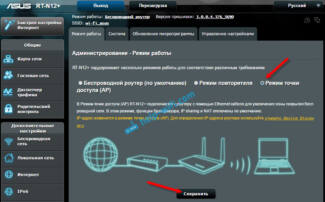
On the Asus router we have to open the "Administration" section and choose the "Operation Mode" tab. It is necessary to tick the box "Access Point" or "Access Point/AiMesh router in Access Point mode", depending on the translation and modification. That is, if your model supports seamless WiFi roaming, then it will be automatically activated in this mode.

Next, assign an IP address for the access point. Since the device will be connected to an existing local network, it must have its own address, assigned in accordance with the settings of the main router. That is, if it has the address 192.168.1.1, then it must be written in the "Default Gateway" section. And for Asus router in the point mode write "192.168.1.2", "192.168.1.3", etc. – any other from the allowed in DHCP range and not occupied by another device.

Finally, we set the network name and password to connect to WiFi

Save Save and wait for reboot. At that time it is ready to connect to the Internet via a wireless signal.
Configuring Some Settings
Using your smartphone you can change the configuration of the router.
Connecting to the Internet
The settings for connecting the router to the Internet, for example TP-Link can be configured via the phone.
To configure the router via a smartphone, you should:
- In the control panel of the wi-fi router you need to find the section "WAN" settings.
- Here you need to specify the type of connection to the network. If your router has a dynamic IP, no additional settings are required.
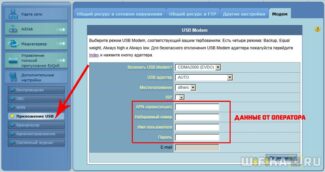
If the type of connection is "PPPoe" or "PPTP", you will need to enter the login and password from the network.
As we said before, these data are specified in the contract with your provider.
Wireless connection security settings
To change the credentials for logging into the router's control panel, follow the step-by-step instruction:
- In the router's interface, you need to find the "System Tools" section.
- Next, you need to select the "Password" column.
- In the input line of the new name and password, enter the new data.
- Confirm your actions by saving the changes.
It's better to duplicate the new credentials on a piece of paper and store it in a safe place.
Wi-Fi Setup
After all the changes you made earlier (changing the credentials), you will need to change the Wi-Fi settings. To do this, use the instructions:
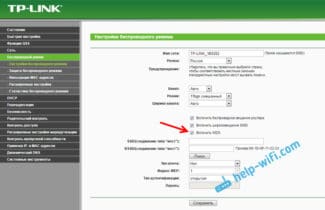
- In the router's control panel, select "Wireless Networks".
- You need to enter the new name in the Wi-Fi name line and save the changes.
- Then you need to connect to the Wi-Fi with the new name (the password should remain the same).
- Now start the browser again and go to the router interface (type 192.168.1.1 or 192.168.1.0 in the address bar of the browser, if Asus you can try – router.asus.com).
- Here you have to choose "Wireless Security".
- Now you have to set the new parameters:
What mistakes can be made when connecting and configuring
Can occur when connecting to the network, after setting up Wi-Fi. After entering a new password, the smartphone may stop connecting to the network. It will say "Authentication error" or "Saved" under its name. To fix this situation, hold down the Wi-Fi network name for a few minutes. After that the command "Delete/forget" network should appear, select the desired one.
Now you can re-select the desired network in the list of available networks, and connect again.
Error "Internet may be unavailable" / "No connection to the network".
This problem is often encountered by users, the reasons for its occurrence can be many. To solve this problem on mobile devices, the following methods will work:
- First of all, you need to restart the router by pressing the Power button. You should also turn off and on the Wi-Fi on your smartphone. Sometimes this is enough to solve the problem.
- If a proxy server is enabled in the properties of the wireless wi-fi network, then the Internet will not work. To check this, in the list of available networks you need to press the desired one and hold for a few seconds. In the menu that appears, select "Change network", then "Advanced". Make sure that the proxy server is disabled.
- For the correct operation of the Internet and some applications, your smartphone must always have the correct date and time. For convenience, you can set these settings automatically.
- Some users find it helpful to change the static DNS servers. In the properties of your Wi-Fi network, select "Advanced". Then click on "IPv4 Settings". Here you need to write DNS manually, according to the table:
Getting Ready: Connecting the Router
First of all, I advise you to do a complete reset of your router. It doesn't matter if it's new from the store, or already worked somewhere, the settings need to be cleared. It may have already been configured, and some old settings we don't need. Because of them, a lot of problems can arise. Therefore, see the article "How to reset the password and settings on a Wi-Fi router?", and do as it says. Have you done it? Great, let's get on with it. If something didn't work, continue as well, let's hope that there are no settings we don't need.
Screw the antennas to the router (if they are removable) , then connect the power cable and plug it into the socket. In the blue WAN socket connect the network cable, the Internet. Which in your home provider carried (it is good to be sure that the Internet works and paid for. Otherwise, during the setup there may be problems and you will think that the router or the way of setting up is to blame).
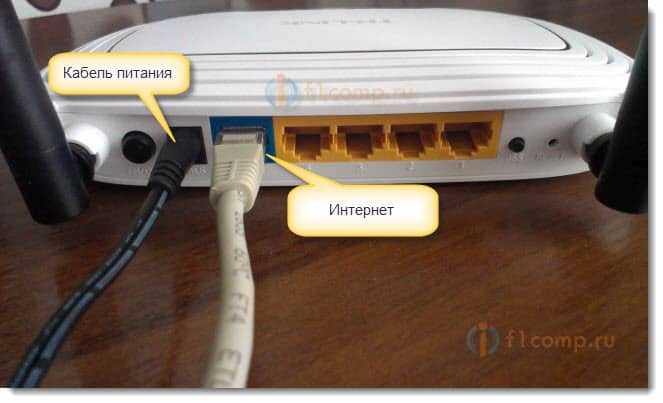
Plugged in, lights flashing, everything is fine. If after turning on the network, the indicators on the router did not light up, then it is possible that it is turned off by a button, which may be on the router itself. Check it out.
Now take your tablet, smartphone, phone (whatever you have) , and proceed to the next point of our instructions.
Let's start setting up the router from your tablet.
By default, the Wi-Fi security is not set and your network is open. Now we connect the tablet to it (this is in my case, when I continue to write the tablet, I will be referring to the device from which to configure).
Let's go into the network settings (we need to enable Wi-Fi).
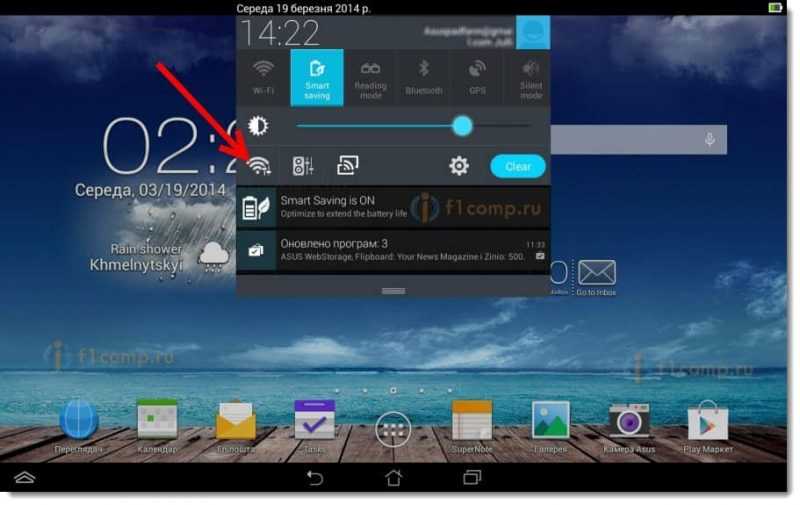
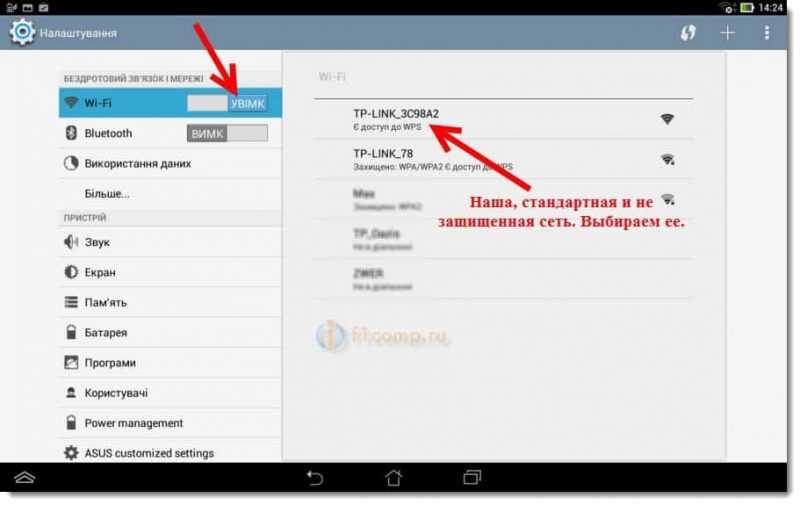
Next, turn on the Wi-Fi network and to the right in the list look for our network.
Here, attention! It will have a standard name and will be open. It is important to choose our network. If you are in doubt, then just unplug your router (turn off and turn on the Wi-Fi on the device) , and see if the network disappears. If so, it means that this is your network, select it.
A window will appear. Simply, click on Connect.
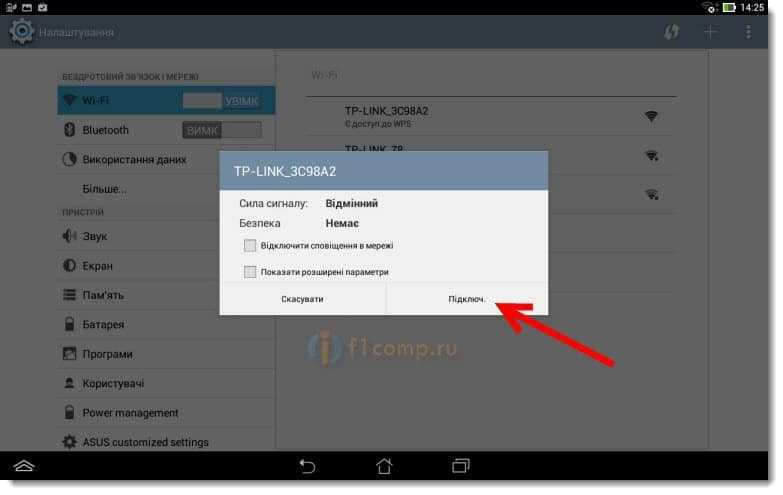
If all is well, then next to the network will appear status "Connected" and an icon with network divisions will appear at the top.

That's it, our tablet is connected to our wireless network. We can proceed with the settings.
Configure the router through the browser on the tablet
We need to launch any browser. It is definitely available on your device. It can be Google Chrome, or some other standard browser.
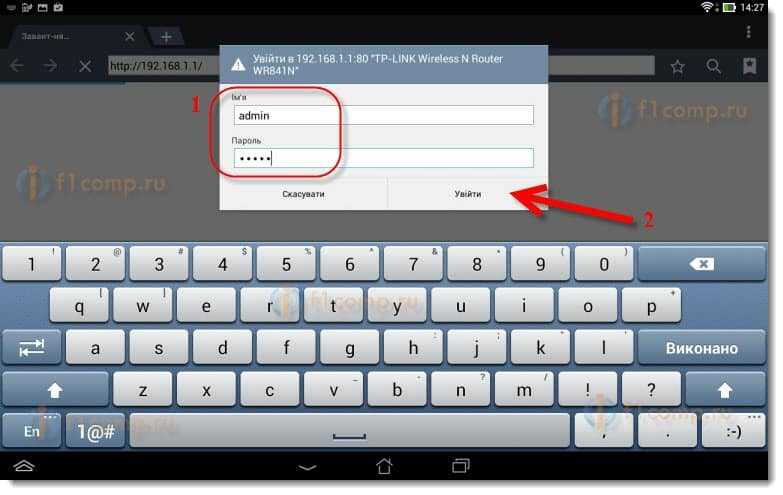
In the browser, press your finger on the address bar and enter the IP address of our router. Usually, it's 192.168.1.1, or 192.168.0.1. You can see this address, and the default username/password at the bottom of your router. They should be there.
Read More:
