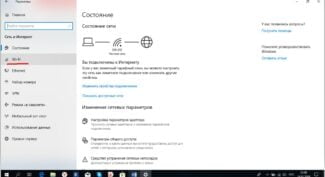
If you can't find it, you can just left-click on Start and start typing "Control Panel" or "Adapter Settings". In most cases, everything will be found, and you will only have to click to go to the desired item. From there, you can proceed in the same way as in Seven. When you get to the list of adapters, look for the wireless connection. Then right-click on it and select "Enable".
- Wi-Fi in Windows 11: how to enable, why no Wi-Fi button, no settings and the adapter "Wireless network"?
- How do I turn on Wi-Fi in Windows 11?
- The concept of a wireless network
- WLAN on your phone
- How to turn on the WLAN autosetting service in Windows 10, 8, 7
- What should I do if the WlanSvc service doesn't start?
- Update: enable "Normal Startup" if error 1068
- Nothing helps, the router is not broadcasting Wi-Fi network, the LED is not lit
- Checking the WLAN function
- Installing Drivers
- Update the adapter driver
- Connecting to a network
Wi-Fi in Windows 11: how to enable, why no Wi-Fi button, no settings and the adapter "Wireless network"?
It is not uncommon to have a situation where after buying a new laptop or PC, or after installing or upgrading to Windows 11 there is no Wi-Fi. There is simply no Wi-Fi button, there is no corresponding section in the settings, and among the network adapters there is no "Wireless Network" adapter. Accordingly, we can't turn on Wi-Fi and connect our computer to the Internet wirelessly.
In this article, we'll analyze all the possible reasons why your laptop may not have Wi-Fi, fix the problems and figure out how to enable Wi-Fi in Windows 11. The article is suitable for both laptops and tablets, as well as for desktop computers (system units) .
To make this instruction clear and simple, we will go in order. First I will show you how to find the Wi-Fi settings and turn on the wireless network. You may have it just turned off and after turning it on you will be able to connect to the wireless network. If you can't find the Wi-Fi settings on your computer, then the second part of this article will tell you why that might be and what to do about it. If you're having trouble or have any questions, you can always email me in the comments.
How do I turn on Wi-Fi in Windows 11?
You can turn on Wi-Fi on your Windows 11 laptop or computer either in the Quick Access Toolbar or in Preferences. You can also connect to the wireless network there.
- You can open the Quick Access Toolbar (that's what I call it) and click on the Wi-Fi button.
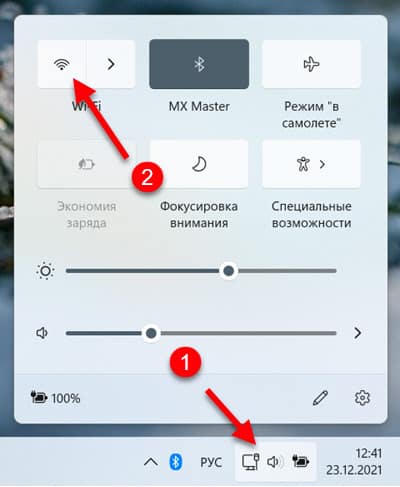 And then click on the arrow next to it, select your network and connect to it.
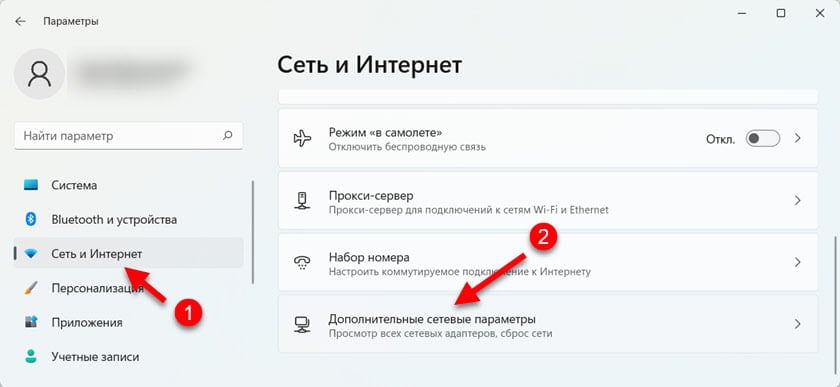
 - The second option is to go to settings (you can open them from the Start menu, or by right-clicking on the Start button and selecting "Settings") and under "Network and Internet" turn on Wi-Fi.

If you have everything the same as in the screenshots above, everything is fine. Next, simply connect to the Wi-Fi network. I wrote more about this in a separate article: how to connect to Wi-Fi in Windows 11.
The concept of a wireless network
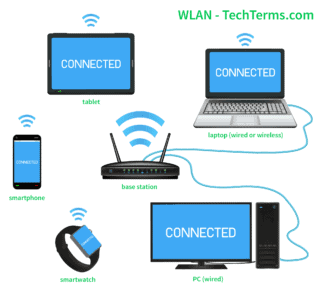
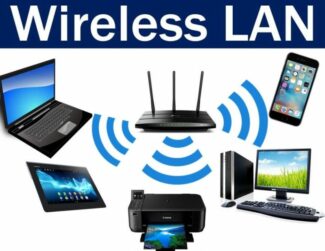
WLAN stands for Wireless Local Area Network. During its operation, it uses radio frequencies rather than cable networks (as in the case of a conventional wired connection) to establish communication and transmit data. This makes it independent of the specific space and available to a large number of users. The most popular technology currently in use for transmitting information over radio waves is Wi-Fi.
Wi-Fi is an abbreviation derived from the term Wireless Fidelity, which means "wireless reliability". By using this technology, users have access to the network throughout its coverage area. Most laptops are labeled Wi-Fi, meaning that they are compatible with WLAN networks.
What is wireless coverage area and what does it depend on? It's nothing more than the Wi-Fi coverage area, within which users can move around without disrupting the connection. As a rule, the distance over which signals can be transmitted is about 100 meters. This depends on many factors, in particular on the number and type of obstacles. In any case, WLAN is a more reliable way of connecting than cable networks. The number of users is practically unlimited, and the range can be expanded by installing overlapping (additional) access points and increasing the number of users in one area.
WLAN on your phone
It is possible to access the virtual network not only from a computer/laptop, but also from a cell phone. What is WLAN in the phone and how do I use it? In essence, it is the usual wireless Internet, but not on a portable PC, but on your cell phone. This feature is now built into all modern models and can be very convenient. For example, you can use Wi-Fi while sitting in a cafe or waiting for your flight at the airport – in general, in any public place where there is an appropriate coverage area. The use of the service is usually free and does not depend on the presence/absence of a SIM card. The only disadvantage is that the battery drains quickly enough. You can connect Wi-Fi (WLAN) in the phone's "Wireless Networks" settings, if you are within the range of the access point.

How to turn on the WLAN autosetting service in Windows 10, 8, 7
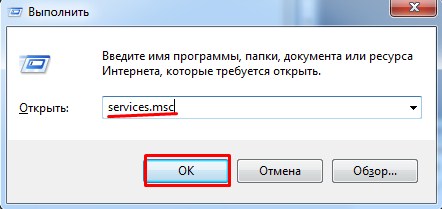
We press the key combination on the keyboard Win + R. The "Run" window will appear. Enter the command "services.msc"and press "Ok".

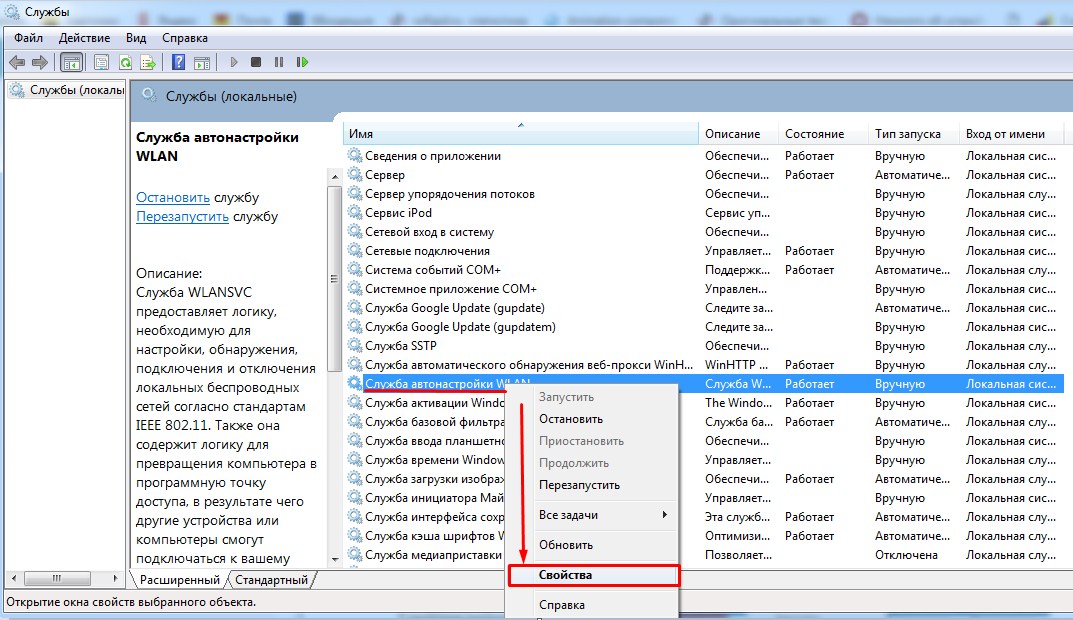
Next, in the list find the desired for us "WLAN Autosetup Service", click on it with the right mouse button, and select "Properties".
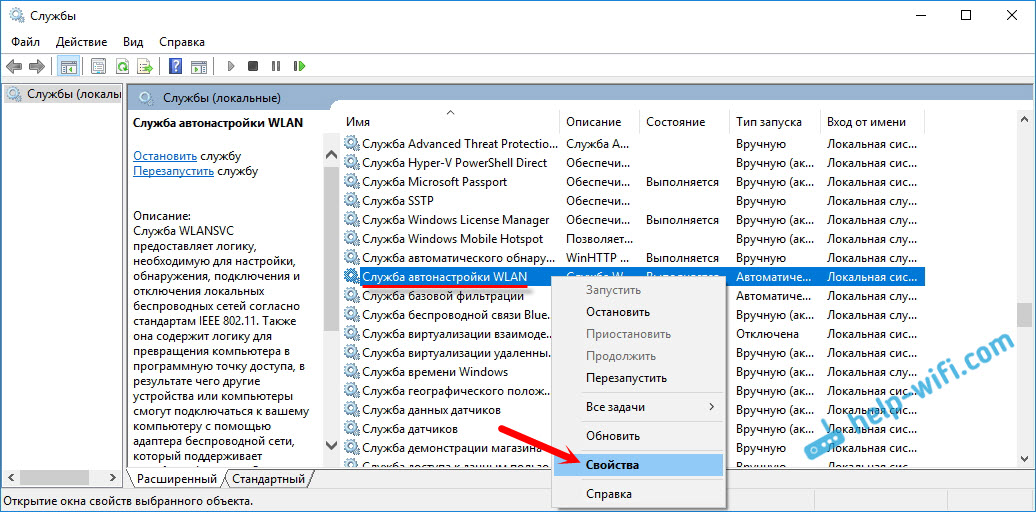
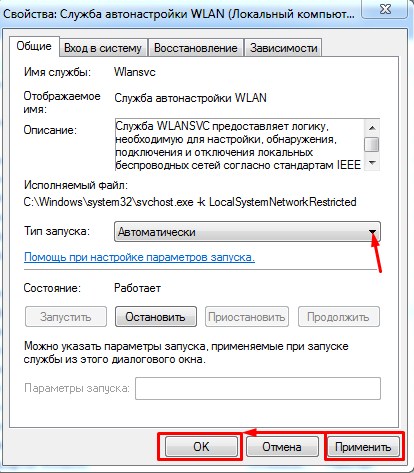
Set the "Startup Type" – "Automatic". Click on the "Ok" button, and "Apply".

Restart your computer. After these steps, everything should work.
What should I do if the WlanSvc service doesn't start?
If you encounter that the WLAN Autosetup service doesn't start, the problem may be that the service itself is completely disabled. Let's check, and turn it back on.
Again we press the key combination Win + R, but this time type in "msconfig"and press "Ok".

Find the service you want in the list, and see if there is a checkmark next to it. If not, check it, press "Ok", and "Apply".

Update: enable "Normal Startup" if error 1068
This solution was shared with us in the comments. It's very simple and helps to get rid of 1068 error when starting a WLAN service. Press the Win + R shortcut on your keyboard, copy the command msconfig to the appropriate line and press Ok.
Nothing helps, the router is not broadcasting Wi-Fi network, the LED is not lit
If you have already tried everything you can, but the router still does not start distributing Wi-Fi, and the WLAN light is still not lit, it is likely that the router is broken. That is, the problem is not with the settings or the software, but with the hardware.
- Do a factory reset of the router. Find the "Reset" button on your router, press and hold it for about 10 seconds. Usually the button is recessed in the case, so you need to press it with something sharp. If this doesn't work, search our website (at the very top) for a query like "reset TP-Link". We have instructions for all popular manufacturers. Or write in the comments, I will tell you.
- If you were able to get into the router settings, then update the firmware. Our site also has many instructions for different routers. Search the manual for your model through a search on the site.
Honestly, these tips are unlikely to help. But before you take the router to the repair, or go to the store for a new one, you should try to reset and update the firmware. Well, poke more button "Wi-Fi" (if you have it), may still be there is a problem, and the indicator WLAN will be lit, and the router will give out a wireless network.
![]()
144

252372
![]()
Sergey
![]()
Errors and malfunctions
Checking the WLAN function
Let me say right away that this function automatically manages all network devices, and it is supposed to be enabled. But sometimes in case of some software installation or viruses the settings can be thrown off.
Installing Drivers
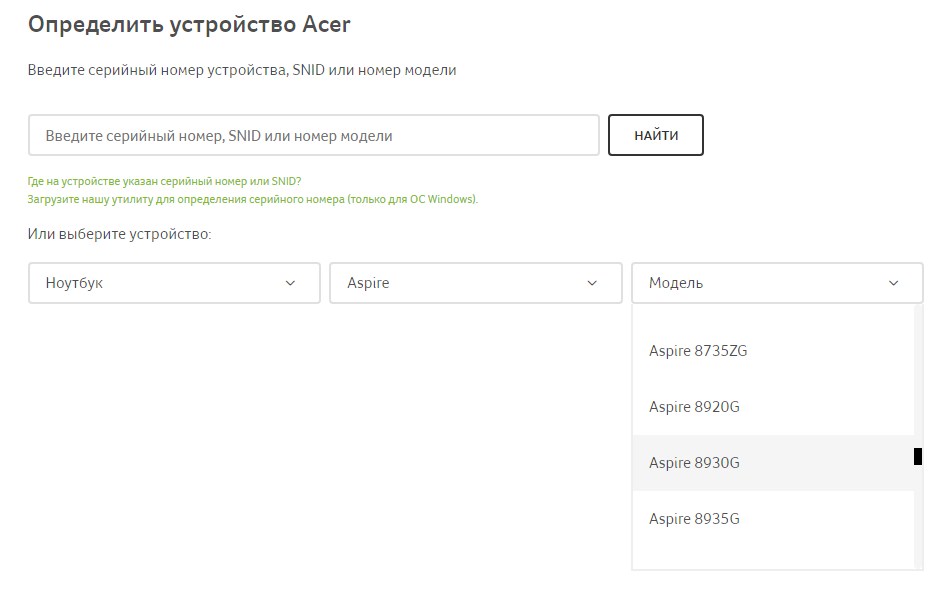
If I were you, I would reinstall the drivers for your Wi-Fi adapter. They should be downloaded from the official website of the company of your laptop.


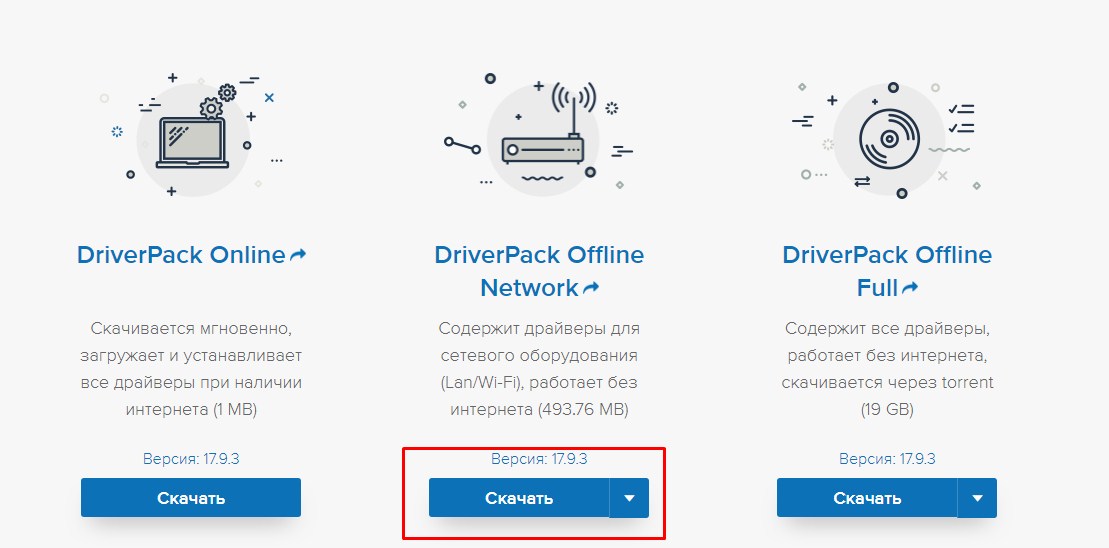
If you can't find the right drivers on the website, or just confused, you can download a whole package from the website – https://drp.su/ru/foradmin . It is necessary to download "DriverPack Offline Network". After installing the driver, don't forget to reboot the machine.
Update the adapter driver
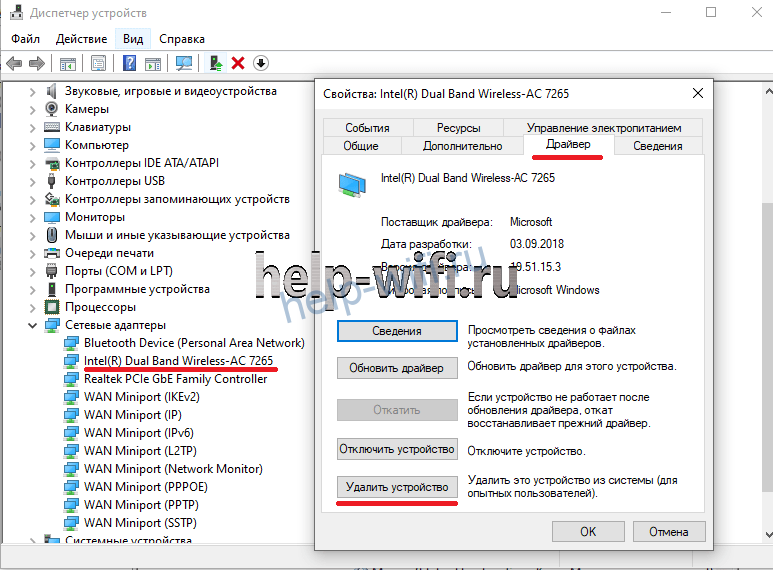
This item is worth doing if there is an unknown device in Device Manager or some known device with problems. Go to Device Manager again, open the one that is working with problems (if it is detected) and click in the tab "Driver" on "Remove device". Wait for the process to complete.
Now download the driver from the laptop manufacturer's website. That's where it's from. If there isn't a version for 10 there, try installing the latest version. They often work much better than those recommended by Ten itself. After installing, reboot the device.
It may be that you can not find the correct model or program. In this case, download the driver pack solution. If at least some internet on the laptop at the time works, then take the small online version. If it's not there, you'll have to download the huge offline version. Run it and wait until it detects all devices and installs the latest drivers. After that, there should be no unknown devices left. If there are, the problem may already be hardware.
Connecting to a network

After turning on the module itself on your laptop, you will need to go to the notification center on windows 10. Sometimes to do this, it is enough to move the cursor to the right edge of the screen. If it did not work, then lead it down to the clock, there will be a message icon to the right of it, click on it. A column will open on the right, in which we click on "Expand" and select the item "Network".
Next, select your network, then a window will pop up, in which you must enter the password from wyfay. After that, the Internet on a laptop will connect.
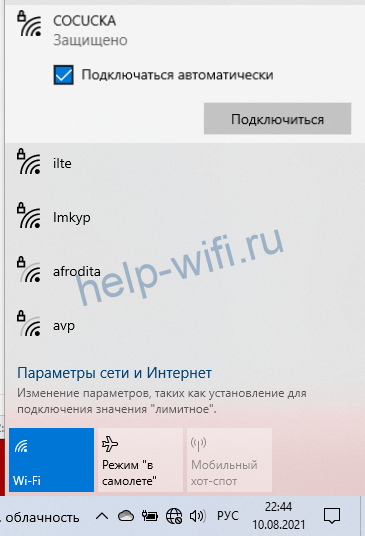
You can click on the very wireless icon in the lower right corner. There will appear a window, which will list all the networks. It remains to select one of them and run.
Read More:
