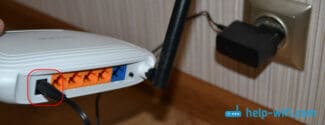
After installing Wi-Fi it is necessary to connect it according to the standard scheme:
- How to connect a laptop to a Wi-Fi router without wires
- Location and turning on the router
- Setting up the router
- Step 2: Using the WPS function
- TP-Link
- Step 3: Connecting in Windows
- Connecting using a patch cord
- Errors when connecting.
- Connecting smartphones and gadgets to a router
- How to connect Android devices
- How to connect to a Wi-Fi router for iOS gadgets
- Is it possible to connect to someone else's Wi-Fi connection
- Step 3: Connect to Wireless Network
- Method 1: Operating system interface
- Step 2: Connect the cable to the router
- Step 3: Connect cable to laptop
- How to connect a router to a laptop
- Via Wi-Fi without wires
- Via cable
- Necessary network settings on the laptop or PC
- Changing from a static IP to a dynamic one
- Starting a DHCP client
- Conflict of networks
- How to connect cable Internet to your computer
- How to wire the Internet to a new computer
- Common Problems
How to connect a laptop to a Wi-Fi router without wires
Often there are situations when people who bought a laptop, faced with problems connecting the Internet. As a rule, this is not a complicated procedure, but there are some points that can cause difficulties for novice users. More details on how to connect a laptop to a Wi-Fi router and the Internet without wires will be described in this article.
To connect the wireless Internet, you will need two devices: a router or router and a laptop with a built-in network adapter or a separate adapter, although many modern models of laptops do not need them. Of course, you will need a place where you can catch the Internet. Before buying, it is better to clarify this information in advance.
Location and turning on the router
Before answering the question of how to connect to the WIFI router on a laptop, you should consider the places where you should not put the router because of its possible incorrect operation:
- You should not place the router near other devices operating at a frequency of 2.4 gigahertz, that is, you should not put it near a radiotelephone, a microwave oven. The reason for this rule is simple: several devices that operate on the same wave, interfere with each other.
- It is not recommended to place the router near mirrored surfaces. Otherwise, the signal will be lost or will work poorly.
- Do not place the router where there will be a lot of electrical appliances. It is necessary to reduce the number of nearby devices at the laptop and the network as much as possible.
- You should not install the router against a load-bearing wall.
Setting up the router
Before you begin connecting your computer to Wi-Fi, configure the router:
The initial setup should be done from a computer connected to the router with a cable. After connecting your computer to the router, follow the instructions for your particular router model. It should be clarified that you need to find out from the provider the type of Internet connection to the actual service address.
Wi-Fi settings are also described in detail in each manual to the device. The router also has a wizard for setting up a wireless connection.
If you did not adjust the security settings when you installed the Wi-Fi router, it is very easy to connect to the wireless internet:
- Turn on the router;
- Activate the communication module on your computer or laptop;
- Search for Wi-Fi network;
- Specify key (network password);
- Wait 1-2 minutes, go to the browser.
Your router will automatically assign an IP address to your wireless device via a DHCP server. The operating system utility will remember the key and when activated, your PC will find and connect to the Wi-Fi network at home.
If the network security requirements were followed when installing the Wi-Fi router and the SSID distribution is hidden, then you need to create a profile to connect the Wi-Fi network to your laptop in manual mode. If the router is set to whitelist access to MAC addresses, you need to create permission at the source for your wireless network user.
The DHCP server may be disabled in the router, then you have to manually enter the TCP/IP settings on your computer or laptop to set the wi-fi.
Step 2: Using the WPS function
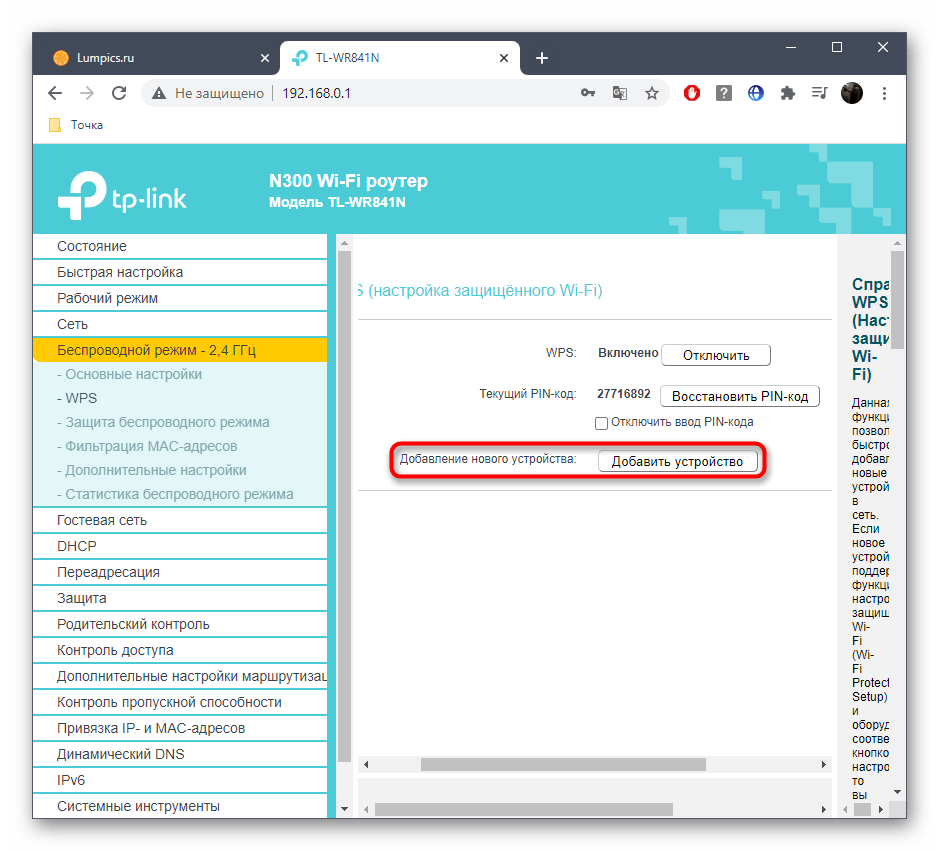
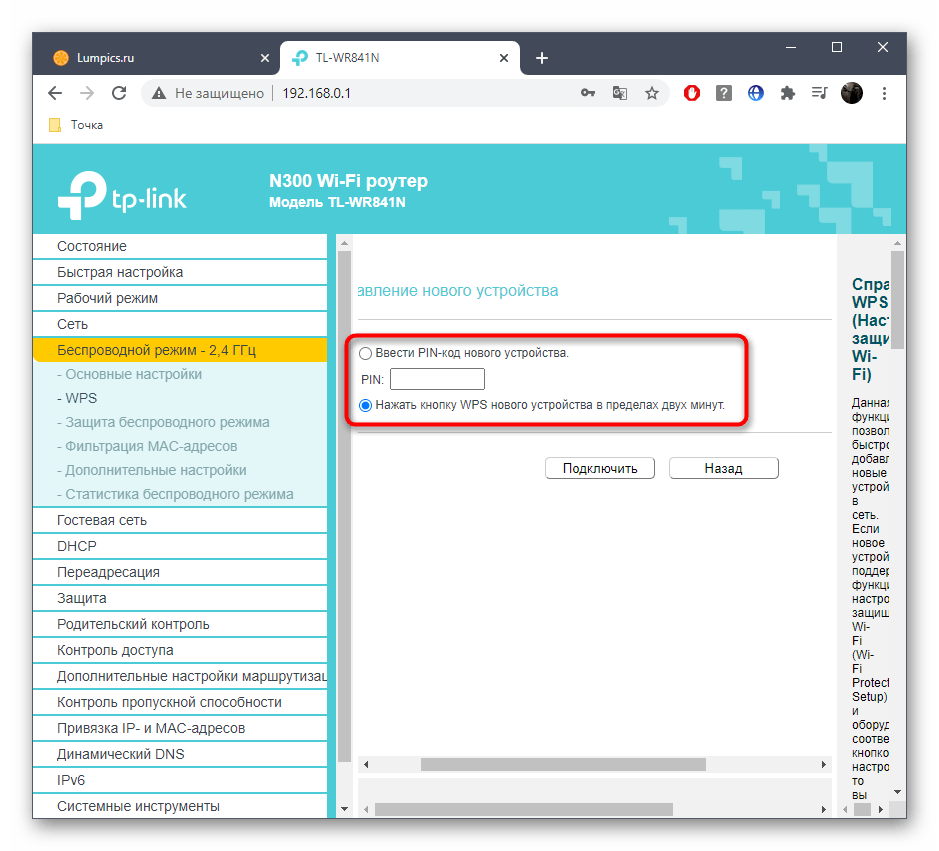
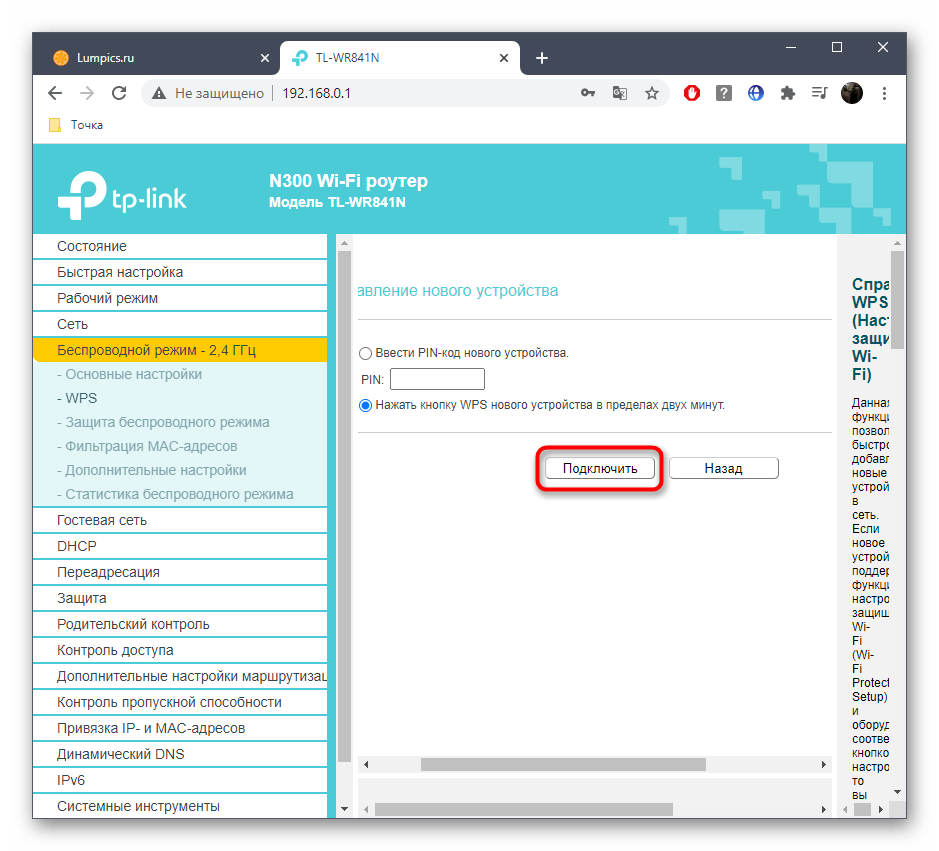
Connecting your device to a wireless network is done using WPS, which is enabled by default on all modern networking equipment. First you need to activate access directly in the Internet center of the router itself. Let's analyze this operation by the example of two dramatically different configuration menu views: ASUS and TP-Link.
TP-Link
The routers from this company have an almost universal web interface, which is also typical for routers from other manufacturers. Therefore, even if you have other network equipment, the following instructions will definitely work for you.
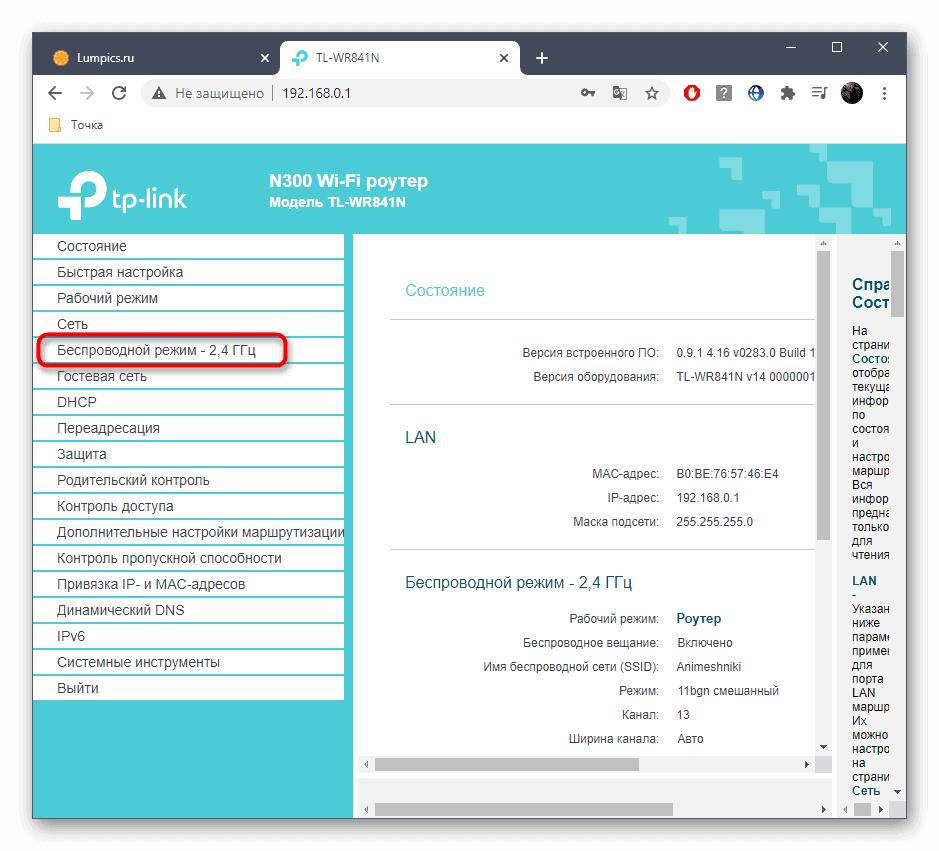
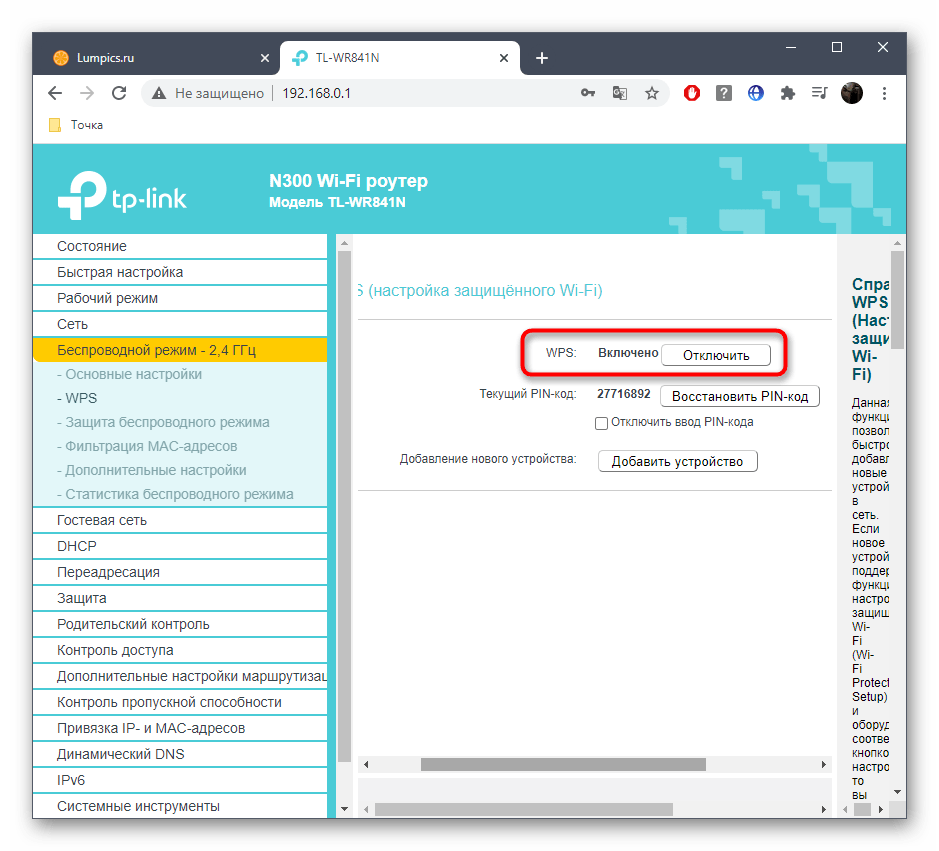
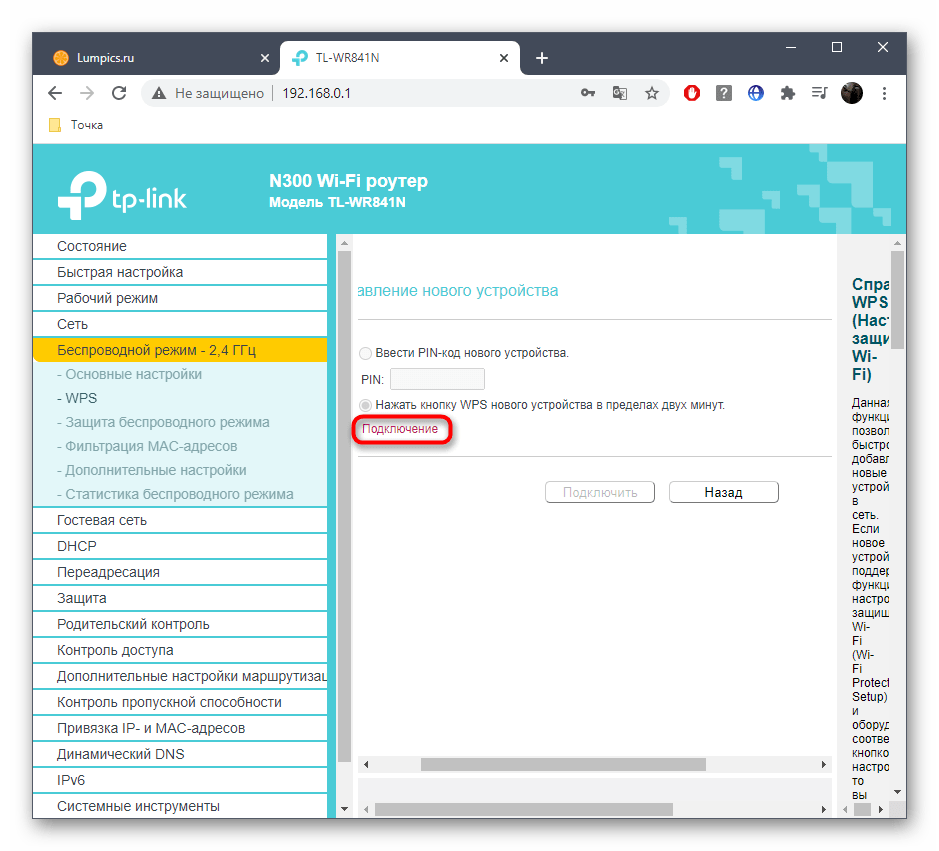
- After successfully logging in to the Internet center, open the "Wireless mode or "Wi-Fi".
- There, move to the category "WPS".
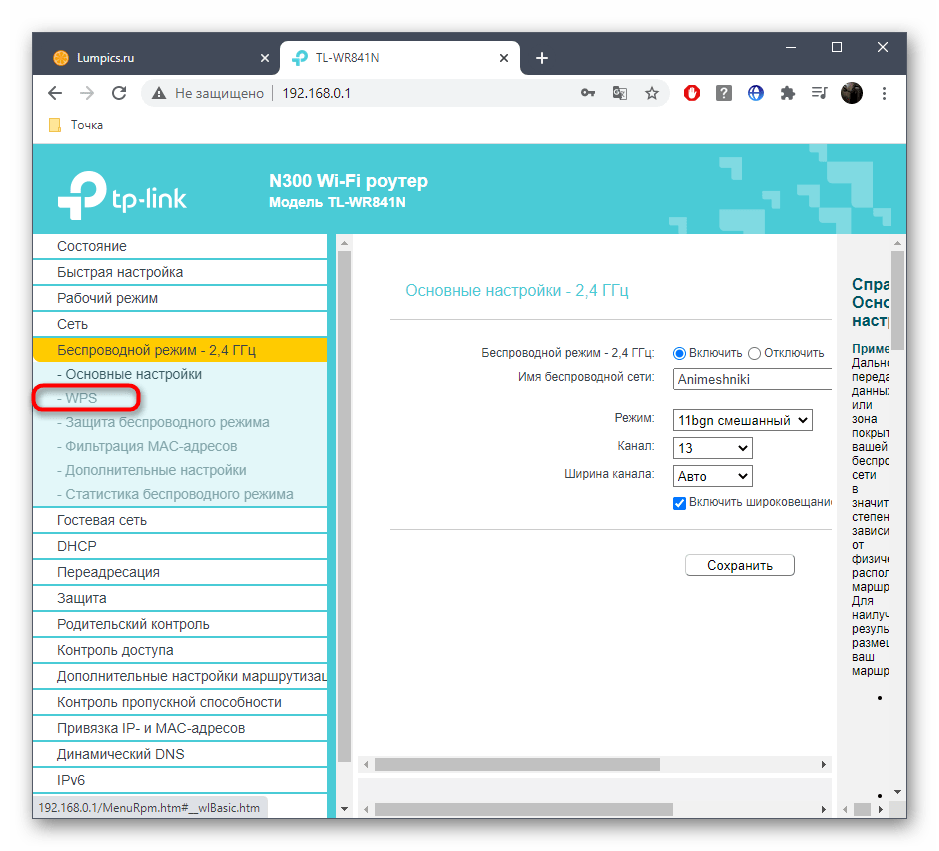
- Make sure that this technology is in the enabled state, and if not, activate it by clicking on the appropriate button.
Step 3: Connecting in Windows
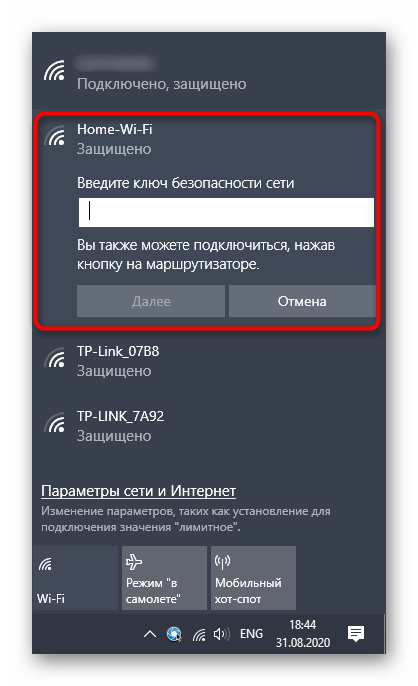
The only thing left to figure out is what to do in the laptop's operating system itself: expand the list of available networks and look for the one you want to connect to. If the WPS is not yet activated, you will be prompted to enter the security key. Immediately after enabling the function, an open connection will become available in the web interface.
If you encounter a situation where Wi-Fi on your laptop does not work for some reason, ask for help in a separate instruction on our website, where you will find a detailed description of each existing method of solving the problem.
Connecting using a patch cord
In this case everything is much easier. Theoretically, as soon as you connect the router wires to the laptop, you should be able to access the Internet immediately. The main thing is that the router should be distributing the Internet at that moment.
If the router is just being installed and you need to connect to it to prescribe the settings, there may be no access. This is a standard situation, because you do not need a working Internet connection to access the control panel. Just go to the admin panel (usually 192.168.0.1 or 192.168.1.1) and enter your login information.
You can buy a cord (patch-cord) in stores, make one yourself or use the one which is usually supplied with the router. Connect both edges of the cable into the Ethernet (LAN) port of the router and the laptop network card. If there is no connector on the computer, you will need an adapter, which is sold at retail outlets.

Once both ends of the cable are plugged in, the Internet should work. If it does not work, the cause is most often in the cord, or rather in its connectors. They should make a distinctive click when plugged in.
Errors when connecting.
Not in all cases, when the router and laptop are connected, there is access to the network. The reasons may be the following:
- The computer's wireless networks aren't working. In other words, the Wi-Fi adapter is not recognized by the system. In this case, installing the driver will help.
- There are cases when the network is recognized and the laptop is connected to it, but the Internet does not work. A red mark (cross) appears on the network icon. Then you need to enable the WLAN Autosetup service. In Windows 10, you need to right-click on the icon "My Computer", select "Manage" and find "Services" in the proposed list. In the window that will open, you will need to find the desired service and change its status to "Running" and the start type to "Automatic".

- The notebook does not see the desired network. Here you need to open the router settings via a web browser – in the address bar go to 192.168.0.1 (or written on the sticker of the device), enter your login and password (admin/admin). Then you should find the WLAN settings category and select another channel.
- It often happens when the network status is signed "No internet access" or "Limited connection". There are several solutions to the problem – restart the router, check the cable for continuity, turn off the anti-virus, change the settings of your ISP.
- In Windows you may often get a "DNS-server not responding" message. In addition to rebooting the devices, it's worth checking the DNS service. On your desktop press Win+R on your keyboard and type services.msc in the opened form. In the window that appears right click on the DNS service and open its properties. Startup type should be set to "Automatic", if necessary. If the "Run" button can be pressed, this should be done.

Connecting smartphones and gadgets to a router
Before you connect to the wi-fi, you should consider that the range of the network, in which you can make a connection to it, is in the range of a few to hundreds of meters. The exact figure of the parameter characterizing the coverage is determined by the signal strength and depends on the router model and the package provided by the Internet service provider.
The ability of the router can also be affected by weather conditions, if the connection is made outdoors. Algorithm of actions required to connect to wireless Internet via Wi-Fi telephone devices with different types and versions of operating systems is almost identical and differs in nuances due to their peculiar functional options.
Important! In order to reconnect to Wi-Fi and not to enter access passwords repeatedly, the first time you connect to the network you must activate the option to remember the login ID. It will ensure the correct automatic connection to the wireless Internet when the module is turned on.
How to connect Android devices
In all versions of the Android operating system, the connection of wi-fi to the phone is carried out according to an identical scheme:
In the latest smartphone models, the procedure is reduced to clicking on the screen on the wi-fi icon, selecting the network and gaining access to it according to the standard scheme. An alternative option is to hold down the settings button in the quick menu.

How to connect to a Wi-Fi router for iOS gadgets
Connect to Wi-Fi smartphone with iOS operating system installed, you can use the functionality of the main menu of the device. To do this, you need to:

- go to the settings terminal;
- choose the appropriate settings;
- open the section allowing to see the connection networks;
- activate the module by clicking on the slider with the enable command on the button in the subsection of wireless Wi-Fi connection;
- select the network to which you want to connect from the proposed list;
- enter the data to gain access.
Is it possible to connect to someone else's Wi-Fi connection
Owners of gadgets and computer equipment can connect to wi-fi through the adapter of their devices connected wirelessly to the router. The router in an active state or connected devices can become a source of Internet for neighbors in the case when it is distributed without a password.

Someone else's wi-fi can be connected to in shopping malls, cafes, and restaurants that provide open access. If the owner of the access point set a password on it, then you can connect to it only if he provides the data to log in, or if you break the password, which is considered illegal.
Important! When detecting the fact of someone else's connection to Wi-Fi, you must make sure that the Internet distribution is protected by a password. If it is not set, you should close access without entering the login ID, then the connected devices will be automatically disconnected after renewing the connection.
If the owner of the device has bothered to protect the wireless connection through its Wi-Fi, but there are suspicions of unauthorized access to the Internet by an unauthorized person, you should go to the network settings and open the tab "DHCP – DHCP Clients List". It will show the information from which IP address the connection was made, as well as the MAC address.
However, with this information it is practically impossible to figure out who broke the password without carrying out complex measures. That is why it is enough to change it and set a more complex alphanumeric combination to prevent the situation from repeating itself.
Having figured out how to connect Wi-Fi to Wi-Fi on gadgets and laptops, you can appreciate all the advantages of wireless access technology. Modern technology allows you to connect to the Internet from a remote router. The procedure is performed according to a certain algorithm, which differs for devices with different operating systems.
Step 3: Connect to Wireless Network
All the preparatory steps are over, so it's time to start connecting the laptop and the router via a wireless network. You can use several different methods depending on personal preference. Each one is different and requires different steps, but leads to the same result. Read on to learn about the features of each option and choose the one that's right for you.
Method 1: Operating system interface
Connecting through the operating system interface is the easiest because it doesn't require going to certain menus and filling out authorization data. However, there is a nuance associated with the need to know the current Wi-Fi password. If you do not know it, go back to Step 1and go to the router settings and change the settings to your liking. Then close the web interface and start the connection by following these steps:
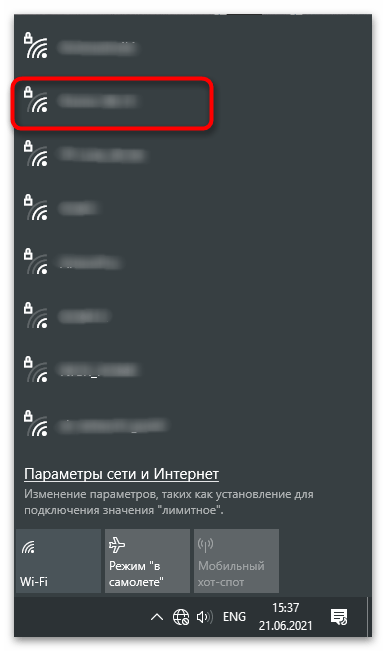
- Click on the Internet icon in the taskbar to open a list of available connections. You can see its image in the circled area in the following screenshot.

- From the menu that appears, select the wireless network you want to connect to and then left-click on it.
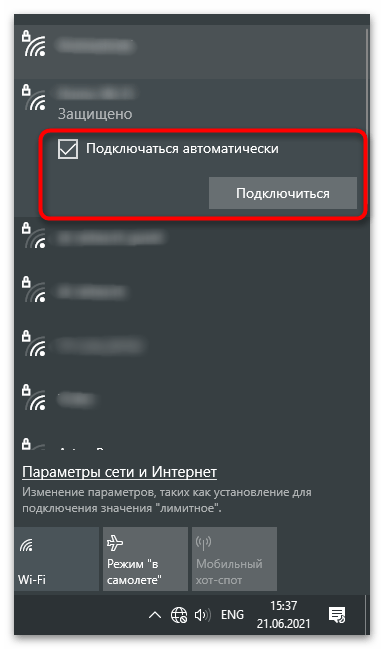
- Check the box next to "Connect automatically".if you want your notebook to connect to the current Wi-Fi immediately after restarting the operating system. Then click on "Connect..
Step 2: Connect the cable to the router
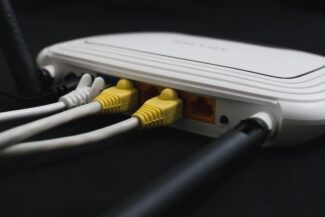
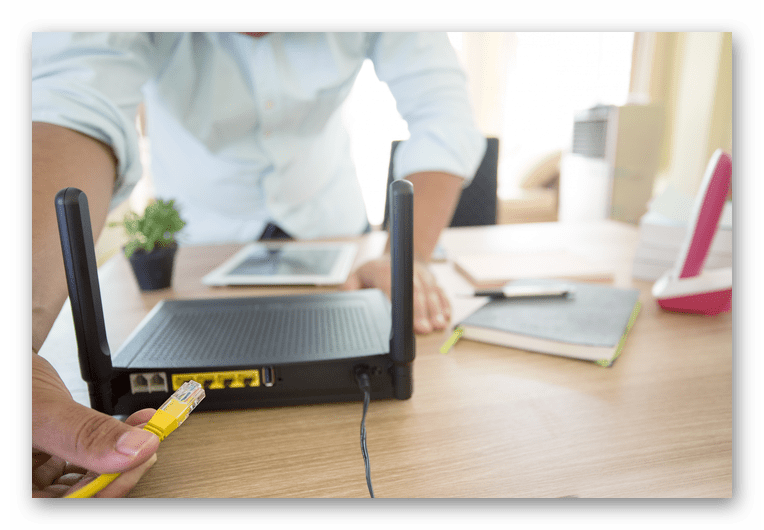
The next step is to connect the cable you purchased to the router. To do this, pay attention to its back panel, where several of the same ports are located at once. They are usually marked in yellow and labeled "LAN"so there should be no problem in finding the right one. Properly insert the cable into the port until you see a distinctive click. If the local network will be further configured via the router's web interface, remember in advance to which port number you connected the cable.
Step 3: Connect cable to laptop
It remains only to connect the second side of the same cable to a laptop by locating the corresponding port on the side panel. It is not difficult to find, because it is shaped differently from the others. You will also hear a click when it is connected. If the connector is protected by a plug, carefully remove it before connecting.
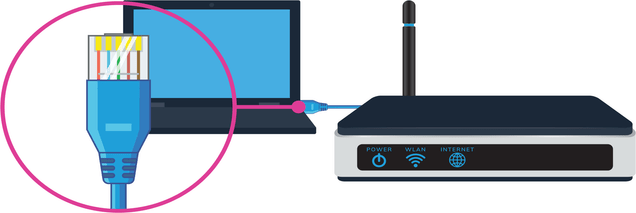
Successful connection will be notified by a corresponding indicator on the task bar in the operating system. If the router has already been configured, you will be able to access the network immediately, but if not, you will be notified "Unidentified network" or "Connected, no network access.".

How to connect a router to a laptop
There are only two ways to connect a router to a laptop: via Wi-Fi or via cable. In most cases, the first option is chosen, because cables are almost out of use, because of their inconvenience. However, the installation via wire is more stable due to the absence of interference with data transmission.
Via Wi-Fi without wires
How to configure your laptop to a wi-fi router – procedure:
- On the taskbar, click on the "Connection" icon, which is depicted as increasing waves.
- Find your network, click on connect.
- In most cases, you need to enter the password listed on the sticker of the router itself.
That's all the steps you need to take to connect your router via Wi-Fi.

Via cable
This method is much easier than setting up Wi-Fi. Ideally, the Internet will start working on your laptop as soon as both devices are connected to each other with a special network cable.
In most cases, when buying a router, the necessary network cable is included in the package, so there is no need to buy it separately. To connect one end must be inserted into the LAN-port of the router and the other end into the laptop. If the port is missing, you must additionally purchase USB-LAN adapters, for example, TP LINK UE300.
Necessary network settings on the laptop or PC
If the user uses a cable connection, but there is no internet after connecting the two devices, it is necessary to go to the network control center using the main menu of the laptop. There you need to find the tab with the changes in the parameters of the connecting adapter. Click on the local network used, find the tab with the properties by right-clicking.
In this situation it is necessary to set the automatic connection to the IP as well as the DNS address and press the OK button. It remains to restart the laptop and try to access the network again.
Changing from a static IP to a dynamic one
How to connect the router to the laptop via wi-fi for dummies – change the static IP to dynamic:
- Go to your laptop settings.
- Find the Internet tab, select Wi-Fi or Ethernet.
- Select the item with the network connection.
- Click on the IP settings section, and after "Settings".
- In the menu change the IP settings, select the option "Automatic (DHCP).
Starting a DHCP client
Follow the step-by-step instructions to start the DHCP client:
- Go to the laptop settings.
- Select the control panel tab;
- Find the "Network" parameter.
- Click on TCP/IP.
- Click on "Properties", select the tab with the IP-address.
- Activate the key "get IP address automatically".
Conflict of networks
To solve the conflict of Wi-Fi networks, you need to make sure that less than 13 Wi-Fi channels are used in the house, as this is the maximum allowed number that can be used in Russia.
If the apartment building uses a lot of networks working on one channel with a certain Wi-Fi, there will be a signal conflict. To eliminate the problem, you need to adjust the frequency segment on which the router (for example, TP-Link models) directly operates. To do this, you can go to any browser to enter the IP address of the router in the address bar and follow the link.
How to connect cable Internet to your computer
To perform this procedure, you need to take a router with one unoccupied cable connector, a cord included and a PC. Then take the cable and connect one end of it to the yellow LAN socket on the back of the router. It does not matter the order in which the cable is connected. The other end of the conductor needs to be connected to the same connector on the PC.
It remains to check the appearance of the indicator to connect the connector of the conductor to the PC. If so, the display of the device will show the corresponding information. The notification panel at the bottom right will show the connection without errors.
How to wire the Internet to a new computer
In the situation of an online connection to a computer device, the algorithm will be different. You will need to create and configure the connection. First you need to insert the cable into the computer card. Then do the appropriate steps:
- Go to "Start".

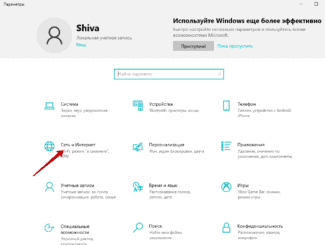
- Find "Settings".
- Click on the Network Control Center.
- Select the setting for the new connection.
- In the new window, select "Internet connection".
- Click "Next" and select the appropriate option with a high-speed connection.

To configure the connection on Windows 7, you need to follow the appropriate steps:
- Click on the "Start" menu.
- Select "My Computer".
- Then find "Control Panel".

- Find "Network and Sharing Center".

- Click "Set up a new connection or network".

- Select "Connect to the Internet".

- Select "High Speed".

This seems to be all the most important steps – then all that remains is to use your Internet on all devices in your home network. And if suddenly there are some problems – be sure to write in the comments. If all goes well – also write, it is very important for me to hear your opinion.
Here I would also like to mention some more interesting optional settings of the router. On all modern routers they are not critical (I have already described all necessary ones above), but maybe you will need them. Usually each of them is located in the corresponding section:
- WPS – setting up quick connection by PIN-code to wifi. It is usually turned off by default. Some people find it convenient, but personally I do not use this device. Hardcore only, complex password only.
- IPTV – many routers support interactive TV from your ISP. The main thing is to have everything connected here while working, otherwise the router will cut off your TV.
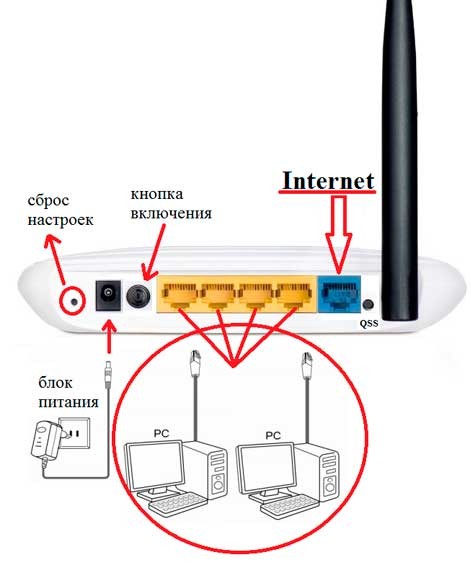
If you do not have something in the setup process, and you can not do anything – do not panic, and reset to factory settings. To do this, press the Reset or Reset button on the back of the router. Usually the button is in a recess, you can reach it with a needle or something narrow. Sometimes you don't get a new router, but an old one – and there may be someone else's settings. So this is a panacea.
Common Problems
There can be a lot of problems, and it is impossible to predict all of them. Here I will just focus on the most common ones:
- Check the cable – more often than not, it's the cable that's to blame for connectivity problems. It can bend, it can come loose, and there will be no connection or Internet. Not to mention the settings. TOP1. Another common cause here is that people confuse the connector for the cable. Remember: the cable from the ISP – in a separate connector (blue), the cable from the computer in any of the LAN connectors (yellow, usually several). If you mix it up, it won't work. But there are exceptions – for example, some routers from providers like Rostelecom. Study the manual just in case.
- DHCP and automatic configuration. The problem is that for some reason, the devices get the wrong network settings. There are two reasons for this: either it was already set manually or the DHCP server is not working correctly. In the case of the manual one, I have already written about it – you just have to change it to get it automatically. In the case of the DHCP server – harder to figure out, for clarification it is the DHCP server that distributes the settings on the network, and it is usually created on your router when you turn it on. What if you have more than one router on your network? You need to check.

