In the personal cabinet you will find the following sections:
- How to reconfigure the router after the change of provider
- Step 1: Factory Reset
- Configuring your router is easy and straightforward
- How to open the TP-Link router interface and how to enter it
- Connection technique
- By cable
- Login to settings panel
- Login to router settings via tablet or phone
- What to do first
- Device configuration
- TP-Link
- By the way
- If the router panel is not available
- How to Change a Router Password
How to reconfigure the router after the change of provider
Friends, even according to my not modest calculations, it has already been produced a change of more than 9 different Internet service providers. It is not surprising, when you first connect everything is perfect in the first 2-3 months, and then the speed begins to suffer, then the constant failure on the line begins. In any case, this is treated as something ordinary, and I think you need to know how to reconfigure the router after changing provider, or how to configure it for a different provider.
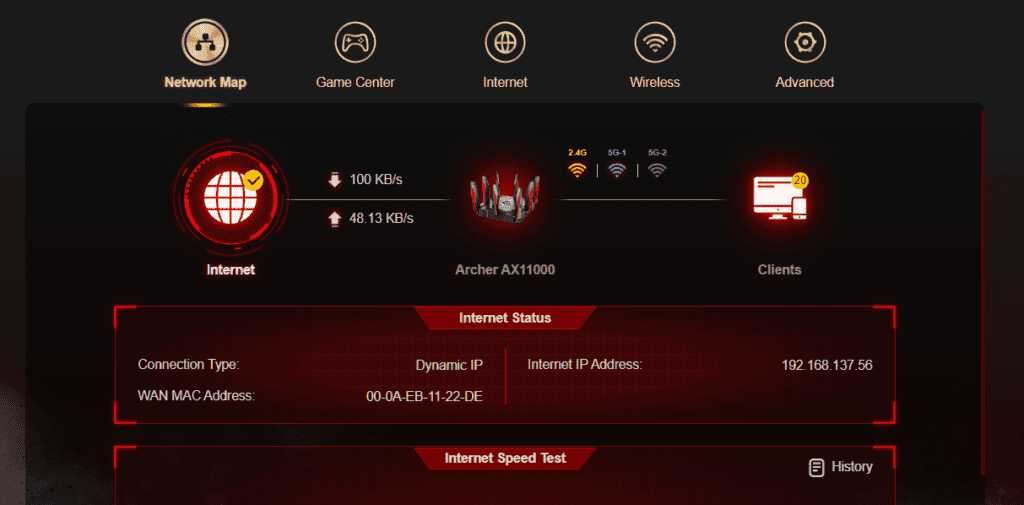
After moving to another place of residence or a change of provider, users think that they will have to buy a new router. This is not the case. It is enough to reconfigure the old router and enter the necessary configuration data. How to do it at home, and what you need to know to do it, is described in detail in this article.
Step 1: Factory Reset
To create a new router connection, you will first have to delete the data previously recorded in it. To do this, the manufacturers have thoughtfully created a button RESET on the back of the device. In order to avoid accidental resetting, the manufacturers place this button deep inside the case and make it smaller than the rest. Router models vary, but the general characteristics of this button are standard. It is always signed with the words RESET or . WPS RESET.
The router itself must be connected to the network and turned on before you start resetting. By pressing the RESET (a needle, ballpoint pen paste or something similarly thin and long is best), hold it for 15 seconds (for some models the hold time varies). The router is reset when all icons on the front panel light up for a moment and then turn off again.
Configuring your router is easy and straightforward
To start with, we have to understand that the router's web interface refers to a personal account, made in the form of a website, where the user has access to the control panel and settings.
It turns out that the interface is four or five pages with the settings, which are accessible through a browser. We are not talking about the site on the Internet, but the memory of the device.
These pages are accessible thanks to the address that each router has. Therefore, when you want to access the settings of the device, you must connect to the local network and enter the specific IP address of the router in your browser. As a rule, in ninety percent of cases, it is 192.168.1.1., it is also possible: 192.168.0.1.
Developers use hostname – the address looks the same as for sites. In other words, www.
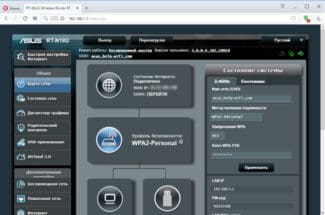
For example: you should consider the router from Asus. After accessing the main page, you can change the necessary settings.
It is important to note that for each router the web interface is different.
External differences are associated with the manufacturer and the date of firmware release. After all, each developer develops the device settings at his own discretion. So, the manufacturer may decide to simplify the interface or make it complex. The language in which the shell is created plays an important role. For example, companies resort to multilingualism, which attracts attention. It is true that routers are also sold, where the settings are only in one language, and not in Russian.
How to open the TP-Link router interface and how to enter it
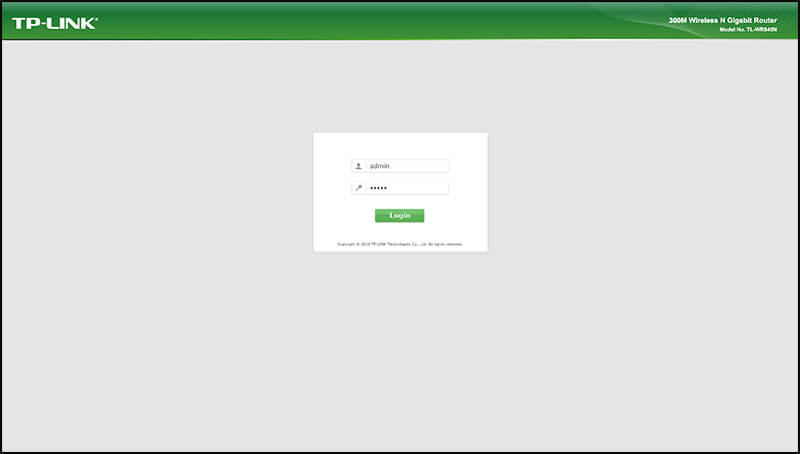
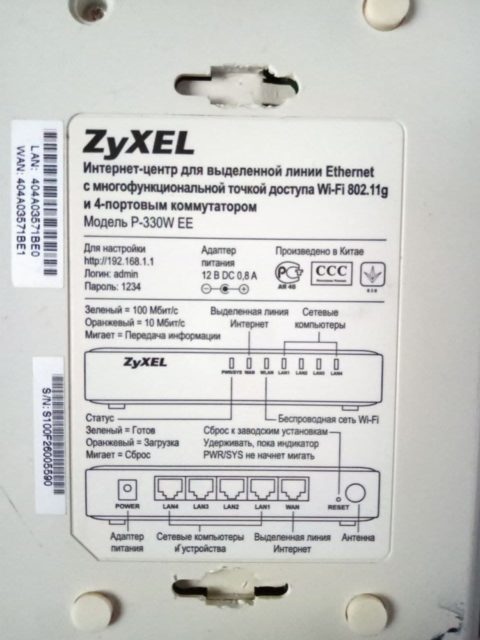
The address to enter the web-interface for the old version is 192.168.1.1, and for the new – 192.168.0.1. However, the device itself has a regular address, usually tplinkwifi.net. In general, you just need to turn the router over and read what is written on the back. There is a sticker with the necessary data.
Using standard browsers, you need to go to the specified address, for example:
After clicking on the link opens the way to a personal account, where the settings of the device are presented. Only a computer or laptop must access the Internet from this router.
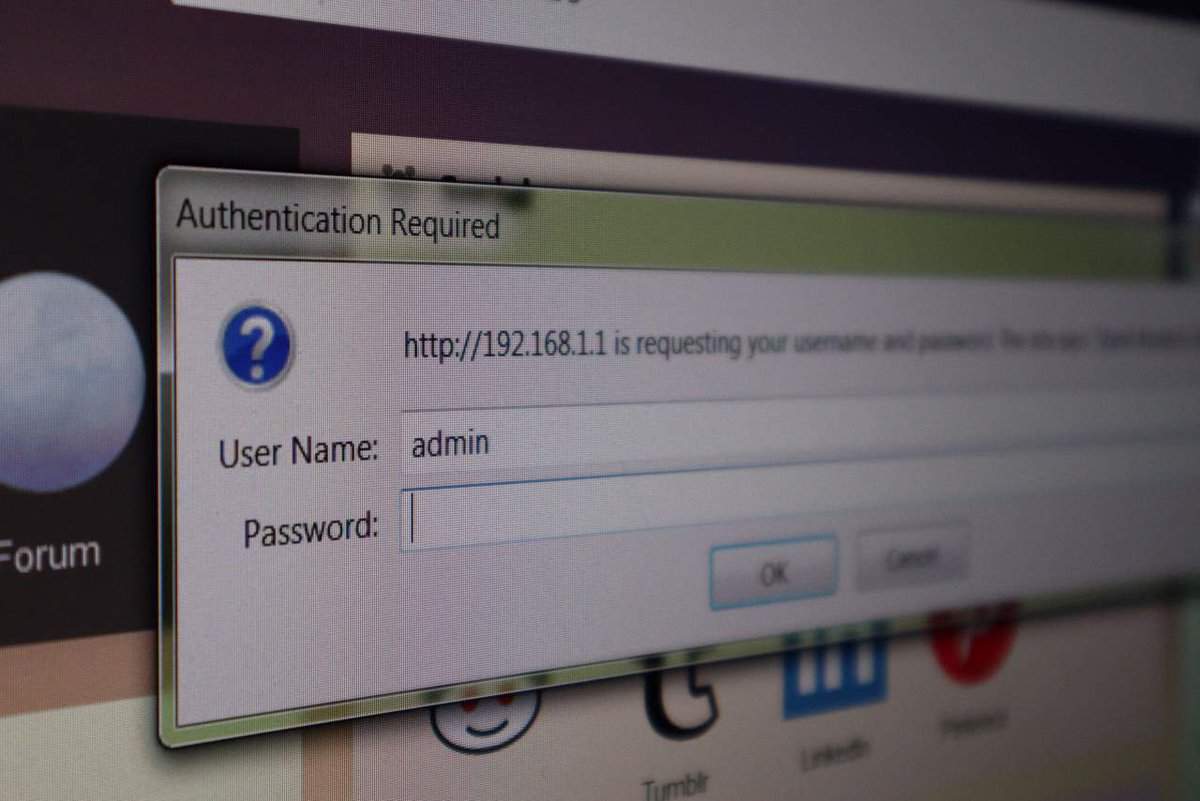
Immediately it will be required to enter a username and password, if nothing has changed since the purchase and installation of the router, then it will be a tie: admin/admin.which is created by the manufacturer.
When the authorization is successfully passed, you can enter the settings. TP-Link, as a rule, today's model, so the interface looks new.
Connection technique
Almost all devices have a similar appearance:
- There are cable input ports on the back of the case and lighting elements on the front of it.
- There are also Ethernet or RJ-45 and power connectors.
- The WAN or Internet network port is for the cord from the ISP.
- The local LAN ports are used for wired connection of various devices in the apartment (TVs, computers).
- The "Reset" button, located on the back of the device, resets all passwords to the factory settings. To prevent its accidental pressing, it is intentionally placed deep. You can use it only with a thin paper clip, after unbending it.
- On the front side of the case there are special indicators. With their help, you can learn about the state of the device. Manufacturers determine the order of their installation at their discretion, depending on the model.
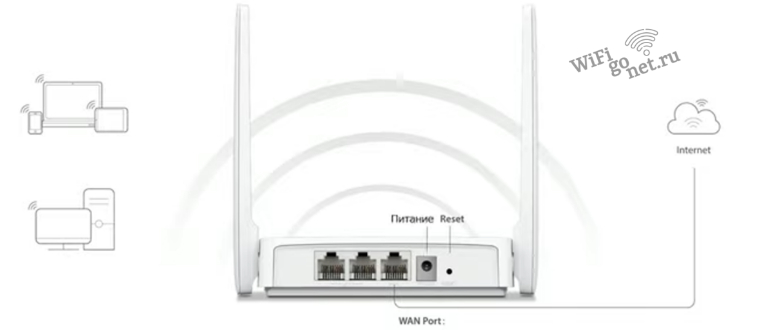
If the router distributes the Internet only to wireless equipment, you should connect only two wires – WAN and power. Then you have to turn the device on and wait for some time. Soon a special LED will light up to indicate the status of the Wi-Fi network.
By cable
There are two ways to enter the router settings – using a cable or a wireless network.
The direct connection via wire is more reliable.
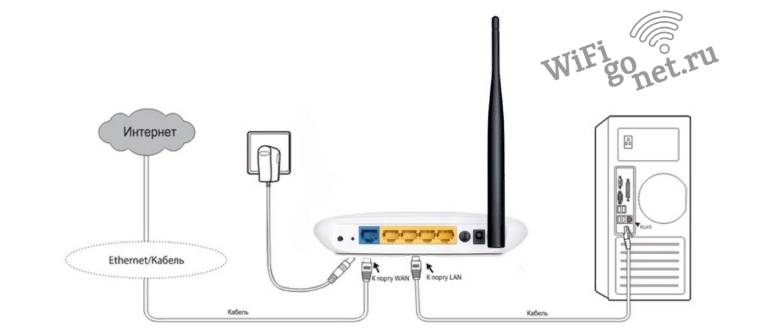
- Take the cable designed for Internet connection out of the packing box. It is sold in the kit with the device.
- Plug the device into an electrical outlet.
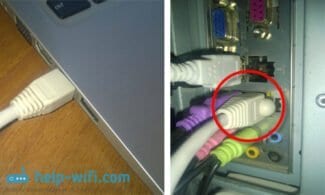
- Find the yellow connector on the back of the LAN housing and insert the wire end into it. It should click into place.
- The other end of the cord should be plugged into a laptop or PC network card slot.
- The LAN connection LED on the machine will light up. The network map on the PC or laptop will start flashing.
- If a warning sign and "No Internet access" appears on the PC, do not be alarmed. It means that the computer has not yet been set up.
- In the final step, you need to open the router settings.
Login to settings panel
In order to implement the login to the router from a laptop or PC connected to the local network in advance, you need to take the following steps:
- Run a normal web browser and enter the address of the router in it. It is printed on the shortcut.
- When successfully connected to the network, a specific authorization form will be displayed.
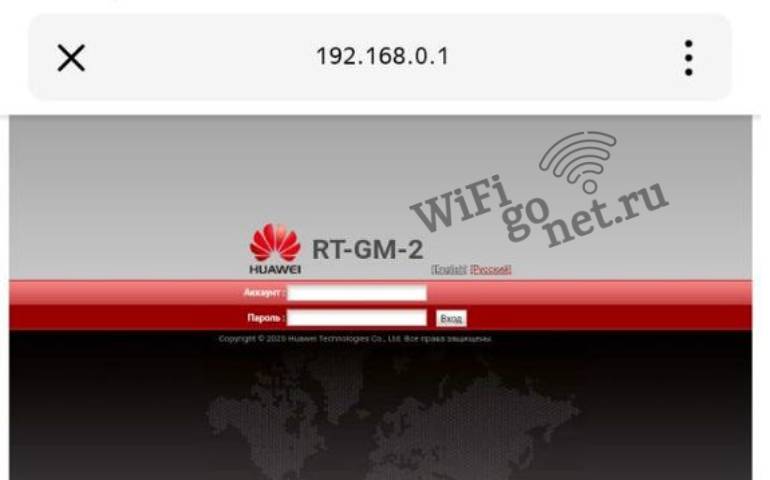
- When transferring to the Internet, you have to enter the address with the http protocol in the line.
- To open the control panel of the device you can also use the IP address from numbers. It must be entered in the defined command line of the web browser.
- Check the "Enter" box.
- You will see a form for authorization.
- Write the password and login (in some devices only the password is needed).
- Opens the router settings window.
When the password to enter the control menu does not work, it means that it was previously changed. The problem is solved by resetting all data by pressing the "Reset" button.
Login to router settings via tablet or phone
This option is not difficult and can be done very quickly. The control menu is organized for the small screens of the gadgets and is comfortable to use.
Logging into the control panel of the device is done in this way:
There is another great method of logging into the router from your phone and then changing its settings. This includes a mobile app from manufacturers. Every major company that makes network devices has developed a specific program designed to manage the router.
Factory mobile apps are produced for MESH Wi-Fi systems. Their basic interface is designed with new users in mind. It is kept as simple as possible so that they can easily understand it.
What to do first
So, first of all, you need to reset all the router settings that were on it before. To do this, the router has a special button called "Reset". To press it, you need a thin object: a toothpick, a pen stick, a needle, a paper clip, a pin, etc. Press the button and hold it for 10-15 seconds. After that, the router will reboot completely and will be ready for reconfiguration.
This action and the following is performed on almost all models of devices. After that it will be better to know or remember the following things:
- Password and login. They are either standard (admin|password), or the password is changed to the serial number. If the unit was installed by couriers from the provider, they most often put just the serial number as the password for Wi-Fi and reconfiguration access.
- Connection type:
- Dynamic IP address;
- Static;
- L2TP;
Device configuration
To reconfigure devices of different models you often need to do almost the same things. Let's start with them:
- Open any browser on the computer to which our device is connected.
- Using the address bar enter: 192.168.0.1, 192.168.1.1. Most often these are the exact addresses, if you have a different numeric code in a similar format on the back of the router or in the instructions, and these do not fit, then try entering it.
- Then a window opens with the fields "Login" and "Password", which must be filled in with the appropriate values. If we use certain types of connections, such as dynamic IP, then these data may not be required and the authorization will happen automatically.

Then the algorithm varies a little bit for different models.
TP-Link
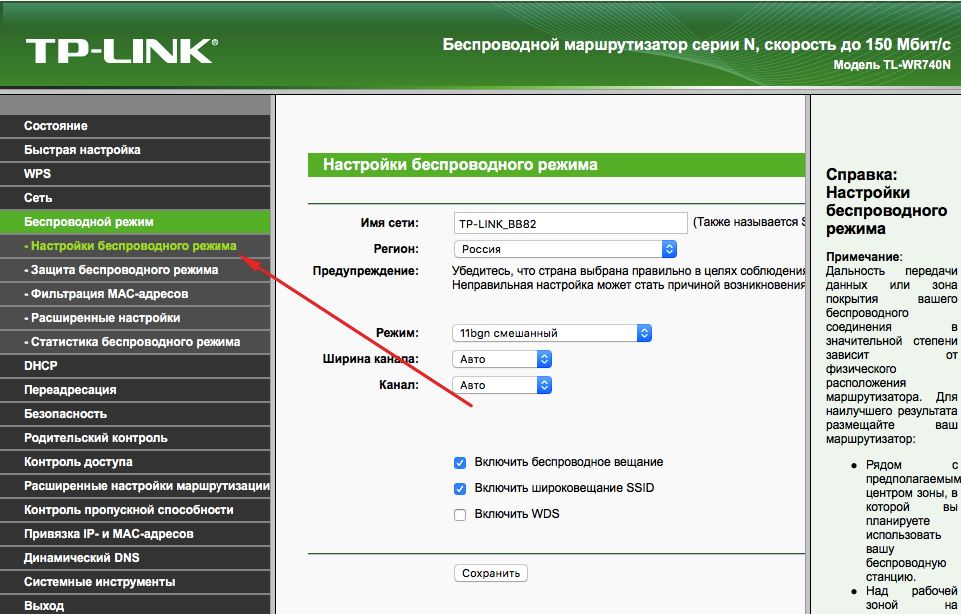
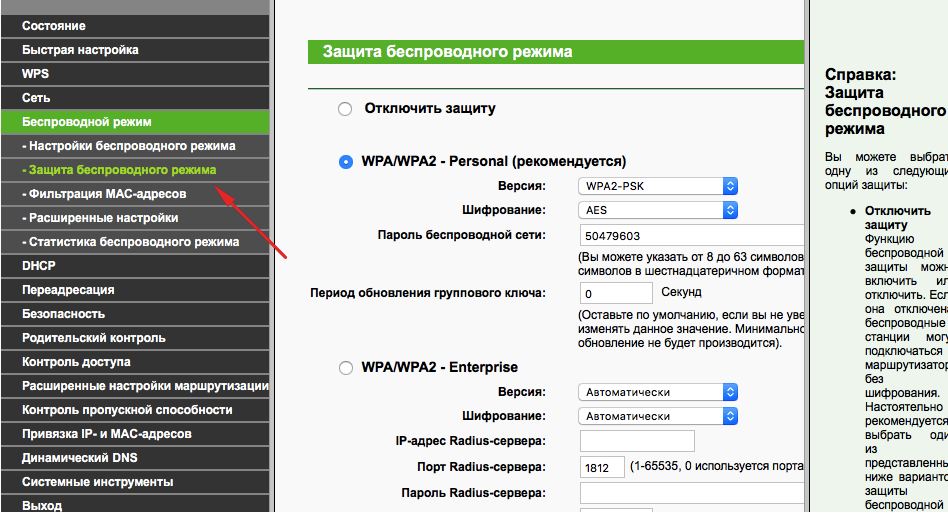
- Then everything is quite simple. We specify the name in the corresponding column, or rather invent it and then open the "Wireless Protection" tab.
- Set WPA/WPA2 as the encryption type, and think of a good password. These two actions will ensure the protection of our data.

By the way
You can update the router firmware using the official TP-Link website. To do this, simply find your model there and download a firmware update for it. Then connect the device to your PC via Ethernet cable. And then in the "System Tools" tab, select the item that deals with updating the firmware.
If the router panel is not available
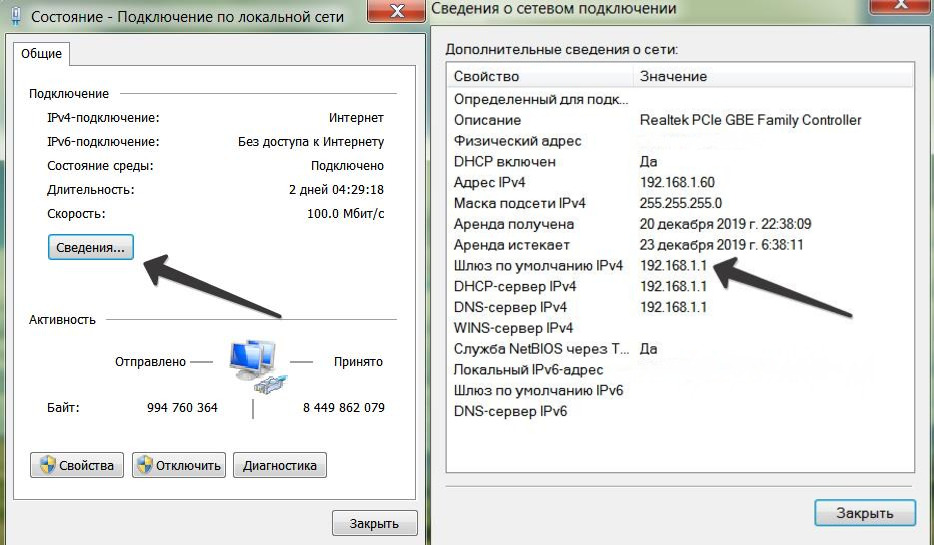
What to do if the sticker on the back panel shows the standard network address, but the user can't get into the administrator panel and even factory resetting doesn't help? To do this you need to find out the IP address of the router with the help of a computer.

Connect the router and the computer with Ethernet twisted-pair cable – one end should be plugged into the LAN slot on the back of the router, and the other end into the LAN port of the network card. Then right-click the network icon next to the clock and select "Network and Sharing Center".
- Click on the link with the name of the network connection.
- Select "Change adapter settings".
- Select "Properties".
- Select "Internet Protocol Version 4 (TCP/IPv4)" and click on "Properties".
- Check if "Automatically obtain IP and DNS" is checked. If not – check it.
- Return to the link with the name of the network connection.
- Select "Details" and find the value "Gateway" – this is the IP address of the router.
How to Change a Router Password
It is recommended to change the default password to a more advanced user password when you first log in to the control panel. Changing a router password is a simple procedure, but it may vary depending on the router manufacturer.
The general algorithm is as follows. It is necessary to turn on the router and the computer, go to the administration panel in the browser and enter the factory username and password. Next, find the section with the administrator's data in the settings, think up a new password and enter it. In the end, you must save the change of settings.
An important nuance – it is desirable not to forget the new password. To do this it is best to print its value on paper, cut it out and stick it on the bottom of the device. For convenience, you can also save it in a text document somewhere on your computer. However, it is advisable not to save the password in a browser – this reduces the security of the device.
Read More:


