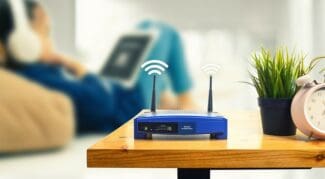
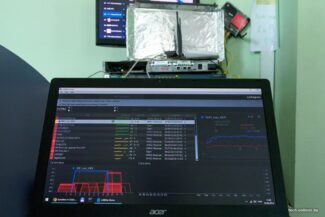
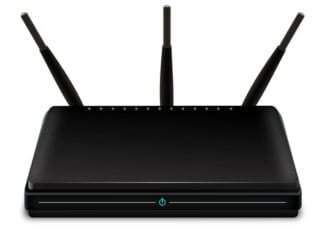
But usually this placement can not provide a confident signal and maximum radius. Therefore, it is necessary to find the optimal zone for installation. We will tell you how to properly place the router in the apartment.
- Internet for the cottager. Getting the maximum speed in 4G networks. Part 2. Choosing an external antenna
- Testing methodology
- +
- How a Wi-Fi signal works
- Recommended locations for placement
- Where not to place
- Antenna rotation.
- Replacing the antenna
- The most inappropriate areas
- Is it worth installing in the switchboard or amplify the signal?
- How to improve WiFi coverage
- Development of antenna-nozzle for the router (WiFi Ladder)
- Choose the best frequency channel
- Turn off the "leeches"
Internet for the cottager. Getting the maximum speed in 4G networks. Part 2. Choosing an external antenna
Recently I have done a comparative testing of LTE routers and quite expectedly it turned out that the performance and sensitivity of their radio modules are significantly different. When I connected an antenna to the routers, the speed increase increased manifold. This led me to the idea of doing a comparative testing of the antennas, which would not only provide connection in a private house, but also make it no worse than in the city apartment, with a connection via cable. Well, what ended this test can be found below. Traditionally, for those who want to watch, not read, made a video.
Testing methodology
Without a normal structured approach is impossible to get quality results, and the purpose of this test, I put the choice of the best antenna for maximum speed Internet access. As a benchmark I chose Zyxel LTE3316-M604 router, which justifiably took the first place in the previous test. This device can work both with a regular wired ISP, activating the standby 3G/4G channel in case of need, and work completely autonomously, using 3G and 4G cellular networks. In my test, only the 4G network is used, since only data is transmitted through it and the voice traffic load does not affect this link.
For the test I chose three different types of antennas: the first test, to get clean values, the router worked without external antennas, using only the built-in antennas. The second test involved an antenna with a circular radiation pattern. The third test involved a panel antenna with a narrower radiation pattern, which was used in the last test. The fourth test was a narrowly directional parabolic mesh antenna.
All speed measurements were performed on a weekday in the daytime, so that the load on the base station was minimal and the download speed was maximal. At each stage the test was performed three times and the average download and upload speed was calculated. The router was connected to the same base station, the alignment of the antennas was made according to the signal readings in the web-interface of the router.
Also I made a daily chart of the download and upload speeds in my area, which perfectly demonstrates the performance of users with the Internet. I suppose that the ISP will have about the same picture of the load on the BS. What is interesting, the download speed graph jumps significantly, but the return graph is almost unchanged – this suggests that users are downloading more than uploading data.
+
Signal amplification allows you to increase the speed by half, the directional diagram allows you to choose a less loaded BS, convenient mounting kit, for several years has not lost its qualities
At the size of 45×45 centimeters has a sail, which requires a quality base for mounting
TTX:
Frequency Range, MHz: 1700-2700
Gain: 25 dB at 1700-1880 MHz, 26 dB at 1900-2175 MHz, 27 dB at 2600-2700 MHz
Maximum input power: 100W
Size, cm: 90 x 81 x 36
Weight, grams: 3200
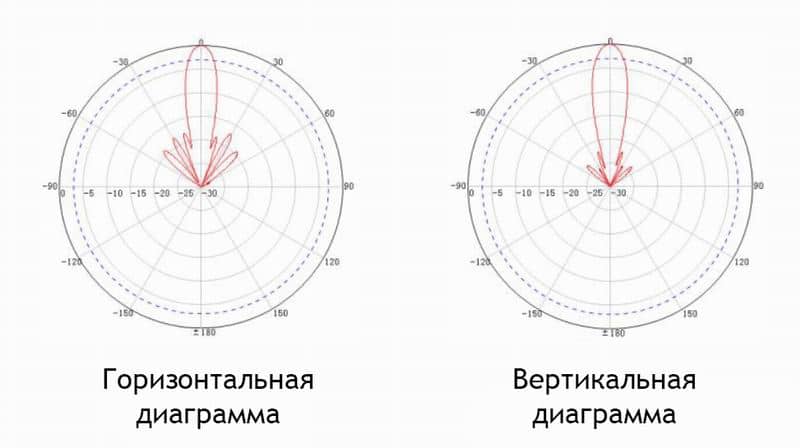
The parabolic mesh antenna is remarkable in itself – it has an impressive size of 90 x 81 centimeters. It is not round, as is common with satellite antennas, which even has a positive effect on the directional pattern. In addition, the mesh design very noticeably reduces the sail – the wind simply passes through it, and it has almost no effect on the signal focus. The antenna works in the frequency range from 1700 to 2700 MHz. There are three positions of the illuminator: one for each frequency. The manual clearly shows how to position the illuminator in relation to the antenna to get the maximum gain at the desired frequency, that is, first you need to know what frequencies your provider works. This is where the router's web interface comes in handy, which quite understandably demonstrates the operating frequency. With this antenna is somewhat more difficult to work, you need accurate alignment, since the angle of directivity is very small. The obvious advantage of such a solution is the possibility of precise direction to the desired BS, even if several stations are located almost straight ahead. There are also disadvantages: the tuning time at the BS increases noticeably, and it becomes more difficult to work with the reflected signal. But the most important thing is the gain. It varies from 25 to 27 dBi. In my case it allowed to increase signal from initial RSRP/SINR -106/10 to -90/19 dBi, and reception speed increased from 13 to 41 Mbps, and transmitting from 12 to 21 Mbps. That is, the reception speed has increased more than three times! Well, in remote areas, where there may be no cellular service at all, it is quite realistic to catch both 3G and 4G signal for a few tens of kilometers!
How a Wi-Fi signal works
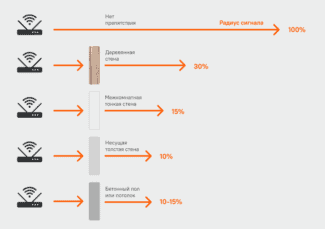
And to begin with the basics, namely, the principle of the signal, because without this theory it will not be possible to choose the best location for the selected router. Thanks to it will be able to take into account all the factors that are usually ignored. So, the signal is transmitted through the radio air, and consequently, its penetration will be interfered by walls, furniture and so on. If you make a gradation on the absorption, it turns out about the following:
The access point, or rather the distance to it, also plays an important role. If you are far away, obviously the signal will be worse.
Recommended locations for placement
Now what about where to place the router in the apartment. The first rule that should be observed when choosing a place – there should be a minimum number of obstacles to the signal transmission. If you take the "standard" layout, it is best to put the router in the hallway. It is not necessary to install it next to all used areas. The signal is distributed equally, and if you need to increase its strength, it is recommended to use special repeaters. This is where it is recommended to put the devices:

It is also worth considering the range of the signal. Yes, it can be increased, but it will be only after identifying all the "blind spots", which take time to detect. Router on the wall in this case will be the best option if located in the center of the apartment. However, when the placement on the wall is made in some corner of the apartment, the distance from the access point increases. This negatively affects the signal transmission.
Where not to place
So, we have understood, where you can put the router. However, we should also consider where and where it is better not to install the router. If we limit ourselves to a brief list, it is approximately as follows:
- isolated spaces: cabinets, furniture, niches – all this "muffles" the signal, and therefore you can not place the router in them;
- on the floor: there are still many objects that will interfere with the normal signal path, and this location can be chosen only in an empty apartment;
- next to the TV: do not hang the router there, because it will create interference, as well as keep a distance of about one meter from such devices;
- metal constructions and any iron, which is characteristic for use in a private house: here there will be the maximum level of absorption, which will make it much more difficult to use the Internet;
- install near warm objects, which are heating: not only will the service life of the device be reduced due to constant heating, but the signal will become worse.
Antenna rotation.
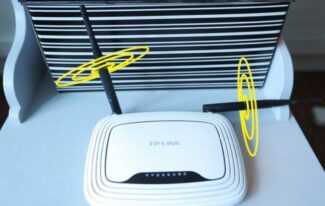
The coverage area is shaped like a torus – a bagel, not a sphere. Waves do not propagate in all directions, but on the principle of concentric circles on the water. To change the plane of wave propagation, the antenna rotation function is provided. It is best if it is in a vertical horizontal plane, and the device stands in such a part of the apartment that this signal is received by all consumers.
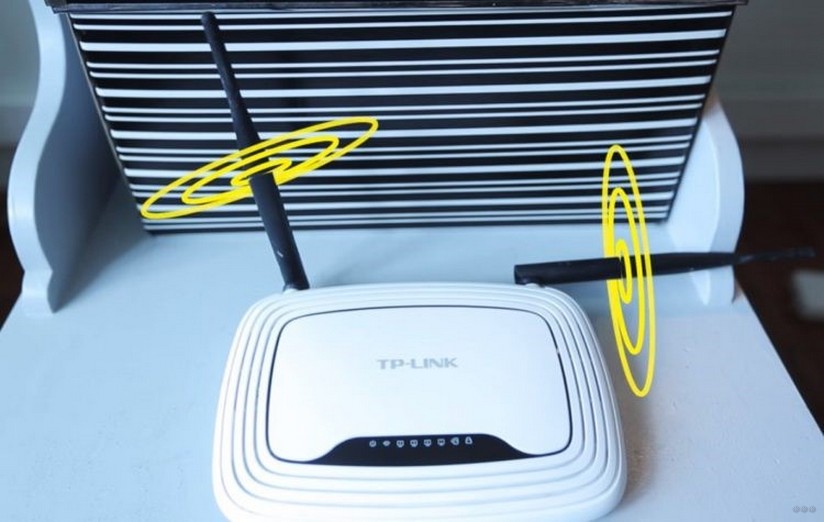
With the antenna pointing upwards, the toroidal field spreads horizontally throughout the apartment. The neighbors above and below will get little. Below them, dead spots are likely to form – areas with negligible signal strength.
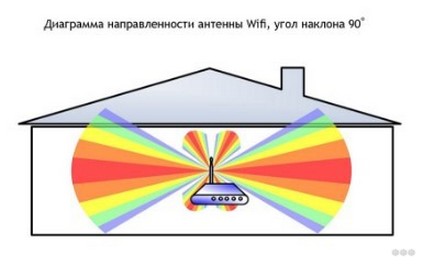
Placing your router at a height where most customers are, and pointing the antenna upward is the best way to improve internet speeds.
Replacing the antenna
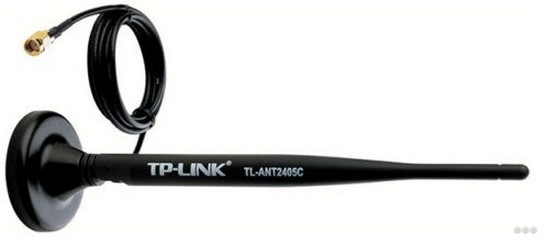
Almost all household routers come with built-in antennas, but there is a solution for them as well – a directional antenna with an SMA connector. It amplifies the signal by changing its radiation pattern – the beams propagate further, but the torus (bagel) becomes flatter. Remote devices will be detected, but there will be dead zones above and below the router.
The most inappropriate areas
It is not recommended to put the device in the following places:
- In an area with partially limited or isolated space – in closets, niches, behind furniture, on cabinet shelves.
- At the lowest point – on the floor, under the table, etc.
- Near appliances and appliances – near a TV, computer, microwave, TV set-top box. They work on the same frequency as Wi-Fi equipment, thus creating interference. It is necessary to maintain a distance of one meter or more.
- On metal structures – iron belongs to the materials with high absorption coefficient. In this case the signal will be reflected and blocked.
- Near the heating system and radiators – the quality of communication is reduced. Constant overheating of the device contributes to the reduction of its service life.
- Do not place the router in the apartment next to the mirror, as it reflects the signal.
- Behind containers with water – the liquid refers to the materials that reduce the quality of communication.
Is it worth installing in the switchboard or amplify the signal?
There is a lot of advice and information about installing a router in a low-current panel. There is no consensus – some support this idea, others are strongly against it. In such a situation the following can be said.
If you intend to place the device in a panel, it should be non-metallic or be built into a foam block wall. Otherwise, the signal will be weaker. If you objectively assess the situation, it is better to install the router outside. Even if externally the device will look pretentious against the background of fancy repairs.
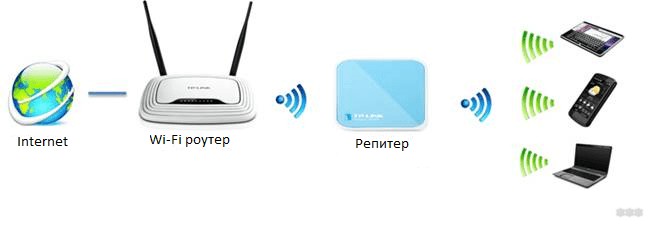
If necessary, you can cover a larger area with a signal. In such cases, it is not necessary to get hold of a second router. Special devices are designed for this purpose – repeaters. They perform the function of receiving and amplifying the signal. It is connected to a socket within range of the router.
How to improve WiFi coverage
The first thing that comes to mind is to replace the router with another. Buy a device with a stronger external antenna or with multiple antennas. If you have an older router model, it's worth a try. Be prepared that it will require additional costs, and a positive result is not guaranteed at all. Most likely, the picture will improve, but the problem will not be eliminated (Fig. 4-5).

Figure 4. Router with two external antennas.

Figure 5. Router with three external antennas.
The next method is to use an active WiFi repeater, also called a WiFi repeater. This device is designed to extend the range of your WiFi network. This is a great method that can often solve the problem at the root. But it also has a disadvantage:
– prices from 1.5 thousand rubles and higher;
– the need for configuration;
– limited zone of use.
And that's not all: the repeater will again receive the signal from all sides and radiate around. That is, if we have an "uncovered" corner of the apartment far away, you will need two or even three repeaters. It would be great to concentrate the signal in a given direction, but you can not – built-in antennas repeaters have a circular pattern. We have not met any repeaters with a jack for an external antenna.
Another feature of WiFi repeaters is worth mentioning – the presence of 220V AC power. Not all people are willing to leave any device plugged in when leaving home. And turning it on and off every time is an occupation for the amateur. In addition, for a house or cottage solution is complicated by the fact that between the house and, say, a barbecue area, most often there is no mains power, and repeaters are often not designed for outdoor use.

Development of antenna-nozzle for the router (WiFi Ladder)
So, we have a router with an external antenna (important: routers with built-in antenna we do not consider). The question arises: how to use this own antenna as an active element (vibrator) of the antenna system? Our goal is to give directional properties to the external antenna of the router, which will increase the range of transmission and reception of WiFi signals in a given direction. The first thing that comes to mind is an antenna of the "wave channel" type, also known as "UDA-YAGI" (after its inventors from Japan). It is a simple and at the same time effective antenna design, which has proven itself all over the world.
So the idea appeared and it was necessary to put it into design. The developers faced the task of calculating a multi-element wave channel for the range of 2.4-2.5 GHz, in which it would be possible to "embed" the regular antenna of the router. During the simulation it was decided that the best option would be a 7-element "wave channel". At quite compact dimensions of the design we got an antenna system, the gain of which allows us to solve the assigned problems. The sizes of the directors and distances between them have been optimized in the physical model, we consider them the best for the solution of the task (Fig. 12).

Figure 12. "Stuffing" of the BAS-2002 WiFi Ladder antenna
The next stage was the development of the antenna mount design. After monitoring the router market, we decided to place the "wave channel" on the external antenna of the router, using it as a carrier element (Fig. 13). We came across the fact that routers have different diameter antennas, and sometimes their shape is far from cylindrical or cone-shaped. For example, a "flattened" external antenna is quite popular. For this reason, the designers developed a universal clip that allows you to attach the product to almost any external antenna of the router. In some cases it will not be the most rigid mount, but we want to note that the antenna is usually installed indoors and only once, so outside physical effects on it will be minimal.
Choose the best frequency channel
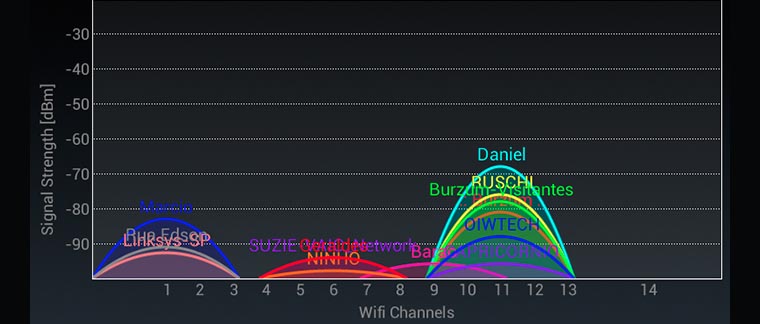
If you open a list of all the Wi-Fi access points in your apartment building, you'd be surprised at how many there are. In fact, every other apartment now has a router, and they all interfere with each other and clog up the frequency channels. For example, in my house, my Macbook sees 18(!) different networks at once.
Try to find out exactly where your neighbor's router is, and if possible, move yours farther away.
But the best thing you can do is switch to a different Wi-Fi channel. You can find the right setting on your router's settings page.
In order to choose the right channel, download special apps that will show you the most "unclogged" Wi-Fi channel. Unfortunately, Apple has cleared the App Store of such programs. But do not get upset, there are analogs for Mac, such as Wifiscanner. The program will show the networks in the area and the frequency channels they occupy.
Turn off the "leeches"
You can also use special applications (such as Fing) to check your Wi-Fi network for "illegally" connected devices. There is always the possibility of encountering a sneaky neighbor, who as a leech was able to connect to your network and sits downloading from a torrent everything in a row.
You can make a list of allowed MAC addresses of devices in the router settings.
All these simple but effective actions will help improve your home Internet speed and save your nerve cells. Share in the comments which method helped you personally and whether you found a freeloading joined neighbor.

Bookmark it
7 simple steps to improve the Internet at home. Nothing is as annoying as a slow home Wi-Fi network. You can't download movies, you can't watch YouTube videos, you can't play online games. But what if we told you that there are several ways to improve signal quality and Internet connection speed at once? All it takes is a few minutes to implement them.
Read More:
