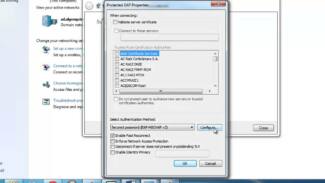
Almost all modern routers manufactured by Microtic can be accessed at: http://192.168.88.1/.

- Router management
- If we do not consider "exotic" methods (for example, via telnetterminal), there are only two basic methods of setting up:
- Connecting your router to your computer
- Front panel of the router
- Adjustment by specialized software
- To access the TP-Link router settings via the internet (by IP or DDNS)
- Remote Management via Cloud Service (TP-Link ID) and the Tether app
- To access your work computer from home:
- VPN (OpenVPN / PPTP VPN)
- Keeping your device secure
- Connecting the router: finishing touches
Router management
Managing a router involves setting up the device. Router is quite a complex network equipment with a huge amount of functionality, and depending on the operating conditions requires a particular management.
Setting up the router requires some knowledge, moreover, before you start to carry out the configuration, it is necessary to connect it to the computer, and go into those very settings.
If we do not consider "exotic" methods (for example, via telnetterminal), there are only two basic methods of setting up:
The first method is more convenient for inexperienced users, because it is designed for almost automatic setup with minimal human involvement, while the second method provides more fine-tuning.
Let's start with the connection to your computer.
Connecting your router to your computer
Any router has a LAN interface (port) for a wired connection to your computer. Also any computer has an Ethernet port for the same purpose. Take a patch cord, which usually comes with the router, and connect the router to the computer through these ports.
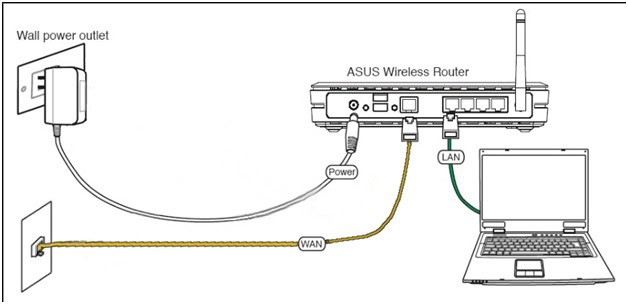
You can also connect via Wi-Fi wireless network, but not all routers and computers have Wi-Fi modules; moreover, wireless network is less reliable and it can fail at the most inappropriate moment.
Front panel of the router
After turning on the router, you should pay attention to its indicator lights, usually located on the front panel. First, to make sure that the router works (in case the power supply burns out), and second, to make sure that the firmware has been fully loaded into its RAM and the router is ready to work.
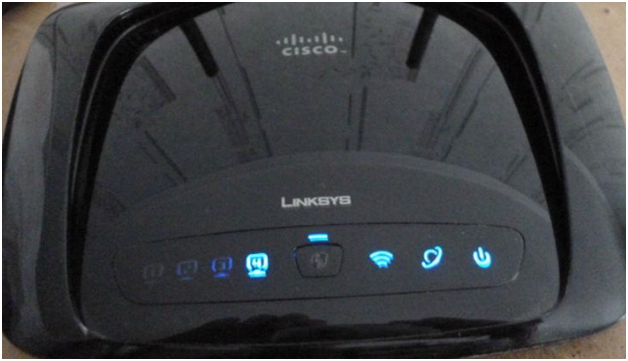
The next steps depend on how you intend to configure the router – with the help of the TOP-assistant, or by yourself through the web interface.
First, let's consider the first option.
Adjustment by specialized software
The software-helper is available on the CD that comes together with the router. Also if you have access to the internet you can download it from the vendor's official site.
It should be noted right away that not all manufacturers develop such programs!
After installing the program, start it using the shortcut on the desktop. Usually the first screen that appears is a welcome screen with the manufacturer's logo in which you need to start configuring the router.
To access the TP-Link router settings via the internet (by IP or DDNS)
To understand how it all works and quickly configure everything, you first need to figure out what IP address your Internet service provider gives your router. White, or gray. Static or dynamic. And if the problem with dynamic IP-address is solved by configuring DDNS, then When your ISP gives you a gray WAN IP address there is no way to configure remote access.
In the article DDNS (Dynamic DNS) on the router: what it is, how it works, and how to use it, I told you more about it and showed in detail how to find out whether your Internet service provider gives you a white or gray IP address. If you do not know which address your ISP is giving you, then follow the link above and determine it.
Then act according to the results:
- If you have a gray external IP address (the WAN IP address that the router is not the same as the one displayed on 2ip.ru) , then the solution is only one – Order the service "static IP-address" from your provider. If such a service is available. Usually, this service is paid.
- If you have a white external IP address and it is dynamic, then everything will work according to the instructions below. But the settings will not be available when the ISP gives another IP address, because it is dynamic. Solution:Perform a DDNS setting on the TP-Link router, or order "Static IP Address" service from your ISP.
- If the external IP address is static (and therefore white) . In that case, everything is fine. Follow the instructions below.
Open the TP-Link router settings and go to "Security. – "Remote Management" .. We need to allow remote access to the router.
Port does not change, and in the field "IP-address of remote control" you must enter the external IP-address of the device for which you will allow remote access to the router settings. Or allow access for all devices.
Remote Management via Cloud Service (TP-Link ID) and the Tether app
First, you need to open the settings of the router and go to "Basic Settings". – "TP-Link Cloud".. There you should go to tplinkcloud.com (click on "Register Now") and register your account. Be sure to keep the email and password you specified when registering.
In the same "TP-Link Cloud" section, in the router's settings, you need to log in to your TP-LINK Cloud account. So that the router will be linked to your account.
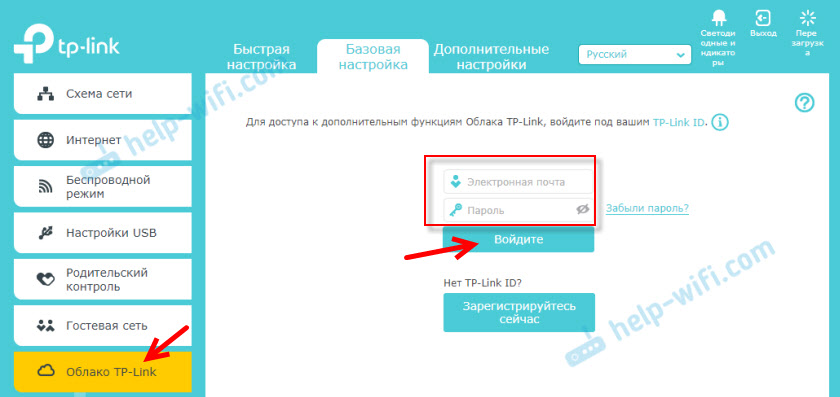
This is what the settings look like after logging into your account and tying the router.

You can unlink your account from your router. Or link another account, or multiple accounts (to share remote access to the router) .
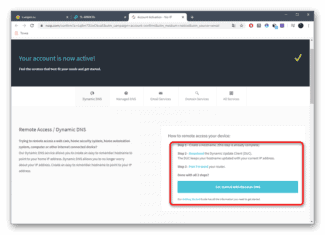
Then you need to go to "Advanced Setup" – "Network" – "Dynamic DNS" and register a permanent address for the router in the TP-Link DNS service.

Important! Do not forget to enable remote access in the "Administration" section. At the beginning of the article, I described it in more detail.
You can use the address registered above to access the router from any device over the Internet.

Enter the e-mail address and password you specified when you registered your account on the TP-LINK Cloud website and you will have full access to the router's web interface.
To access your work computer from home:
Connect to your work computer from your home computer. To do this, press the Win +R key combination, and in the program's "Run" menu that opens, type mstsc and press Enter. You will see the following window.

VPN (OpenVPN / PPTP VPN)
With a VPN connection, the office network will work as a server and your home computer can access it via a router, which will act as a gateway to the VPN server. This method is more secure because the VPN provides encryption of data and control channels.
Before you enable the VPN server, it is recommended to set up a dynamic DNS service, such as TP-Link DDNS. Do not forget to synchronize the system time of the router with the Internet.
Popular ways to set up VPN connections are OpenVPN and PPTP VPN. You can choose either method according to your tasks. If you are using an OpenVPN server, you will need to install the OpenVPN client utility on every home computer you plan to use to access your work computer.
Keeping your device secure
Remote access should be disabled by default, although some ISPs enable it, and this opens up the possibility of tracking sensitive local data.
It is important to change the default password so that outsiders do not have access to the data.
Since family members are unlikely to hack into the router, the password should not be too complicated and easily forgotten. After all, then you will have to reset the settings and then reconfigure the router.
Connecting the router: finishing touches
When the parameters are prescribed, the device should work. If not, then the main points are checked, perhaps the settings are originally incorrect. For example:
- The cable is not connected;
- router is not plugged in;
- the computer is not connected to the router;
- wrong interface address;
- Incorrect login/password mapping;
- Incorrect data for connecting to the Internet.
- If there is no Internet, you should contact your provider.
Friends, thank you for visiting wifi-start.com! If you liked the article – give us a plus sign, if you have any questions – ask them in comments!

I hope my material helped you and was useful! Please, if you have any questions – write.
Read More:
