Linksys
- Router configuration with the help of programs
- Installing the program
- ISP program
- Installing the ISP Region
- Connecting the wires
- Top 10 router management applications
- TP-Link Tether
- Asus
- Netgear
- YouTube video: 10 best apps to manage your router.
- Fing
- IP Tools
- Network Scanner
- Configuration Wizard
- Step 3: Wi-Fi
- Step 4: Connecting to the Internet
- Automatically setting up an Internet connection on a TP-LINK router
- TP-LINK: Quick Setup of the Wi-Fi Network via the program from the disk
- Step 6: Guest Network
- Step 7: Using the "Share Wi-Fi" feature
- TP-LINK Tether: How do I download and connect to my router?
- How do I use TP-LINK Tether, and manage my router?
Router configuration with the help of programs
In this article we will consider how to configure routers using a specialized software, rather than through a web interface. Typically, the router configuration software is written by the manufacturer of the device and can be installed either from the CD included in the package or downloaded from the manufacturer's official website.
There are also software assistants for a specific provider, if the latter cooperates with the router manufacturer.
These programs are aimed at facilitating the connection settings for inexperienced users, and the user is only required to select a provider from the list and enter the username and password, but about everything in order.
First of all we're going to study the automatic configuration program from the manufacturer ZyXEL. It's called Netfriend.
Before you start configuring the router, if it has been configured before, do a complete reset. To do this, press the "Reset" button on the back of the device and hold it for 10 seconds.
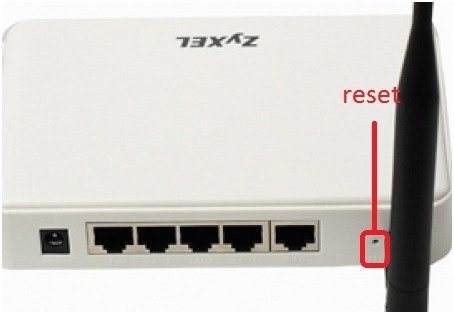
Then we take the enclosed disc and install the program on the computer from which we will further configure the router.
Installing the program
Insert the CD in the CD drive of the computer, the main window of the program will open. If autorun of disks is switched off on your computer, start the disk via "my computer".
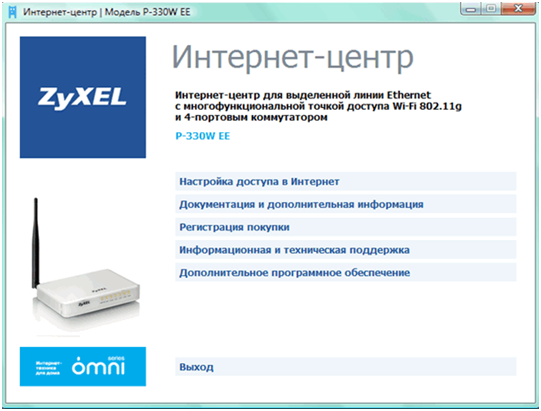
Attention! On the first steps of setting the network wire from the provider (WAN port) is not to be docked!
Select the first item on the list – setting up the Internet access. This will start the installation of the Netfriend program.

ISP program
Now let's have a look at the ISP's, not the router manufacturer's, helper program. As an example, let's take the provider Rostelecom, the helper program is written for the Sagemcom F@st 2804 router.
As in the first case, we insert the included CD into the drive of the computer and install the program. You will see a shortcut on your desktop and start the program.
Installing the ISP Region
On the first step of the quick setup we will be asked to select the mode of the wizard.

Since we are configuring for the first time – we choose the full setting. Click Next. Next, we will show the program where we intend to access the Internet.

For convenience, we see a map of Russia – just click on the region where we are now, and the wizard itself will recognize the region. We press "Next", where we will be asked to specify the branch of the provider (if there are more than one in the region).

Connecting the wires
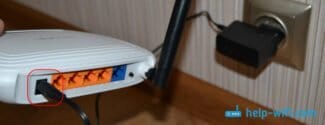
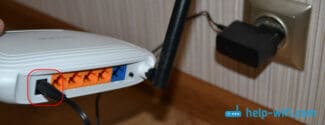
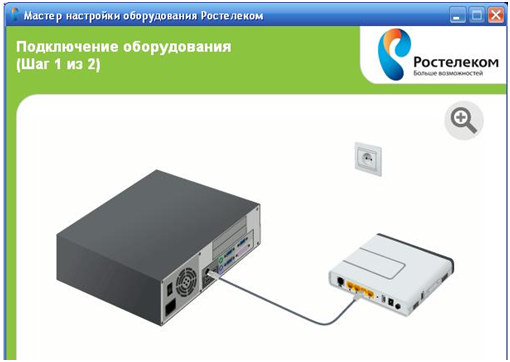
Next we begin the connections. We take the ISP wire, and connect it to the router's WAN port. In the setup wizard we specify our choice.

Of course, if we connect via Ethernet, we specify it. But in most cases it is ADSL.
The wizard will tell us with a picture what and where to connect.
Top 10 router management applications

TP-Link Tether

TP-Link Tether
TP-Link is a very well-known router manufacturer. This app is designed to support TP-Link routers. The application is used to manage the user's WiFi networks. The application provides the ability to configure SSID, passwords and Internet or VDSL/ADSL settings applicable to your devices. The user has the ability to block user access to networks and manage the permissions of client devices. Parental control is also available from within the application. The user can manage multiple TP-Link devices using this app only.
Asus

ASUS Router
At the moment we know that Asus is a well-known brand that produces electronic goods, which include routers. The application gives the user the ability to manage his network at any time and from any place, no matter where he is. It also gives users the ability to monitor and control the router using the AiMesh 2.0 network topology. The app also provides the ability to set parental controls, schedule reboots, and remove USB devices.
Read – 10 best WiFi hacking apps everyone can use
Netgear

YouTube video: 10 best apps to manage your router.
Fing

Fing
The Fing networking app is a very well-known app for managing a user's networks. The app allows the user to understand which devices are connected to the network, run speed tests and understand the analysis and associated latency. The application also features advanced analysis of NetBIOS, UPnP, SNMP, and Bonjour devices by name, property, and device type. Advanced application features include the ability to block unknown devices and intruders from accessing the network automatically before they are on the network, the ability to analyze bandwidth by device usage, find the best places to access Wifi, and much more.
IP Tools

IP Tools
This is a very powerful network utility tool to add to your arsenal. The application is designed to detect network problems, locate IP, external IP/host, MAC, DNS, and a host of other network details. The app can also monitor ping speeds and scan ports to find open ones. Perhaps one of the best features of this app is the IP calculator, which takes an IP address and calculates broadcast, network, and host range.
Network Scanner

Configuration Wizard
This section is for those who connect to the Internet via VPN (L2TP). Web authorization is available in your city. Make sure that your city name is indicated in the upper left corner of the page and use the instructions from the web-authorization section.
The Configuration Wizard creates a L2TP VPN connection, configures routers and diagnoses the connection – you only need to download it from our site and choose what it should do.
Note: The program works on Windows 2000, Windows XP, Windows Vista, Windows 7, Windows 8 and Windows 10 operating systems.
Once the installation is complete, a shortcut for the VPN connection will appear on your desktop. Run the program (the shortcut will be created automatically on the desktop). The main menu of the program will open if you want to configure a VPN connection, or a router and click "Configure connection".

Select the type of connection you want to configure – Wi-Fi router (if you are connected to it) or VPN connection, and then follow the program prompts.

The Setup Wizard is used to configure the VPN connection, wi-fi router and diagnose network problems on your computer.
Click the "I don't know what to configure" button and the program will automatically detect the type of connection and suggest the appropriate setting.
The Setup Wizard can configure: D-Link DIR300/NRU, D-Link DIR300A/C1, Beeline SmartBox, Beeline D150L, Beeline Wi-Fi router and TRENDnet 432BRP D2.0. In the future, this list will be updated with new models.
Run the Setup Wizard program. The main menu of the program will open, press the "Fix Internet" button.


Press in turn the following buttons: "Clear DNS-cache", "Clear hosts file", "Reset Winsock", "Reset routes", "Reset TCP/IP parameters", a tick will appear against these items. Close the program. Restart your computer.
Step 3: Wi-Fi
First, set up the wireless network, as this is how you connect to your phone and other mobile devices.
- After selecting a local device as shown in the previous step, a new login form will appear. It is not necessary to enter the previously created authorization data, but a username and password to access the router settings. Most often you will need to enter admin in both fields, but these values may vary depending on the device model. To find it, look at the back label on the router itself.
- You will immediately find yourself in the router's main management menu, where you click on the current wireless network.
- If the equipment operates on two frequencies, specify exactly which one you want to configure for use.

- Set a new wireless network name and set a password. You can also use this menu to disable Wi-Fi altogether, if necessary. Remember to save your changes when you are finished.
Step 4: Connecting to the Internet
The most important step of this material is to configure the connection to the Internet, because this is what determines whether or not the signal from the provider will come through. Most applications only allow you to set the basic parameters, and the whole process looks like this:
- Performing this step directly depends on the model of equipment used. First you need to open the panel with all the sections. Sometimes it is located immediately on the left, and in other cases you will have to go to "Tools"..
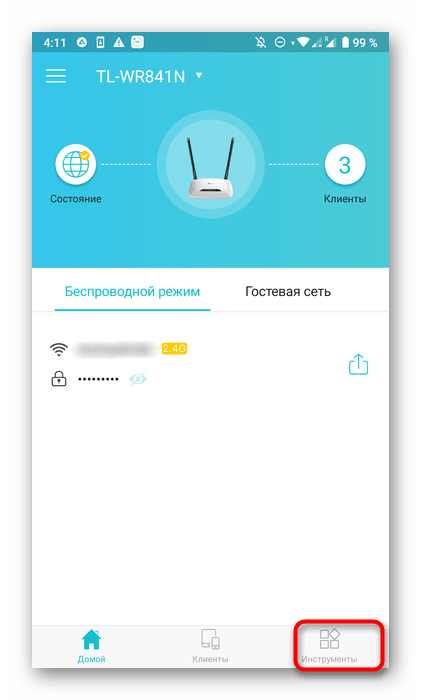
- Select the option "Internet Connection or "LAN"..
- The following steps are also related to different router manufacturers. Some of them, like TP-Link, only allow you to view the default settings, and you have to go to the web interface via a browser to configure them. In other cases, you can change all the items yourself. To do this, you need to know what type of connection your provider provides. Look for this information in your contract or contact technical support directly.
Automatically setting up an Internet connection on a TP-LINK router
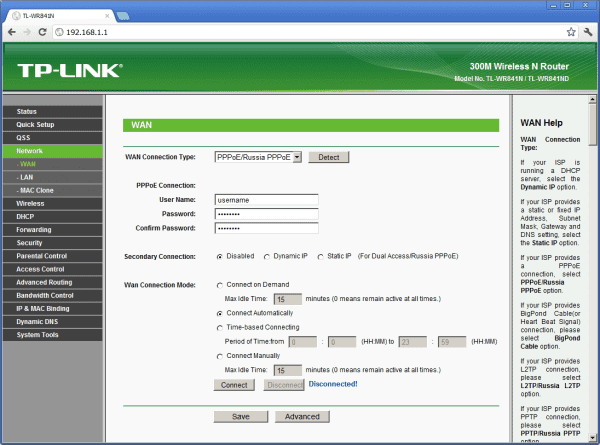
Now we need to set the most important settings. Configure our router to work with the internet provider. Nothing complicated. Just select your country, region, ISP, and connection type from the list. You do it like this:

If you have NOT Dynamic IP., but for example PPPoE, L2TP, PPTP, you will also need to specify the user name and password. And also other information, if needed. All this information must be provided by your Internet provider.

If your country, region or provider is not on the list, then check the box near "I have not found the appropriate settings" option.and specify the settings manually.

If the settings are correct, the router will connect to the Internet and proceed to configure the wireless network.
TP-LINK: Quick Setup of the Wi-Fi Network via the program from the disk
A window will appear in which we need to set the name of the Wi-Fi network. Come up with any name you want. You can even leave the standard one (which is already prescribed).
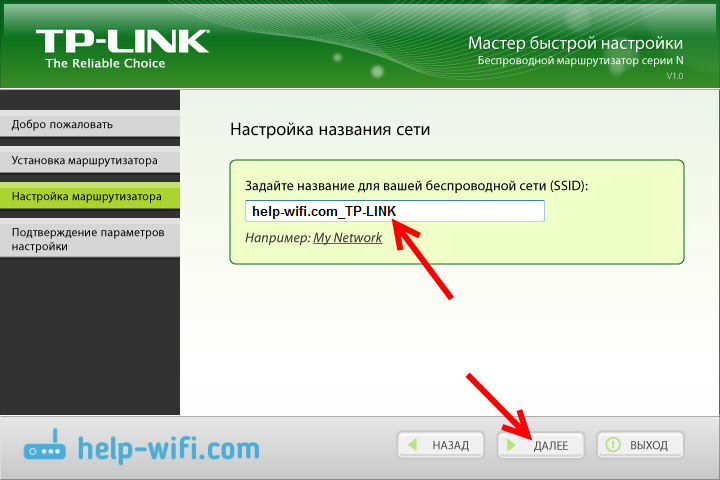
Click "Next", and a window will appear with the security settings of the non-breed network. Now we will set a password on the Wi-Fi. Let's leave the selected item "Highest security level (WPA2-PSK)"..
Erase the default password, make up your own, and write it down. Think of a good password, not as I have in the screenshot below 🙂 Click on "Next". You can change your wireless password at any time.
Step 6: Guest Network
Almost all TP-Link routers support setting up a guest network. This allows you to create a separate SSID for Wi-Fi, shielding it from the home group. To do this, you only need to set a few simple parameters.
- Open the category "Guest Network..
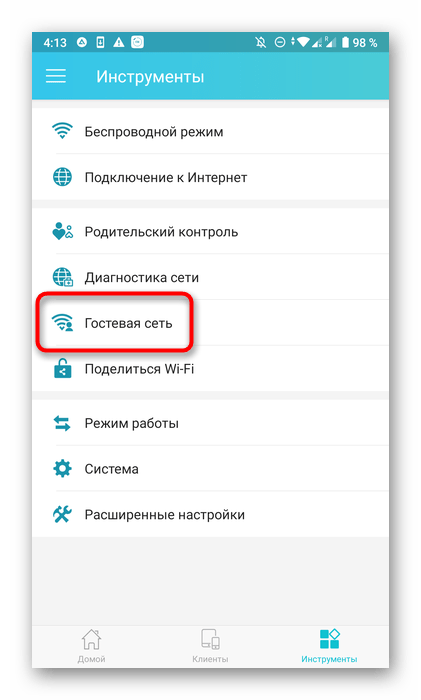
- Enable local access, and then go on to the Wi-Fi setting.

- Here, activate wireless mode by moving the slider.

After saving the settings, go to view the available Wi-Fi networks. The guest network you created should now be there.
Step 7: Using the "Share Wi-Fi" feature
Function "Share Wi-Fi isn't really related to router setup, but it's definitely worth mentioning. It's designed to quickly connect other equipment to your wireless network, and it works like this:
- Through the "Tools" select "Share Wi-Fi.".
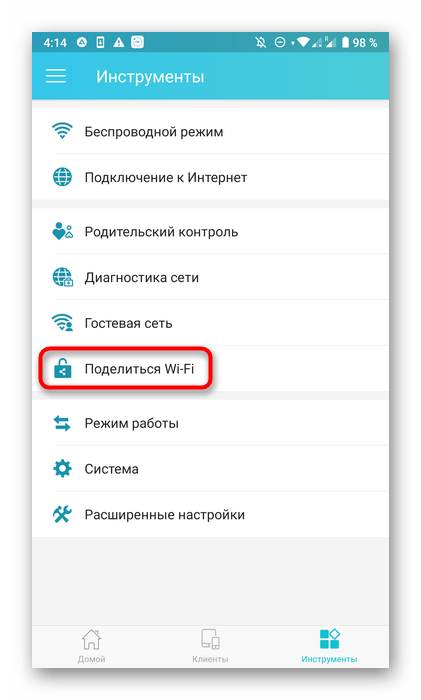
- Tap on your wireless network.

- The screen will now display the name of the Wi-Fi, its password, and a QR code.
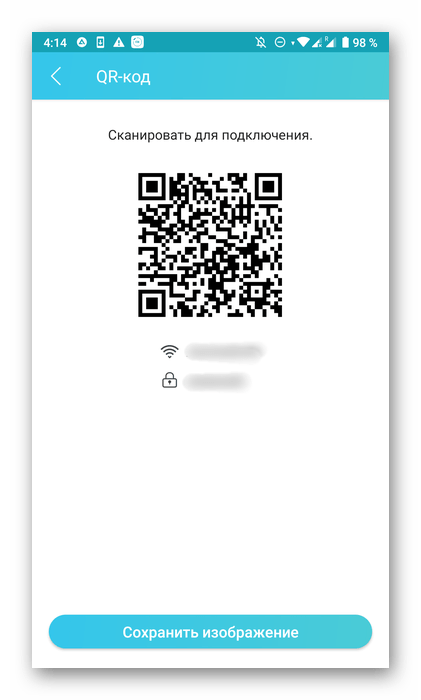
Now other users can enter the password or scan the QR code for a quick connection, if their devices support such a function.
TP-LINK Tether: How do I download and connect to my router?
As I wrote above, you can install the program from the app store. Here are the links:
Or simply on your mobile device, type "tp-link" into the search box, and install the app.
In order to manage or configure your router from a tablet or smartphone, you need to connect to it via Wi-Fi. Most likely, you are already connected to it. Well, if you have a new router, and you want to configure it through the TP-LINK Tether program, then connect to the Wi-Fi network with a standard name, which will appear as soon as you plug in the router. The name of this very network and the standard password are indicated on the bottom of the router's sticker.
Next, simply run the TP-LINK Tether program on your mobile device. You will see a brief description of the functions. Click the button Start. And if you are already connected to your router, it should show up in the program. Or pull down to refresh. So choose your router, and specify the user name and password. The defaults are admin and admin. If you have changed them, specify yours.
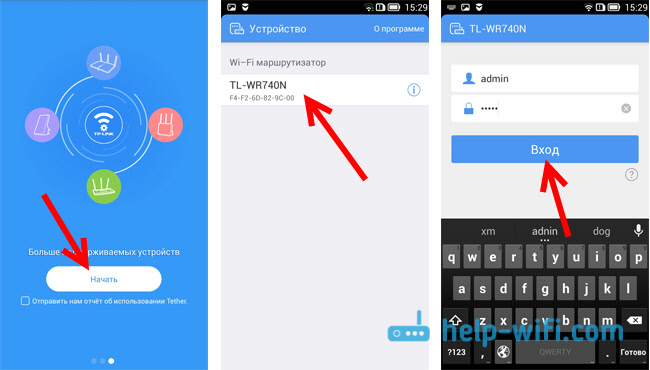
Press the button Login, and get into the settings of your router via the Tether app.
How do I use TP-LINK Tether, and manage my router?
I used the TL-WR740N V5 to connect and write this article. So if you have a different router, there may be more sections and functions in the program. For example, after connecting to Archer C20i, there is a Guest Network section, where you can manage the wireless guest Wi-Fi network. Everything depends on the router model.
The main page is the network layout. It displays the devices that are connected to your router. Click on any client, and you can see information about it. But, the most important thing here, is the blocking of clients. Simply select the desired device, and click on Block. A locked device will be disconnected from the router and will not be able to connect to it. Locked devices are displayed in the Manage – Locked Clients tab. You can unlock it there. It's a lot easier than going into the router settings like I showed you here.

That's where we're at. Next, let's go to the Manage (bottom) , and let's go through all the sections.
Here are the minimum settings of the Wi-Fi network. If you select this tab, then you will see a switch that can be used to turn off Wi-Fi at all. But be careful here, because you yourself are connected by Wi-Fi 🙂 .
And if you click on the name of your network, a page will open where you can change this very SSID name, or change your Wi-Fi password. You can also disable the password with the switch, and make your network open. To save the changes, just click on the button Done.

If you change your network name or password, remember to reconnect your device with the new password.
Read More:
