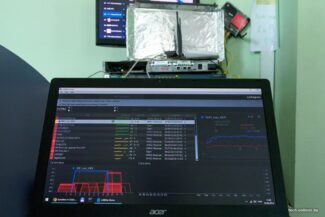
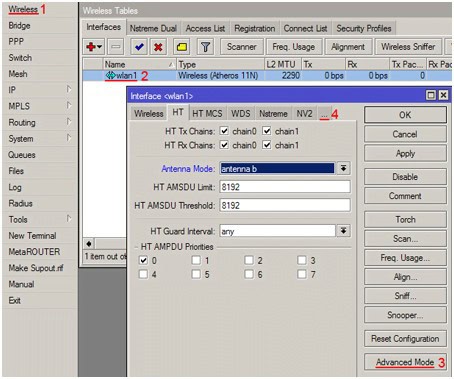
In the range submenu select the tab "manually" and select the necessary frequencies. For the best result, we go through the frequencies constantly referring to the signal level by the way "Additional settings" – "Status".
- Selecting Transmitter for Router
- Omnidirectional antennas
- Principles of wifi antenna placement
- Frequently Asked Questions
- ▶ Is the KROKS 4G router's frequency aggregation not working?
- ▶ The 4G frequency aggregation of the TP-Link MR6400 router is not working.
- ▶ I use 4G router for a long time, but only now the speed has dropped dramatically?
- ▶ I have doubts that you can configure everything yourself?
- Setting up a 3G 4G LTE antenna for summer cottage, country house
- How to transfer wifi over a distance of 1 km?
- How to transmit WiFi at 5 km. or more?
- A brief description of the equipment
- Let's move on to the configuration
- Installing and connecting the Wi-Fi antenna
- Wireless network adapter mode on ASUS routers
- Wi-Fi receiver from a TP-LINK router
- D-Link router as a listener
Selecting Transmitter for Router
It sometimes happens that if there is a wireless network in a building with 2 or 3 floors, the WiFi signal does not reach some rooms, or there is a signal, but the connection speed is weak. One of the reasons this can happen is the wrong wifi antenna for the router.
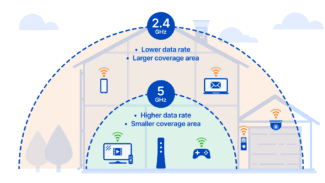
WiFi is a technology that only works well in "line of sight". Any obstacles in the form of walls, cabinets, mirrors, and more are very bad for wireless signal propagation. Therefore, a reasonable choice of antenna for the router will depend on the comfortable operation of the network.
All WiFi antennas can be divided into two types: directional or omni-directional antennas, which, in turn, into indoor and outdoor antennas.
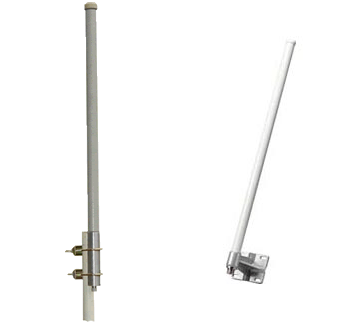
Omnidirectional antennas
This class of antennas is basic for building wireless networks. The bulk of "home" routers are equipped with these very antennas. They evenly distribute the WiFi signal throughout their range. Generally speaking, omni-directional antennas are simple prongs that spread a WiFi signal in a plane perpendicular to their own axis.
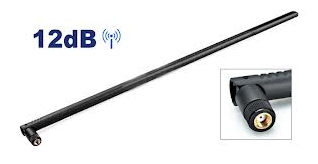
Note – omni-directional antennas must be installed only vertically. Then the signal propagation will be correct and the wireless coverage will be maximum.
Sometimes it happens that it is necessary to cover a large area with a wireless network, for example, some industrial facility. Then an outdoor omnidirectional antenna with a gain of 8 dB is installed on the central building. Such an antenna is capable of transmitting a WiFi signal at a radius of 600 meters at 54 Mbit and 1800 meters at 1 Mbit.
Principles of wifi antenna placement
Many factors influence the wifi antenna's power.
Let's look at a few guidelines for wifi antenna placement to maximize signal strength:
- If the antenna is omni-directional, you should place it in the center of the building.
- It is best to place the antenna or router itself above the level of furniture.
- Check the firmware on your router; it must be the latest version.
- It is best if the antenna is placed away from windows, mirrors, and steel structures.
Frequently Asked Questions
▶ Is the KROKS 4G router's frequency aggregation not working?
This mode must be supported by the base station in addition to the 4G cat.6 router. Check with your cellular provider. Or the aggregation is not supported on the frequency selected by the 4G router in automatic mode. Manual configuration is required. An example is shown below in the manual.
▶ The 4G frequency aggregation of the TP-Link MR6400 router is not working.
That's right. It is not supported by this model. Only 4G cat.6 routers support this mode. You can read more about frequency aggregation in the detailed article.
▶ I use 4G router for a long time, but only now the speed has dropped dramatically?
Most likely the problem is with the load on the base station or the cellular operator has changed frequencies. This often affects the result of the work. Do the settings to change the frequencies of the 4G router modem – it will definitely help.
▶ I have doubts that you can configure everything yourself?
Our dear customer! More than 3000 customers have been able to configure the equipment by themselves using this manual. Different age groups, different abilities. You just need to allocate enough time to study and configure it. In any case and at any stage you can contact our experts and highly qualified engineers will install and configure the equipment.
Setting up a 3G 4G LTE antenna for summer cottage, country house
Setting up the equipment includes the correct installation of external antenna in the direction of the base station (BS) of the operator, fix it in this direction and connect the antenna with a 4G router. In addition, the function of selecting the necessary frequencies in TP-Link models is not provided, so you need to "flash" the router to the custom firmware. This is not difficult.

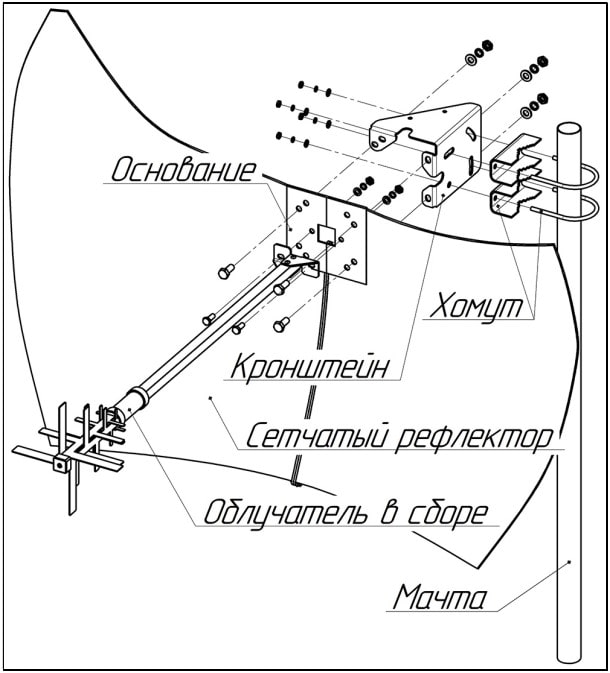

The height of the installation affects the final result: the higher, the better. This is an important point and should not be neglected. Our experience shows that sometimes when installing 3G 4G antenna only 1(!) meter height difference gives 2(!!) times speed increase. Check if this is not your case.
If you know the approximate directions to the base stations (BS) of the cellular operator, you must first check the signal from these directions.
To do this, the antenna is connected to a TP-Link MR6400 router with a SIM card. It is necessary to disconnect the regular antennas and through cable assemblies connect an external antenna.
The SIM card is inserted before turning on the router. Pay attention to the correct insertion of the SIM card in the slot.
After booting up the 4G router (about 1-2 min.) you need to connect to the wifi network, the default network name and password are on the back of the router.
It is necessary to open the browser (Explorer, Chrome, Opera, Firefox) and in the address bar enter:
192.168.1.1 and click on the "Login" button

Authorize in the web-interface of the 4G router. Immediately select the Russian language, if necessary, and set a password for access to the administrative panel for security purposes, especially for those who are planning to use a static address. Remember it or you will have to configure it from the beginning.
How to transfer wifi over a distance of 1 km?
To build a bridge, we need two of the simplest wireless access points. A good option is the TP-Link TL-WA5110G. What makes it so remarkable? The transmitter power of this access point model (hereinafter referred to as AP) is 26 dBm, which is many times more than the power of any other AP for home use. This equipment is out of production, but if you can find a working second-hand model, feel free to buy it.
For the radio bridge we need 2 APs. One must be configured as a normal access point and the other as a client.

- SSID. Network name is set at will, you can not change the standard
- Region. Region does not play a special role
- Channel. It is desirable to choose a channel from 6 and above, so on "high" channels d 2,4 GHz, the air is less noisy
- Power. The transmitter power should be set to maximum, i.e. 26 dBm and check the Enable High Power Mode box.
- Mode. Mode set 54Mbps (802.11g), as the other in the list has less bandwidth.


SSID we write the same as on the first device (you can also click on Survey at the bottom of the page, there we will see a list of available devices and click Connect).

Do not forget to set different IP addresses on both APs (Network section)!
With standard antennas devices connect confidently at a distance of 1 km in a line of sight.
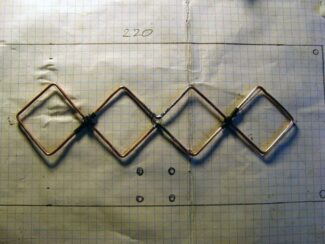
If you replace the built-in circular antenna with a directional antenna (see figure below) – you can significantly increase the communication range.

How to transmit WiFi at 5 km. or more?
If you're looking for a more serious option, the next part of this article is just for you.
Ubiquiti is well known for their products for building wireless connections. The brand also produces equipment for "smart" houses, surveillance cameras and much more, but the first thing that comes to mind when you hear Ubiquiti is undoubtedly Wi-Fi equipment.
We will not talk about the entire line of equipment, and will choose only what we need.
A brief description of the equipment
To build a bridge will be on the equipment NanoBrige M5 or NanoBeam M5.
- NanoBrige M5 is out of production, but it can still be found at some dealers, and second-hand versions in general is full.
- NanoBeam M5 – a new development, it is similar to the previous model, but it has a completely different stuffing. Faster processor Atheros MIPS 74KC, more RAM, 64 MB of RAM are on board now. The gain of the external antenna has increased. The shape of the transmitter has changed. The design has also changed for the better. Installation is even easier and faster.
Both devices are positioned by the distributors as equipment for distances of 5 km, but in practice were launched links for 20 km and more with very good indicators of stability and bandwidth at this distance over 120 Mbps over Wi-Fi.
Below are the antennas themselves for long distance wifi transmission.


Let's move on to the configuration
After adjusting the network interface of your PC, laptop for the network 192.168.1.0/24 and connecting the equipment in the following scheme – we can proceed to the setting.

If you have new equipment, so to speak, "from the box", then after entering in the address bar of the browser 192.168.1.20 and clicking on the transition – we should get to the authorization page, it looks like this:
Installing and connecting the Wi-Fi antenna
Before installing the Wi-Fi antenna you need to decide on the place where it will be installed and check the availability of mounting hardware. If the kit contains the necessary fittings, mount the antenna in accordance with the following basic rules:
- for best signal quality it is recommended to install the room amplifier within direct line of sight of the router;
- Take into account the presence of obstacles (walls, ceilings, furniture), or better yet, place the antenna above the furniture level. The ideal option for the living room are ceiling antennas, which look like a flat plafond of a lamp;
- Do not install the antenna near windows and mirrors. They can reflect the signal, forming dead zones behind them.
- For outdoor antennas check the availability of built-in lightning protection, and if not, purchase a separate special device. Self-made devices in the absence of lightning protection must be grounded.

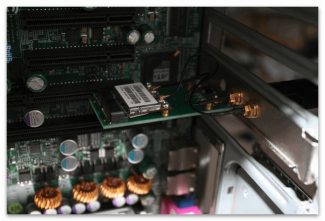
After installation the antenna is connected to the router or access point. The type of connection depends on the router model. If the router has removable antennas, unscrewing them, you can free the connectors to connect a factory or homemade amplifier. You can also simply connect the amplifier to the router, which has a special socket for an external antenna. Additionally (in case the connectors are incompatible) you may need an adapter or a so-called N-type connector.
Depending on the antenna design, it can be connected to the router directly via a universal SMA (MMCX) connector or via a cable crimped with an N-Male connector and connected to the N-Female antenna connector. If there is no such cable in the set it can be made by yourself, using a television cable of RG-6U type and the adapter N (Male) – F (Female).
Wireless network adapter mode on ASUS routers
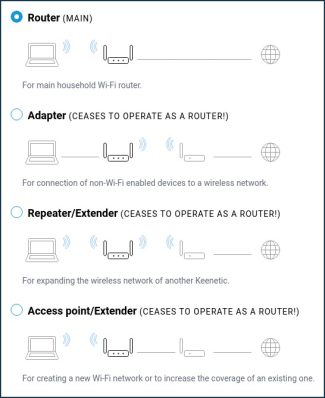
If you want to use an ASUS router as a receiver, there are a few options here as well. These routers are able to work in repeater mode, which is already good. Yes, this mode is intended for slightly different tasks, but in the repeater mode ASUS router distributes the Internet via cable, and therefore can be without problems as an adapter.

Only while writing this article on a more expensive model Asus RT-N18U I discovered the Media Bridge mode which suits us much better than the amplifier mode (even if you look at the scheme of the control panel).

But Asus RT-N12+ doesn't have this mode. Which is quite logical, because it's not really suitable for serious multimedia tasks. Shortly I'll prepare a separate instruction on configuring the Media Bridge mode. I'll check it all and write whether it is suitable or not.
Wi-Fi receiver from a TP-LINK router
Especially, often asked how to convert into a receiver such popular shares as TP-LINK TL-WR740N, TL-WR841N, etc.
On such devices have to use the bridge mode, aka WDS.
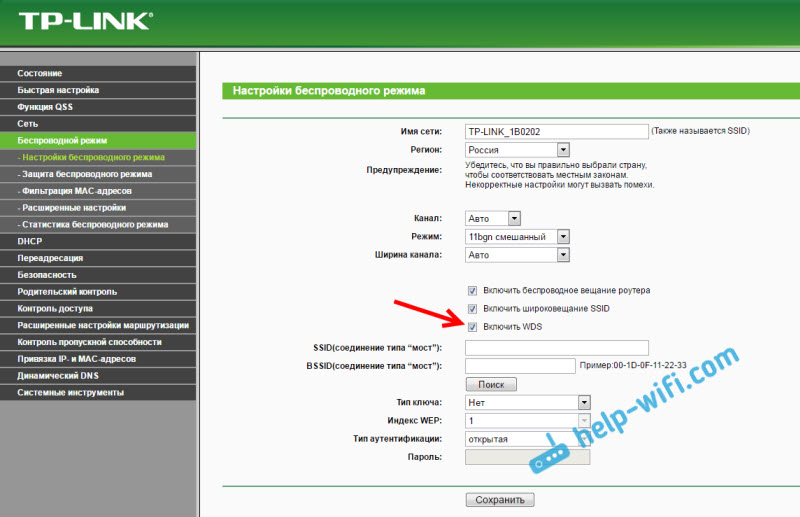
Because in the repeater mode, these routers do not work (wrote about it here). But I can't say anything about the new routers from TP-LINK. They may already have support for different operating modes. I know that only TP-LINK access points can work in repeater mode. As far as I know there is no adapter mode.
I can say with confidence that in bridge mode the internet from the TP-LINK router over the network cable works. There were a lot of questions about this, I asked TP-LINK support, everything works. You just need to turn off DHCP. The article at the link above has all the information you need.
D-Link router as a listener
I can't give an exact answer for all D-Link router models, but from my own experience I can say that in order to use these routers as an adapter they can be set up in wireless client mode. I tested it on DIR-615 and DIR-300.

We have to admit that this mode of the D-Link router is excellent for distributing the Internet via cable. Moreover, you can disable the wireless network; and this is very useful.
For more detailed instructions on setting up client mode on D-Link devices, see here: https://help-wifi.com/sovety-po-nastrojke/nastrojka-dvux-routerov-v-odnoj-seti-soedinyaem-dva-routera-po-wi-fi-i-po-kabelyu/. See after the title "Connecting a D-Link router to another router via Wi-Fi (client mode)". It's all detailed there. Maybe later I will prepare a separate instruction.
Read More:
