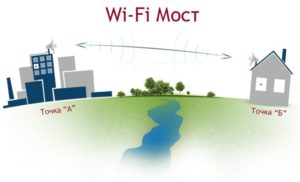
Imagine an imaginary straight cylindrical tube (shaded gray in the picture) with antenna "A" and antenna "B" installed on both sides in the centers of its holes. The inner space of the tube is the Fresnel zone. For a good signal and stable connection in this "pipe" there should not be any extraneous objects, such as: houses, trees, power lines and other structures.
- Wifi for the long haul
- Selecting the antenna for transmitting and receiving
- What equipment do you need
- Bridge
- How to transmit wifi at a distance of 1 km?
- How to transmit WiFi at 5 km. or more?
- A brief description of the equipment
- Let's move on to the configuration
- Connecting the wi-fi gun to the smartphone
- Recommendations
- Improving network coverage with the right installation
- Configuration of signal propagation for video surveillance
Wifi for the long haul
Hello, dear readers! And interesting we will have an article today. Today we will look at a question that concerns many people, namely, how to catch or transmit a wi-fi signal over a long distance. For a home router, one problem remains – the gain is small for a large apartment or house. Most of the time, cheap devices have broad antennas that don't reach as far as you'd like.
Sometimes in suburban areas, villages, villages or industrial plants you need a Wi-Fi signal transmitter for long distances. And now we will clarify a small question. The fact is that the transmitter, it is the primary base or, for example, our router. But the receiver will be a laptop, phone, tablet, etc..
And then you have to figure out exactly what you want. To make a more powerful base, so that other people for many kilometers could catch your Wi-Fi signal. In that case you need to buy expensive equipment and put up a high antenna. But if you want to catch someone else's wi-fi signal over a long distance, the issue is much easier to solve. I hope we have solved the problem of determining the transmitter and receiver.
There is another third option – installing and configuring a multi-kilometer bridge. Here is an example. We have a fiber optic network in a village. At a distance of 2 km there is a house, up to which, of course, no one will wire separately. The homeowner went to the village to arrange to share the Internet with a friend.
It is possible to install a powerful narrowband antenna at the transmitter point, which sends the signal, exactly to that house. There, another similar antenna is also placed on the roof to improve reception. Then the two routers are linked and a regular bridge is set up. One router receives the Internet and shares it with the second one via wifi. You get a PtP topology.
And so look at the picture above. For a cleaner transmission there should not be any obstacles between the two antennas. The gray part is the so-called Fresnel zone. The calculation of the zone, namely the height of this gray area, is done according to the formula:
Selecting the antenna for transmitting and receiving
Here there is a question – and what kind of the antenna it is better to choose? There are two variants, it is possible to try to make it independently by the hands or to buy ready-made. On the homemade I have already written a very detailed article and you can read it here. It describes all the steps, the material, as well as a drawing and video, for those who like to look, not read.
There are several options for professional outside antennas:
All are external and can be mounted on roofs. Also, all have protection against moisture, dust, and there is the ability to work in both cold and heat. As you can see, these models are quite expensive, but have a stable and good performance.
I need to create a WiFi network with a neighbor at a distance of 450 meters. (The visibility is almost direct, a couple of trees get in the way a little.)
Read the internet, where craftsmen create networks of 15 km. The main way – 2 antennas pointing at each other.
1. 1. Will routers for 800 meters (I've seen such from Asus) help? Or is the antenna more reliable?
2. Which antenna will be optimal in quality (considering the trees – more powerful)?
I am going to make the antenna myself. It is necessary to minimize costs.
3. Explain the layout of the equipment.
My neighbor has an ADSL connection (telephone line, if I'm not mistaken). What kind of equipment does he need to get, what kind of equipment do I need?
As I understand it, you need to: put a regular router to the neighbor, to the router somehow(?) attach an antenna, aimed at me. My antenna to what to attach, if I have two computers without wi-fi? (a card in the computer or another router for me?)
Long distance wi-fi transmission is an increasingly popular system, which is a set of hardware and software that allows you to increase the distance the signal can be sent over a radio link. In this way it is possible to distribute Internet access to friends and acquaintances, a neighbor or other people. In addition, it will also help the user to catch the signal better.
What equipment do you need
To transmit Wi-Fi over a decent distance, you need special equipment – a long-range Wi-Fi antenna. It is noteworthy that there must be several such antennas and they must be identical. When using them you can reach distances of up to 90 km, so transmitting the Internet to a distance of 5 km without line of sight is not considered a great achievement.
- The first thing to do is to build yourself or buy an antenna to transmit the Internet over long distances. It is necessary to observe the scheme, in which the next amplifier should be more powerful than the previous one.
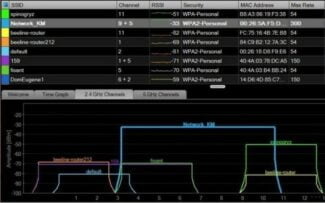
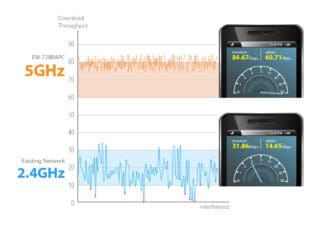
- Choose a transmission channel with minimal interference. If the user lives in a city, the 3 GHz frequency is best;
- Use a powerful transmitter. To amplify the signal by 3 dB, you need to increase its power several times.
Note! You will need a whole network of devices and a radio card if the frequency is greater than 5500 mHz in order to make a normal long-range transmission.
Bridge
The use of a bridge makes it possible to connect devices that are far apart.
The following devices are most commonly used as a standard bridge:
- NanoStation M5. Allows to conduct Wi-Fi amplification for 5 km.
- NanoBeam M5-400. Allows you to work at the same range, but with higher speed.
- AirFiber 24. This is the most advanced equipment.
How to transmit wifi at a distance of 1 km?
To build a bridge, we will need two of the simplest wireless access points. A good option is the TP-Link TL-WA5110G. What makes it so remarkable? The transmitter power of this access point model (hereinafter referred to as AP) is 26 dBm, which is many times more than the power of any other AP for home use. This equipment is out of production, but if you can find a working second-hand model, feel free to buy it.
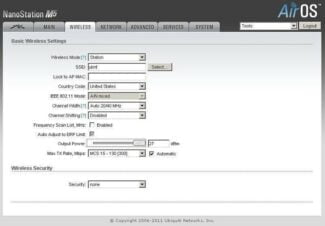
For the radio bridge we need 2 APs. One must be configured as a normal access point and the other as a client.

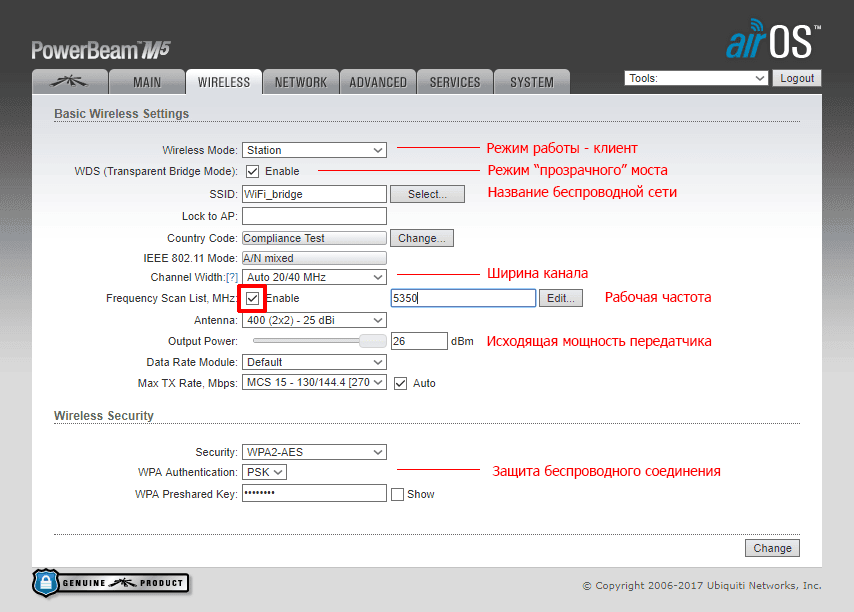
- SSID. Network name is set at will, you can not change the standard
- Region. The region does not play a special role.
- Channel. It is desirable to choose a channel from 6 and above, so on the "high" channels d 2.4 GHz the air is less noisy
- Power. The power of the transmitter is set to maximum, i.e. 26 dBm and check the box Enable High Power Mode.
- Mode. Mode set to 54Mbps (802.11g), as the other in the list has less bandwidth.


SSID we write the same as on the first device (you can also click on Survey at the bottom of the page, there we will see a list of available devices and click Connect).

Do not forget to set different IP addresses on both APs (Network section)!
With standard antennas devices connect confidently at a distance of 1 km in a line of sight.
If you replace the built-in circular antenna with a directional antenna (see figure below) – you can significantly increase the communication range.

How to transmit WiFi at 5 km. or more?
If you need a more serious option, the next part of this article is for you.
Ubiquiti is widely known for its products for building wireless connections. The brand also produces equipment for "smart" houses, surveillance cameras and much more, but the first thing that comes to mind when you hear Ubiquiti is undoubtedly Wi-Fi equipment.
We will not talk about the entire line of equipment, and will choose only what we need.
A brief description of the equipment
To build a bridge will be on the equipment NanoBrige M5 or NanoBeam M5.
- NanoBrige M5 is out of production, but it can still be found at some dealers, and second-hand versions in general is full.
- NanoBeam M5 – a new development, it is similar to the previous model, but it has a completely different stuffing. Faster processor Atheros MIPS 74KC, more RAM, 64 MB of RAM are on board now. The gain of the external antenna has increased. The shape of the transmitter has changed. The design has also changed for the better. Installation is even easier and faster.
Both devices are positioned by distributors as equipment for distances of 5 km, but in practice were launched links for 20 km and more with very good indicators of stability and bandwidth at this distance of over 120 Mbps over Wi-Fi.
Below are the antennas themselves for long distance wifi transmission.


Let's move on to the configuration
After adjusting the network interface of your PC, laptop for the network 192.168.1.0/24 and connecting the equipment in the following scheme – we can proceed to the setting.

If you have new equipment, so to speak, "from the box", then after entering in the address bar of the browser 192.168.1.20 and clicking on the transition – we should get to the authorization page, it looks like this:
Connecting the wi-fi gun to the smartphone
When the antenna is ready, it remains to connect it properly to the devices. When connecting to a smartphone or tablet first connect the gun to a USB modem, then to a smartphone and finally to the router.
Important! To connect to the Wi-Fi whistle you must carefully disassemble the antenna so as not to damage the wires. It is necessary to tin the soldering points, and then solder the wire.
The outer braid is fixed to the outermost disk, which has the largest diameter, and the central core to the neighboring disk. The antenna-gun is securely attached to the bracket to make it easier to aim at the router that gives out the signal. The appearance of the device, of course, comes out very unusual.
Using a gun to amplify the wi-fi signal at home
Recommendations
Before you begin, you should always take into account the fact that there should be a direct line of sight between the objects of amplification. That is, both ends must be in a straight plane with no other objects between them.
How to transfer files from computer to phone via Wi-Fi
In addition, it is necessary to observe the so-called Fresnel zone. It can be considered on the example of an ordinary pipe, with two antennas at the end of each outlet. Thus, the Fresnel zone is the inside of the pipe. The rule states that a quality signal between the two points will be only when the inside of the imaginary pipe is perfectly clear, which implies the complete absence of trees, buildings and other objects.
Important! The radius of such a zone depends on the range between the points and the frequency of the radio waves at which they apply. The greater the range, the greater the radius needed.
There is also no need to calculate everything yourself, as there are a large number of specialized sites that have online calculators. You just need to enter certain data, and the system will calculate everything automatically.
Improving network coverage with the right installation
Sometimes you can achieve the coverage you need without the expense of long-range wi-fi transmitters, antennas, and repeaters.
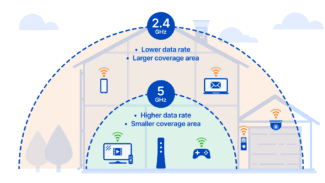
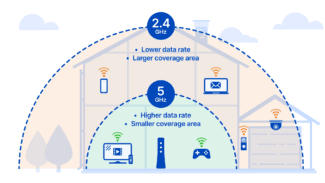
- Vertical Antenna Positioning. In a tilted position, the signal is spent spreading into the floor and ceiling. This is more of an installation optimization, but will work for a small expansion of coverage;
- optimal location of the access point. The latter should be located as close as possible to the receiver or equidistant to several;
- minimum amount of interference between the router and the devices. Either remove serious obstacles, or arrange the devices so that there is no interference between them. This is difficult to arrange;
- Changing the router mode. The new 802.11n mode has better propagation and signal quality. The inconvenience is the inability to connect to equipment with 802.11 B/G;
- changing the channel of the router. This is done in the settings. In fact, this method is a special case of the third point. It will only help against interference of neighboring networks;
- amplify the power. It is again a question of settings. Often only 75% of the possible power is set. But by changing the setting to the maximum, there is a risk of signal quality degradation;
- blocking the signal from propagating in the wrong direction. This is where metal-containing materials that do not allow the signal to pass through can help.

Some of these ways are difficult to do in practice. If you can still re-hang a mirror, you can not do anything with a reinforced concrete wall. Finding a suitable location for an access point is easy, but not the fact that there will be an outlet. In addition, these means are not very effective, but not too expensive and solve some problems. In any case, the method must be chosen according to the purpose. Next, consider the configuration of the network in the organization of video surveillance.
Configuration of signal propagation for video surveillance
If we talk about the device of the outdoor wi-fi camera, the signal propagation in the range of the wi-fi router will have two problems: the coverage area and a large amount of interference. Therefore, the best options are to use a strong antenna and to optimize the location of both the router and the cameras.
The range of the wi-fi camera also depends on atmospheric phenomena, so an effective option seems to be a remote antenna or the location of the repeater outside. This will help not only to strengthen the radio signal, but also to avoid additional interference: walls, partitions and other obstacles in the building.

It is possible to provide the required coverage through a powerful router. But the disadvantages of its use have already been written above. Although there is an outdoor version, which will make the signal distribution efficient, and in the case of video surveillance, the quality of information transmitted to the router is extremely important.
Of all the methods described above, it is unlikely to be sufficient to limit yourself to just one. To increase the range of a Wi-Fi camera, and even more so several, you will need to combine two or more methods. In the case of filming, it is important not only to ensure communication between the camera and the video receiver, but also to establish a stable connection.
The range of wi-fi depends on the specifications of the access point and its settings. The peculiarity of the spread of the wireless network is that it depends on external factors. In domestic conditions, the budget version provides little coverage. For comfortable use on large areas and over long distances, you will have to resort to all sorts of tricks. The latter, fortunately, are not too few.
Read More:
