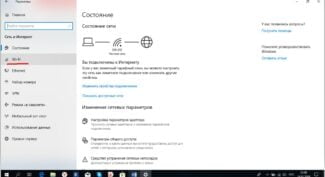
The updated Win 10 OS has some changes, including in the procedure for establishing connection.
- How to turn on the Wi-Fi on your computer: a detailed instruction
- Wi-Fi on Windows 7
- How do I catch a wireless signal?
- How do I connect my WiFi router with a wire?
- Frequent problems and their solutions
- Method 2: "Control Panel."
- Method 3: "Device Manager".
- Solving possible problems
- No network icon in the system tray
- Solutions to possible problems
- Home networking between PCs and laptops
- Modem setup and Internet connection
How to turn on the Wi-Fi on your computer: a detailed instruction
If you use a PC for a long time, the question of how to turn on Wi-Fi on the computer can cause a smile. However, very often there are nuances that puzzle both beginners and pros. I myself have faced the problem that the way that worked before did not help (it happened when reinstalling Windows). Therefore, I believe that both "dummies" and "confident users" it is important to know all the methods how to configure Wai Fi on a computer: PC or laptop. Below I will describe the "regular" methods of connection, and then the solution to problems and malfunctions.
Wi-Fi on Windows 7
The answer to the question of how to turn on Wi-Fi on a Windows 7 computer is quite simple. In the right corner of the system tray there is a wireless connection icon. It is necessary to click it, select the desired network and connect to it using the password.
Of course, it is worth knowing the precautions before finding the Wi-Fi network on your computer.
Do not connect to unfamiliar open networks, and in cafes and hotels do not transfer important and confidential data over the Internet. They can be seen by the owner of the router, and sometimes it is a special technique of intruders.
If you see a red cross on the icon in the tray, it means that either there are no networks to connect or the problem is in your adapter. You need to turn it on, and to do that, it's worth knowing where to find Wi-Fi on your Windows 7 computer.
In most cases, this is the answer to how to turn on Wi-Fi on your computer. You can use the "Device Manager" , but it will be the same action of enabling/disabling the adapter. The icon in the tray will change and the connection will happen, either automatically or with your help.
As a rule, you shouldn't have any problems. But if suddenly the computer does not see the modem or there are some other errors, you will have to dig into the settings.
How do I catch a wireless signal?
If there is a signal, one device must send it (router) and another device must receive it. Today, laptops and many tablets have WiFi receivers by default, while desktop computer units are not usually equipped with this part. But miracles do happen – the receiver is occasionally added during assembly as an additional feature. It is not hard to check this:
If the list contains names without these words, then there is an option to connect a wireless receiver to your computer yourself, which come in two types:
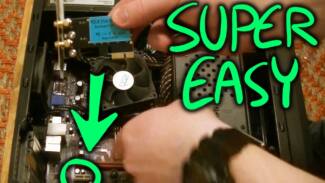
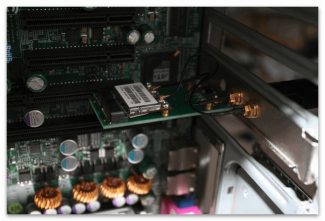
The problem, how to connect your computer to the Internet via a Wi-Fi usb adapter, is solved in three steps: connection to the port, installation of drivers and configuration. In the same way you can connect the internal (PCI) adapter, only the port is located on the motherboard.
If the installation of drivers did not occur automatically after connecting the adapter, you will have to use a disk with drivers or download them from the Internet (in this case, you can temporarily use the cable from the router to the computer to access the Internet).
As a rule, after the installation of drivers in the taskbar (in the tray) appears an icon of WiFi network, clicking on it, the user will see a list of wireless networks. It is enough in the list to select the name of the home network and enter the password – the factory name and password can be found on the router or in the manual.
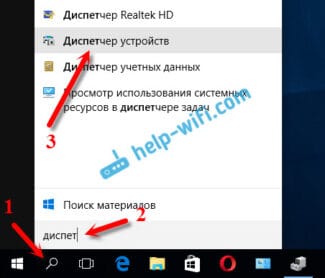
If there is no icon on the taskbar, then it is worth searching for the list of available networks in the control panel or in the system settings, the easiest way is to use the built-in system search:
How do I connect my WiFi router with a wire?
Do not forget that it is possible to connect the Wi-Fi router to the computer (PC) via cable – wired connection is less prone to speed jumps. This requires a crimped cable – its length should be enough to connect the router and PC. To connect, you will need to:
- Plug the router into an outlet and connect the ISP cable to the special port on the router – it is different from the others in color or separate arrangement.
- Connect a network cable between the router and your computer.
- Then you need to configure the Internet. Most often this is done by a specialist from the provider when you first connect the Internet, if the user has to do this on their own, you can ask the technical support service for settings.
Frequent problems and their solutions
While following the instructions, different errors can occur. Either there is no internet on the receiving gadgets, or the access point does not turn on, the network cannot start, or other unpleasant messages. Their solution comes down to a few points:
- Make sure you follow the instructions at the end of method 2 exactly.
- See if you have network access on the giving PC.
- Update your Wi-Fi driver. You need to do this so that the computer is receiving WiFi and sharing the network. Download it from the web site of the PC brand or the brand of the Wi-Fi module.
- If you have an error in the Mobile Hotspot menu on Windows 10, then apply the command line from methods 3 and 4.
- Disable antivirus – it may be blocking your attempts.
These methods help in 95% of cases. Now you'll be able to stay connected on all your gadgets at all times as long as your PC has access to the internet. You always have a portable Wifi at your fingertips.
Method 2: "Control Panel."
- Go to "Control Panel through the menu. "Start" menu..
If there is no problem with the drivers, the network connection will turn on and the Internet will work.
Method 3: "Device Manager".
- Go to menu "Start Menu and click on "SCROLL on "Computer.". Then select "Properties.".
- Go to "Device Manager..
- Navigate to "Network Adapters.. To find the Wi-Fi adapter, search for "Wireless Adapter" .. If there is an arrow on its icon, it is off.
- Click on it "PKM" and select Select "Enable"..

If the above methods have not helped you and still not connected, you probably have a problem with the drivers. You can find out how to install them on our website.
Solving possible problems
Now let's take a look at the glitches that may occur while performing the above instructions and suggest solutions.
No network icon in the system tray
This problem has two sources: for some reason the icon is disabled or there are technical problems with the network adapter.
- The first source of failure can be solved quite easily. Right click your mouse (RIGHT MOUSE CLICK ( PCM) on the taskbar and select menu item "Taskbar Options.. Scroll down to the link "Select the icons to display in the taskbar" link and click on it. Next, from the list, locate the "Network. – if it is not active, click to enable it. Now the desired item should be displayed in the specified area.
- The second source of the problem is more serious. Firstly, call the "Run" window with a combination of keys Win+R, type devmgmt.msc into it and press "OK.". This will open the "Device Manager"The "Device Manager" snap-in will open, and you will need to expand the The "Device Manager" snap-in will open, and you will expand the "Network Adapters" category.. Find the entry on the list that corresponds to your Wi-Fi device, looking for one with the words in its name wireless or Wireless Network. Pay attention to its icon: it should not have an error icon in the form of a yellow triangle with an exclamation mark. If it does, click on the BY DOUBLE-CLICKING and select "Properties.. On the "General" under "Device Status" the error code and its text description will be displayed. The most common problem is missing drivers (code 2), which can be easily solved by simply downloading the appropriate software package for the model and installing it. Read more: Example of installing drivers for the Wi-Fi adapter Codes that indicate a malfunction (e.g. 10 or 43) are not so easy to handle. If in the case of an external adapter connected to the PC via USB, you can simply replace it, then with a laptop you have to visit the service center for a more detailed diagnosis and possible replacement.
- Separately, a few more words about the situation when the list of network adapters is missing the desired item. The first thing you should try is to reboot the computer – you may have experienced a single failure. If this procedure does not help, run the "Device Manager and use the "View" menu. – "Show hidden devices.". The missing component should now appear. Click on it PCM and select the option "Activate"..
Solutions to possible problems
If the Internet does not appear after performing all the items of the instructions, there may be the following reasons:
In this case, the simplest explanation could be that the option On Airplane is accidentally activated on the device. You need to disable it and try again in 5-10 minutes.
When connecting for the first time and in a situation where there has been no access to web resources for a long time, you should update the network software.
The operation is performed through the Manager and the Network Devices tab. After selecting the adapter, right-click on the touchpad and select Update in the menu.
To change this setting, you need to go into the settings of the router, and to clarify the information with your provider – the limit may be provided by the tariff plan.
The system provides the ability to block certain gadgets by their MAC addresses. It is not possible to automatically get on the blacklist, so it is worth checking the security – if the router has not been hacked.
To regain access to the Internet, the user needs to open the MAC-Filtering section, find the name of his gadget and remove it from the list.
The IP Settings should be set to Auto Data Access. The operation is done through the Network Control Center, where you need to find the Network Settings and the item "IP Version 4".
- The following message appears: Connected without Internet access.
The notification can occur due to one of the listed reasons, or due to the operation of a protection program.
Antivirus may notice suspicious activity when a new line appears and therefore disable access to it. Here you need to understand if the antivirus program is the problem, and if so – add the network to exceptions; alternatively – download another, more loyal defender.
Setting up Wi-Fi on your computer is done in a few simple steps, the main thing is to have the necessary equipment and connected Internet service. However, it is not uncommon for a subscriber to encounter difficulties – limitations, lack of network, system errors, etc. Many of them can be solved by yourself, others, such as line failures, may be temporary and not the user's fault. In more serious cases (wire damage, chip breakage, etc.) you will need to call a master.
Home networking between PCs and laptops
There are a number of simple steps you can take to connect your PCs and laptops, using a wireless network and a wire.
- Ethernet cable. Turn the computer unit over, inserting one end of the wire into the case. The connector will have a square shape. The other end must be put into the laptop.
- On the computer, click on the "Start" button. Click on the "Windows" icon.
- In the search query, enter "Control Panel." Press Enter to have the computer search for the prescribed values.
- Go to "Control Panel" through the "Start" menu at the top. The "Control Panel" appears in front of the user.
- Click on the "Network and Internet" icon. Usually the section you are looking for is on the left side. On the right side, you may be prompted to resize the icons. Nothing needs to be done here, the step is skipped.
- Go to the "Network and Sharing Center" section.
- The connections known to the computer are opened. Select the "Ethernet" connection.
- A new menu will appear, where you must go to the "Properties" section, located at the bottom, on the left.
- Go to "Internet Protocol Version 4". This item is easy to spot, as it is centered, highlighted from the other lines.
- Go to "Properties". It is required to check the "Use the following IP address" box. Here you need to enter the required combination of the IP address (192.168.1.1), subnet mask (225.225.225.0), main gateway (192.168.1.2).
- Go to your laptop by opening the "Network Control Center". Here you select the properties of the Ethernet connection. Click on "Internet Protocol Version 4", go to "Properties". Check the box for "Use the following IP address". They enter the new IP address (192.168.1.2), subnet mask (225.225.225.0), default gateway (192.168.1.1).
- On the desktop computer, go to the Start menu again, then click on the Windows icon. Select a shared folder. Where you insert all the files you need to share with all the computers.
- On the desktop computer, click on "Explorer." Click on the desktop computer and double-click on the shared folder.
- Copy shared files to the laptop by means of combinations "Cntrl + C", "Cntrl + V".
Modem setup and Internet connection
Connection is easy, just connect the USB modem to the socket of your PC or notebook. On the screen you will be asked to connect, and you have to agree with it. If the device is connected, it will start automatically.
Everyone will be able to access the Internet via a PC. This requires knowing how to connect to the Wi-Fi on your computer. It is enough to perform a series of simple steps once to make sure that the connection remains permanent.

Certified computer network security specialist. Routing skills, creating complex network coverage schemes, including seamless Wi-Fi.

