The device will connect to both secure networks and any wireless network it can catch. If the connection is lost, the data transfer will be delayed until it is resumed. With this card, the so-called infinite memory feature opens up. As soon as it runs out of space, it will start transferring files to the selected device. The transfer can be made to a computer, tablet, phone or any other device at hand. That way, you don't have to worry about running out of space on your camera at the most inopportune moment.

Advantages and disadvantages of SD card with WiFi
SD card with WiFi will be a useful find for those who value their comfort and do not like to perform unnecessary manipulations. Especially photographers and those who often have to transfer different files from one device to another will appreciate them. Social networking fans who often share photos will not be left indifferent either. In this article we will consider the advantages and disadvantages of such cards, based on the information provided you will be able to make conclusions, whether you need a SD-card with WiFi. Here are reviews of two of the most popular models with a breakdown of the pros and cons.
To think that an SD card with WiFi will only be useful for photographers is a mistake. It is worth to understand the purpose of this device to assess its convenience.
Who might need it?

Fast data transfer from your camera to your computer, smartphone, tablet and other devices will definitely make life easier for many people. If your camera does not support wireless data transfer function, but in general the model is completely satisfied, and you do not plan to buy a new one, then such a card will be the way out.
It's easy to understand how a memory card with WiFi works. Everyone has seen small modems, they have WiFi modules, such modules are also in smartphones, but they are even smaller. The module can be so small that it can even fit into a memory card. Such an upgrade opens up a lot of possibilities.
If you rarely take the SD card out of the camera, you probably don't understand why you need a WiFi card. But you'll probably find it appealing to be able to transfer photos from your camera directly to your smartphone and instantly share them on social networks or send them to your friends. It's just as handy to send files to a printer and print them out right away. It's also nice to be able to quickly drop music onto a player that doesn't support wireless streaming.
Card with Module
The card with module had a complete case that connected the memory and the wireless module. It could only work with the SD standard. The most popular at the moment are Transcend products.
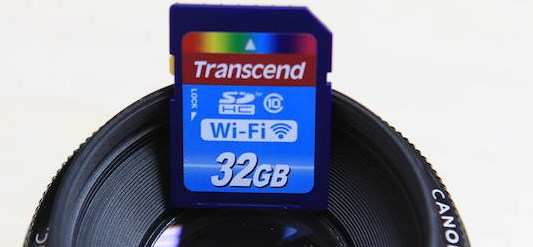
The model itself works on the wireless standard Wi-Fi – 802.11 b/g/n. Therefore, it will only work with a frequency of 2.4 GHz – this is quite enough. Write and read speed, oddly enough – is not limited to wireless transmission at all. But there are limitations on the type of data writing to the drive. The speed ranges from 8 to 18 Mbit per second.
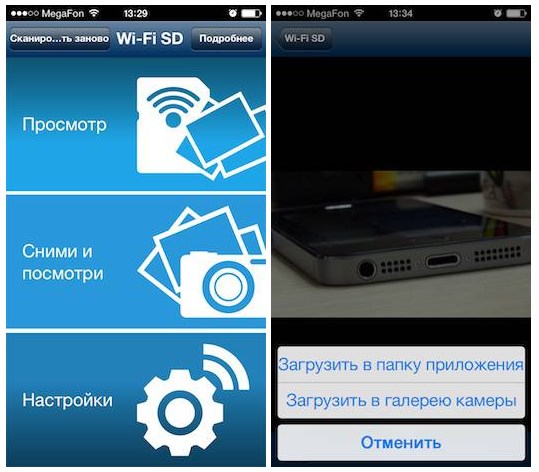
To connect, you will need to download the official program from Google Play or the App Store. In fact, there is nothing complicated about setting it up. After installation, go to the card, connect and change the network name and password to suit you. There is a small minus in the fact that this model does not support all models of cameras – the list can be found on the official website.
MicroSD WiFi module
No matter how you look at it, the microSD format is much more popular than the standard one. That is why a separate module was invented for the use of small cards. As you can see, it has absolutely no other connection than Wi-Fi.
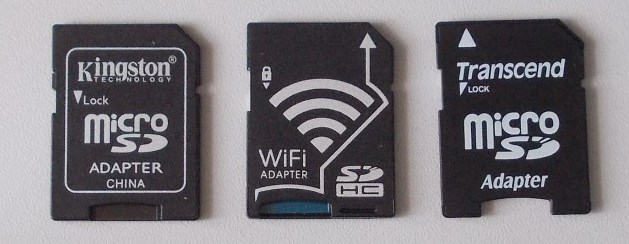
This kind of thing is usually made by the Chinese, so there may be some difficulties. After downloading the application it was necessary to connect to the wireless network of the card – I managed this without any problems. But the password for it was nowhere to be found. I had to look for it on the official website.
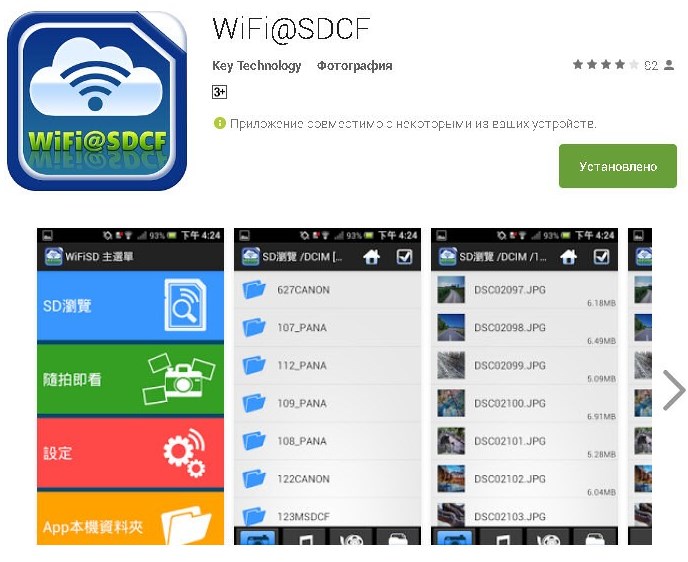
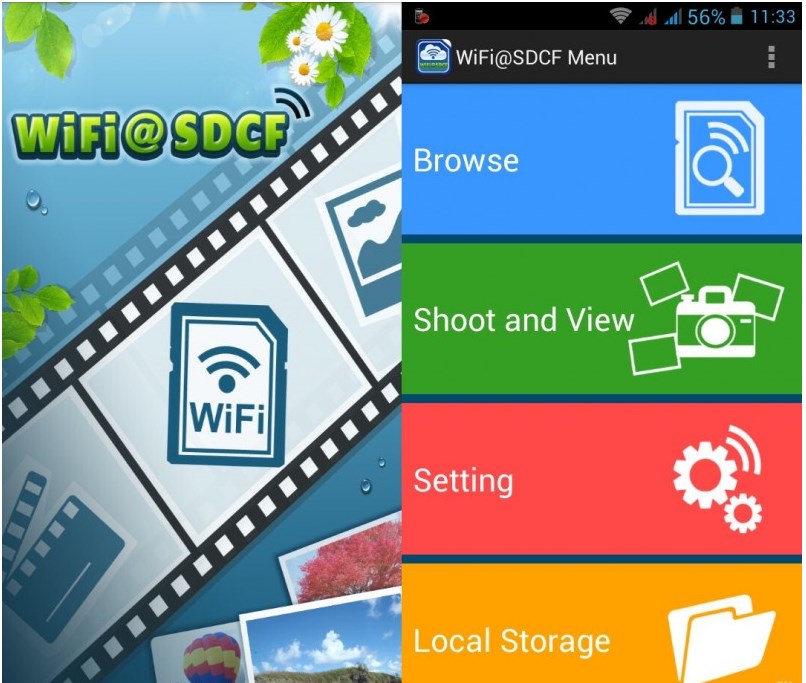
After launching the application you can see all the sections. In the main menu there are categories: photo, video and settings, where you can change the network name and password.
What do I need to work with Wi-Fi SD?
The very first thing is to check your camera for built-in Wi-Fi. If you bought your camera recently, chances are high that it's already equipped with Wi-Fi and you didn't pay attention to it. Although it sounds a bit ridiculous, it does happen.
Second, check your camera for compatibility with the Wi-Fi SD card. As a rule, almost all SDHC-capable cameras support Wi-Fi cards without any problems. But, it's worth checking compatibility before you buy, such as Eye-Fi's website suggests checking your camera's compatibility with a Wi-Fi SD card. The tool is very detailed and not only confirms compatibility, but also cites possible model problems due to hardware or firmware limitations.
In this article, we will look at the Eye-Fi Wi-Fi SD card settings, but the settings and general principles are the same for all manufacturers. For example – Toshiba FlashAir, excellent cards and a decent alternative to Eye-Fi.
Warning. New versions of Eye-Fi are not compatible with older cameras. But there are plenty of Eye-Fi versions on eBay and nothing prevents you from buying them there or from photographers.
Setting up an Eye-Fi SD card
Although you can transfer data from the camera using Eye-Fi to smartphones and tablets, the initial setup requires setting up on a PC (Windows or Mac).
Insert the Eye-Fi into your computer's card reader and navigate to its root. Everything you need for setup is in the "START HERE" folder.
Go to the subfolder according to your OS and run the Eye-Fi Center software installation.
During installation, the program will add to the Windows firewall settings and explain how to receive firmware updates. It will also configure the Wi-Fi network.
When setting up, specify where you want to send photos from the camera – to a computer or Android/iOS. Let's specify the computer.
After all the Wi-Fi, transfer method, and social media settings for automatic photo posting are done, remove the Eye-Fi card and insert it into the camera.
This test photo will be automatically transferred to your computer from the camera to test the connection. Our lego man photo transferred without any problems.
The most common cause of errors when transferring photos to your computer is aggressive battery saving settings. To avoid these problems, the Eye-Fi website even has a set of recommendations for each supported camera model in terms of power consumption settings.
After a simple test of wireless photo transfer from the camera to the computer, let's launch the Eye-Fi Center program and customize Eye-Fi's operation.
There are really a lot of settings here, so you'll need a fair amount of time to get everything set up. The settings are grouped by type – from simple Eye-Fi data transmission settings, to privacy settings (geotagging). Let's take a look at the basic settings.
Under the "Networks" tab, you'll find the Eye-Fi's communication settings with the outside world. Here you can add and delete network connections between the photo and the card, as well as configure Eye-Fi to work with public Wi-Fi networks.
In the "Photos" tab you can configure the local location of photos, as well as set up online storage of photos in Flickr, Facebook, etc.
Read More:


