Why not, for example, ask for a new router from your ISP? If you're a regular customer, that might work, but see if you have to sign a new contract in that case.
How to extend your WiFi area
When using wireless networks, it's not uncommon to find that your current WiFi coverage area isn't enough. In the office, the signal from the router may not reach the partition between the offices, in the apartment it may not reach the kitchen, while in the country house or cottage it is completely absent on the second floor. And this is not an exhaustive list of problems faced by users of WiFi on a daily basis!
WiFi technology has a number of features, limitations and requirements for operation. The quality and speed of a wireless network depends on the number of devices to be connected, the operating frequency, the layout of the room, the presence of shielding surfaces in the signal path, the power of the transmitter and many other factors.
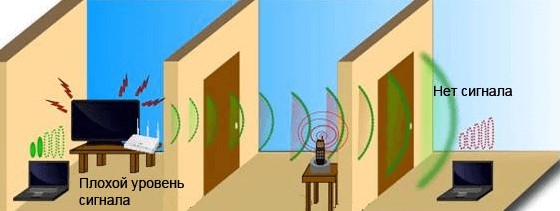
WiFi signal, like any other radio signal, propagates according to the laws of physics. It is only natural that a complex room configuration or poor placement of radio absorbing materials will have a negative impact on coverage and result in "dead zones" (areas where a wireless network is not detected or signal strength is too low to work comfortably). The same principles of building networks are valid for both indoor and outdoor spaces (streets, parking lots, driveways).
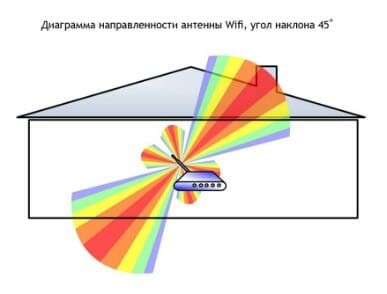
In some cases, to solve the problem it is enough to change the location of the router. By moving the device to the optimal place in the apartment, you can get rid of "dead zones". However, the opposite situation is possible, when together with getting rid of one "dead zone" you get two others, but in new places.
Correct installation of the equipment – Certainly the first thing to look for when deploying a wireless network. But while experimenting to find the best place to install a router is easy to do in your own home, it can be difficult or impossible in the office, where the location of workstations and networking equipment are approved long before the wireless network is set up.
Connecting more powerful antennas
Replacing your router's WiFi antennas with more powerful ones can improve connection quality as well as increase coverage. The included antennas of inexpensive routers are usually compact and have low gain. When you connect more powerful antennas, the reception and transmission of radio signals is improved, allowing you to use the router's raw power more effectively. Connecting a higher-powered antenna is a passive method of increasing the WiFi zone, because it does not use additional active radio devices.
As a powerful antenna with a circular pattern, you can use Stella-8: this antenna operates at 2.4 GHz and has a high gain (up to 8 dBi). As an even more powerful antenna, you can use the Stella-11 (11 dBi gain). If your router operates in two frequency bands of WiFi (2.4 and 5 GHz), look at the versatile MikroTik Omni or Stella-6 AC.
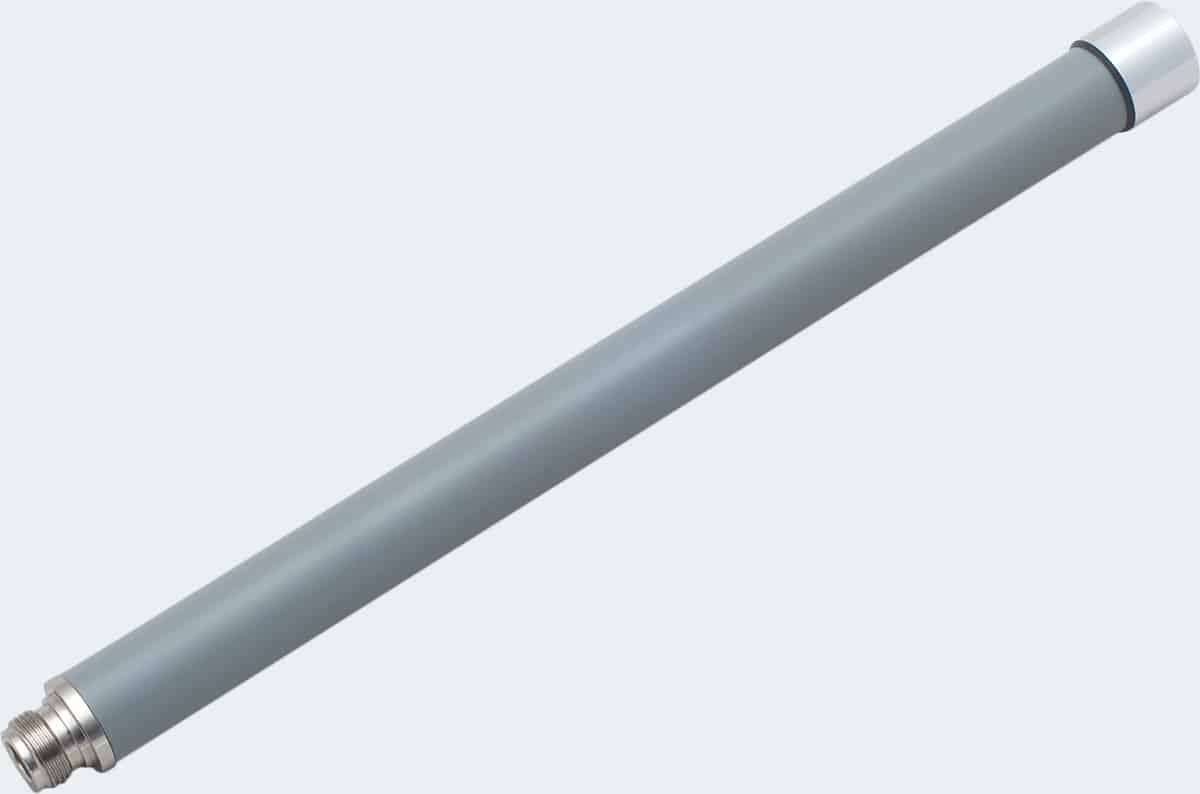
Circular antennas are most often used to create a WiFi zone: they guarantee network access from any direction. However, in rare cases, there is a need to provide access in one direction or purposefully "punch" the signal through a partition or other obstacle. In this case, it is recommended to use directional antennas of panel type, which "focus" all signal power in a narrow sector. These antennas are often encased in a sealed housing, so they can be used for distributing WiFi outdoors (for example, in the yard of a country house or in the parking lot). Among the directional antennas, we recommend the AX-2418P (2.4 GHz) and AX-5520P (5 GHz).
Connecting high-powered emitters is possible only for routers and access points with removable antennas. Often manufacturers install non-removable antennas on their devices, and in low-cost models this is due to cheaper production, and in expensive ones – to the use of high-tech solutions (distribution of antennas by frequency bands and spatial streams). Routers with removable antennas include the popular TP-Link Archer C9.
Manual

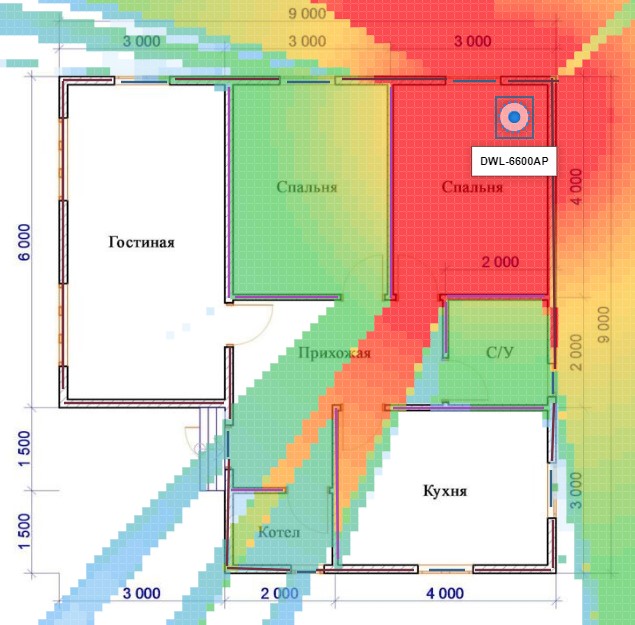
Did you look at the picture above? Yes, we still build some coverage maps manually. What you need to do this:
- Photoshop (or some other graphics editor, it's a matter of habit). Here we throw in the found room plan, arrange the access points, specify the measurements.
- Any network analyzer. Just take the signal level and add it to the map.
Dear student, at the moment you can not come up with a more successful scheme – saw so, you'll do faster than looking for analogues. If you do it all the time, it starts to get a little boring – you need to repeat measurements for different frequencies, somehow remember all these taken points, and visually not everyone will understand the coverage area, but the method is quite working and for the current day.
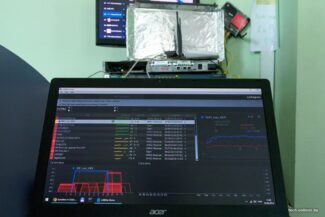
What about the software analyzers? There are two options – to use a laptop (Windows) or phone (Android). In an extreme case, you can do with "the number of antennas", but please do not do so, because there are good options programs, the more bonus learn what signal corresponds to the required number of antennas. What I personally use:
- Laptop – inSSIDer – free, handy, clear. We put it on the laptop and just have time to copy the signal.
- Smartphone – WiFi Analyzer – Also works fine, but on Google Play this application has many clones, although for the most part they all work the same. And while we are on the subject of smartphones, I recommend checking out the app "WiFi Heatmap", it might well satisfy your need.
In fact, we have a great selection of Wi-Fi analyzers on our site – choose and use them.
Acrylic Wi-Fi Heatmaps

The first (and one of the most popular) program that actually builds WiFi maps (and is in fact actively used for WiFi network planning). And it does it properly and beautifully. As a bonus, it can even build volumetric coverage maps. But all good things must be paid for, and students are unlikely to like such prices. Please note that the first columns refer to monthly fees:

Providing line-of-sight.
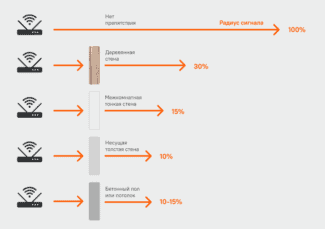
Obstructions to any signal affect its level. Diffraction of radio waves operating at 2.4 GHz Wi-Fi is relatively small because the wavelength is tens of centimeters. This is not long enough to go around obstacles such as walls or furniture, so as the signal passes through from the router to the network device, some of the energy is absorbed, some is reflected, and the rest passes through and reaches its destination.
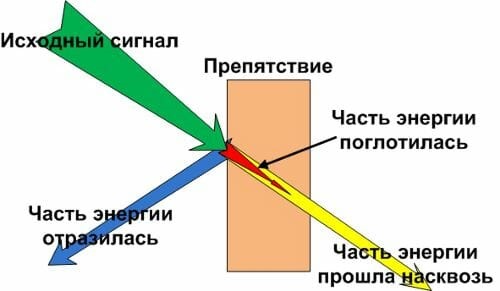
The amount of absorption depends on the material through which the wave passes.

There is even a special table indicating the loss of signal level in dB and the effective distance (the value determining the radius of the radio wave after passing an obstacle).

The 802.11n protocol, which appeared in 2009, can cover a radius of 400 meters in the "clear field". You can calculate what level of signal will reach the client machine through possible obstacles, and whether it will reach at all.
For example, the router is installed in the bedroom, while the tablet is in the kitchen. How much distance can the router cover if the radio wave has to go through three walls? Do the math:
Eliminating sources of interference
The 2.4 GHz frequency is publicly available and used for Wi-Fi and Bluetooth devices. Yes, Bluetooth bandwidth is pretty low, but it can still interfere with an access point.
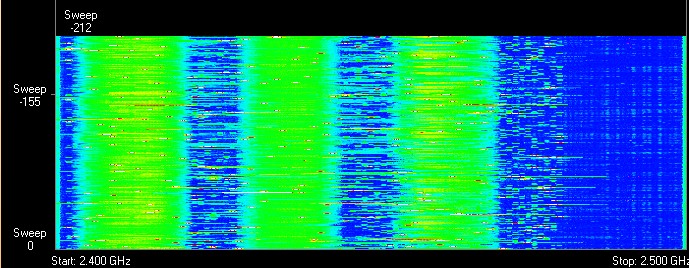
You can see a picture in the "listening wave": the green dots are the flow of the router's Wi-Fi radio waves, and the red dots are the interference in the air created by Bluetooth.
The microwave also uses a magnetron for heating and cooking, which also operates in the 2.4 GHz band. Its radiation is so great that it pierces the microwave oven's protective screen and completely obscures the signal from the wireless network.
Therefore, do not place the router near a microwave oven or be prepared for total clogging of the airwaves during signal reception when heating or cooking "crispy chicken".
For a better understanding of the topic, I suggest reading the following article.
Installing a Wi-Fi Amplifier
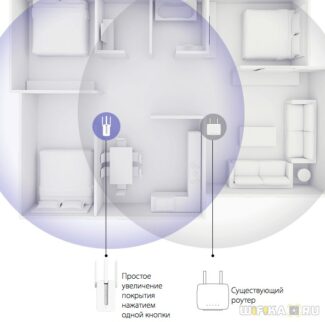
Wi-Fi amplifiers – also called repeaters or extenders, more properly – increase Wi-Fi coverage by 'capturing' the wireless signal from a router and relaying it. Some people rightly question whether they work at all. They do, but it's not the best solution if you need very fast Wi-Fi.
However, they are inexpensive and easy to install and configure. Models like the TP-Link TL-WA860RE can be bought for as little as $20. But this model only supports the rather old 802.11n standard. If you want something faster and more modern, you can recommend the $35 TP-Link RE300, which supports the newer 802.11ac standard.
The Wi-Fi repeater can be used to boost the signal from a router on another floor or in the opposite wing of the house.
The repeater uses half of its built-in antennas to receive the Wi-Fi signal and the other half to replay the signal; thus, the potential Wi-Fi data rate through the repeater is effectively halved.
This is not noticeable in lightweight scenarios such as web surfing or sending/receiving emails, but can be noticeable when transmitting large files over the network, such as high-resolution video. That's why we recommend Powerline adapters for more demanding scenarios. But many people find that for watching Netflix or YouTube videos, amplifiers work well, too.
Wi-Fi amplifiers should be placed in the center of the house, close enough to the main router, as shown in the figure above. If you place the repeater close to the edge of the main network, hoping to boost the signal in this way, you will reduce the speed of connections to the rest of the network and to the Internet.
Using the 2.4 GHz Wi-Fi band instead of the 5 GHz band
Wi-Fi can operate in one of two frequency bands: 2.4 GHz and 5 GHz. Many people think the second one is better because it is faster.
The 5 GHz band is indeed faster, but you have to pay for everything, in this case a reduced range. The higher the frequency, the shorter the wavelength. Also, signals on the 5 GHz carrier frequency cannot pass through walls, ceilings, floors and people as well as signals on the 2.4 GHz frequency. (Incidentally, this is the same reason why 5G networks offer such high speeds – they operate at much higher frequencies, in the millimeter band – but these signals have trouble getting through glass, trees and even rain.
The 2.4 GHz band, on the other hand, offers better signal propagation over longer distances, but at lower speeds. So you can get a good signal over a longer distance from the router, which is essentially increasing its range, if you switch your smartphone or laptop to the 2.4 GHz Wi-Fi band. Many routers broadcast the signal on both frequencies under the same network name. This is done for convenience, but implies that you can't select a range at the network connection level – the selection is automatic.
If your router falls into this category, log in to the settings web page and open the Wi-Fi menu, where you can set separate network names for each of the two bands.
You should also keep in mind that communication devices using the 2.4 GHz Wi-Fi band often encounter interference from household devices using the same frequency: microwave ovens, baby monitors, Bluetooth devices, etc.
This interference reduces Wi-Fi speed and range. The longer range you want, the slower speeds you'll get; the faster speeds you want, the more you'll have to mitigate the impact of interference by moving your Wi-Fi device closer to the access point.
Read More:
