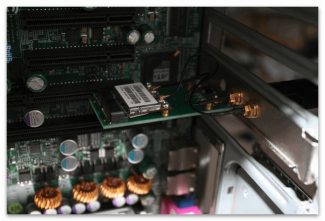
To check whether the module has been installed on the laptop, the manufacturer's official website will help. Here you should enter the serial number of the laptop, go to its page and find the item "Wireless connection". Here you will find detailed information about the adapter, including the bands it supports. If you do not have the necessary information, you should check the possibility of connecting the device to a wireless network on other Internet resources, including online stores.

Connecting Wi-Fi on a Hewlett-Packard laptop: universal manual for all models

The most popular way to connect laptops to the Internet involves using Wi-Fi technology. Almost all laptops, including HP models, have modules that support it. Most of these adapters are automatically configured and perform their functions without causing any problems to users. If there are difficulties, you will have to figure out how to turn on Wi Fi on your HP laptop for the first time and in all other situations.
Checking for connectivity
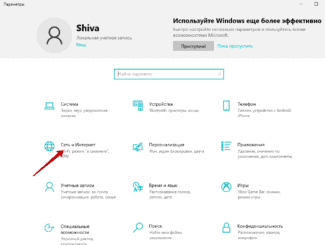
Before activating the adapter, you should first make sure that it is present on the laptop. The first step is to look for the wireless connection icon in the bottom right corner of the screen. If it is not there, you should open the "Network Status" section by typing its name in the search bar of the Start menu.

After that, you should first go to the "Network and Sharing Center" located on this tab, and then to the section on changing the adapter settings. There should be icons for all connections, including wired and wireless. If the desired option is missing, it is due to the following reasons:
- There is simply no built-in Wi-Fi module, and you will have to connect to the Internet using a cable.
- Drivers corresponding to this model are not installed. Suitable software will have to be downloaded onto the laptop from the manufacturer's page and installed manually.
- The wireless network adapter has been disabled, or if the operating system has been recently installed or reinstalled – not enabled.

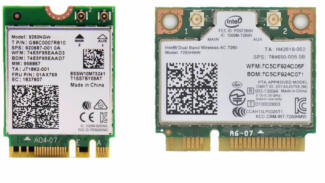
To check whether the module has been installed on the laptop, the manufacturer's official website will help. Here you should enter the serial number of the laptop, go to its page and find the item "Wireless connection". Here you will find detailed information about the adapter, including the bands it supports. If you do not have the necessary information, you should check the possibility of connecting the device to a wireless network on other Internet resources, including online stores.
Connecting your laptop to a wireless network
In this section you will learn how to configure wifi on a laptop on which you have decided to install Windows 7, as well as how to connect it to a home network that has a proper connection to the Internet.
After turning on the laptop and waiting for the operating system and all the necessary services to load, you should pay attention to the taskbar. If the laptop has a wi-fi connection, a special icon appears in the corner of the screen. The way the icon looks like you can see if the laptop is connected to the network or not.
If you need to check whether there are available connections, you must click the left mouse button (mouse) on the icon, and then select the desired network.
You may be required to authenticate, i.e. enter a security key. After entering the password correctly, your device will be connected to the Internet.
In some cases the wi-fi connection icon may not pop up when the laptop is switched on. This indicates that the wi-fi module on the laptop is not working or is turned off. On some laptop models, you can turn it on by simply pressing the appropriate button on the device, and in some cases the module must be turned on programmatically.
To enable the wi-fi module programmatically, go to the Control Panel, where you need to find Network and Internet and Network Connections. Then you see the icon wireless network connection, on which you right-click and select "enable".
After these manipulations, the wi-fi connection icon in the taskbar should appear. If this does not happen, it is necessary to check the installation of drivers for wi-fi module. You can do this by installing drivers from the disk, which is included with the laptop or downloading drivers from the Internet, referring to the developer's website.
Setting up wifi on a laptop with Windows XP
The Windows 7 operating system is quite well optimized for maximum ease of communication setup. With Windows XP, the setup process and the rest of the tasks are pretty much the same.
- Turn on your laptop wi-fi module.
- When an icon appears in the tray, double left-click on it. A window appears in which you should click Search for wireless networks.
- As a rule, you will see a list of available points, which you could connect to.
- If you cannot connect this way, you should enable the wireless network connection via Start – Control Panel – Network Connections.
- The next step is to view the available wireless networks.
- As in Seven, select the Change Network Preferences line.
- In the window that appears again, select Network by Access Point and check the box next to "Automatic network connection".
- The next thing to do is to go back to Wireless Networks and click Refresh List.
- Then you specify the desired network, click Connect, and enter the access key.

