The user can compare the result with his own password to draw a conclusion about the security of the network. If required, set additional security measures.
- Setting up a wireless network in Windows
- 1. Get the right equipment
- Setting up a modem and connecting to the Internet.
- Hardware for connecting Windows to a wireless network
- Broadband Internet connection and modem
- Wireless router
- Wireless network adapters
- Positioning the wireless router on the network
- On your computer
- On smartphones
- Configuring connection settings
- Connecting to a wireless network
Setting up a wireless network in Windows
With a wireless home network, you can access the Internet in different parts of your home. This article describes the basic steps for setting up a wireless network and how to get started.
1. Get the right equipment
To set up your own wireless network, you will need the components listed below.
A broadband Internet connection and a modem. A broadband Internet connection is a high-speed connection. The most common types of broadband connections are DSL and cable connections. To get a broadband connection, contact your Internet service provider. DSL commonly used by telephone companies and cable operators. Internet service providers often offer broadband modems. In addition to modems, some ISPs offer wireless routers. You can also find these devices at electronics and computer stores or online retailers.
2. wireless router. A router transfers data between your network and the Internet. With a wireless router, you can connect computers to your network. Using a radio link instead of wires. There are different types of wireless networking technologies, such as 802.11a, 802.11b, 802.11g, 802.11n, 802.11ac и 802.11ax.
3. wireless network adapter. A wireless network adapter is the device that connects your computer to a wireless network. To connect your laptop or desktop computer to a wireless network, it must be equipped with a wireless network adapter. Many laptops and tablets, as well as some desktops, have wireless network adapters.

Setting up a modem and connecting to the Internet.
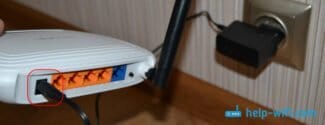
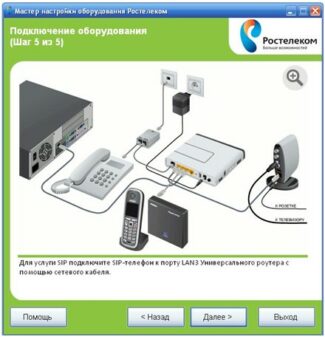
Once you have the necessary equipment, you need to set up your modem and Internet connection. If your modem has not been set up by your Internet Service Provider, connect your modem to your computer and the Internet by following the instructions provided with your modem. Well, if your modem uses DSL, plug it into a telephone wall outlet. If you're using cable, plug your modem into a network outlet.
Position your wireless router to maximize its signal strength and minimize interference. Follow the tips below for best results.
Place the wireless router in the center of your home or apartment. It is best to place it as close as possible to the center of your home or apartment so that the wireless signal evenly covers all corners of your home.
Place the wireless router above the floor, away from walls and metal objectssuch as metal cabinets. The fewer physical obstacles between your computer and the wireless router, the stronger the signal.
Reduce the level of interference. Some network devices use the 2.4 GHz radio channel. This is the same frequency used in most microwave ovens and many cordless phones. When you turn on the microwave oven or answer a wireless phone call, the signal from your wireless router may be temporarily interrupted. Most of these problems can be avoided by using a cordless phone that operates on a higher frequency, such as 5.8 GHz.
Hardware for connecting Windows to a wireless network
Broadband Internet connection and modem
Broadband Internet connection guarantees high data transfer rates – as opposed to slow remote access, which is not powerful enough to support a wireless network. Typically, a broadband connection is established using a digital subscriber line (DSL) or cable. To get a broadband connection, contact your Internet service provider. Usually phone companies provide DSL connections and cable companies provide cable connections.
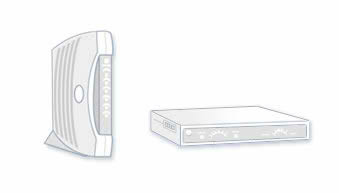
ISPs often provide and even install broadband modems. Some Internet service providers offer a combination of a modem and wireless routers. You can also purchase this equipment at computer and electronics stores.
Wireless router
A router transfers data between the network and the Internet. A wireless router allows you to Connect your computer to a network Not with cables, but with radio signals.
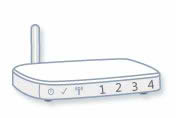
There are several types of wireless networking technologies, including 802.11a, 802.11b, 802.11g, and 802.11n. We recommend using a router that supports 802.11g or 802.11n technology because such models can provide proper data transfer speeds and maintain sufficient radio signal strength.
Wireless network adapters
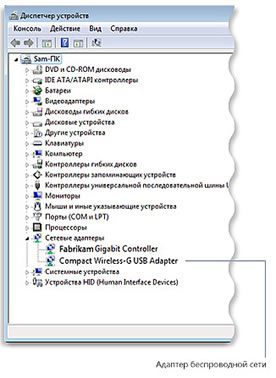
A network adapter – Is the device that connects a computer to a network. To connect a laptop or desktop computer to a wireless network, they must be equipped with a wireless network adapter.
Positioning the wireless router on the network
The wireless router should be placed where it can receive a strong signal with minimal interference.
For the best results, use the following tips:
- Place the wireless router in the center. The router should be placed closer to the center of the home to provide a strong wireless signal throughout the home.
- Do not place the wireless router on the floor or near walls or metal objects.such as metal filing cabinets. The fewer physical obstacles between your computer and the router, the stronger your router's signal will be.
- Reduce interference. 802.11g networking equipment uses a radio frequency of 2.4 gigahertz (GHz). Microwave ovens and many cordless phones typically operate at this frequency. If the microwave oven is turned on or a call comes in on the cordless phone, the wireless signal may be temporarily interrupted. Most of these problems can be avoided by using a cordless phone with a high frequency (such as 5.8 GHz).
On your computer
Before you connect your computer to the WiFi, make sure that the proper adapter is installed and correctly recognized by the system. Traditionally, many users have a preference for a cable, so there are PCs without the right module. You can check if there is suitable hardware through the taskbar or Device Manager.
Adapters come in different types. You can connect a USB whistle, they are often Plug-and-Play, so on Windows the drivers will appear in the system without unnecessary action on the part of the user. 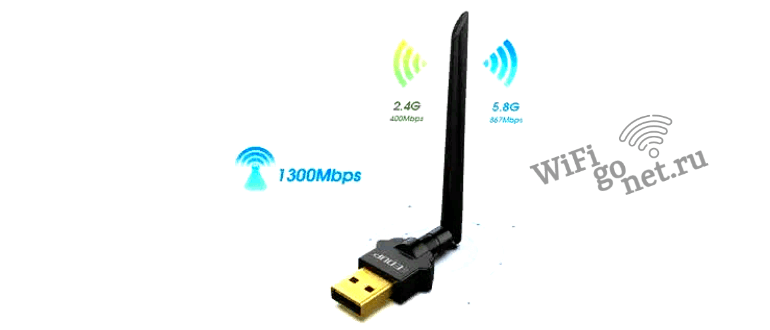 And you do not have to open the system unit to install the module. You can also choose a built-in module.
 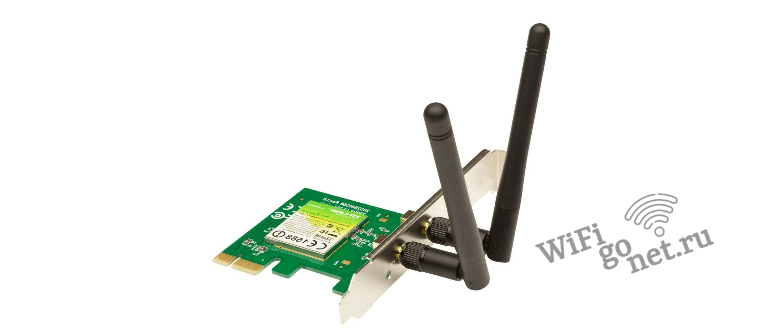 And you do not have to open the system unit to install the module. You can also choose a built-in module.
 This option is optimal if you plan to use Wi-Fi all the time. But before you use this type of adapter, you need to get the drivers. It is recommended to download them in advance. You can use a cable or transfer from another PC on a medium.
Once the adapter is installed, the user will be able to connect to the WiFi. Network search and authorization is performed using the same algorithm as for laptops. You must first open a list of all detected SSIDs. Then select the desired one, and then enter the password.
On smartphones
Your smartphone or tablet is equipped with a wireless module that allows you to use Wi-Fi. The sequence of actions almost does not depend on the version of Android or iOS. For most mobile devices, the algorithm of how to connect WiFi is as follows:
- You should activate the wireless module. You can do this both through the pop-up top menu, and through the general settings of the device.
- From the list of available networks you need to select the SSID, enter the password.
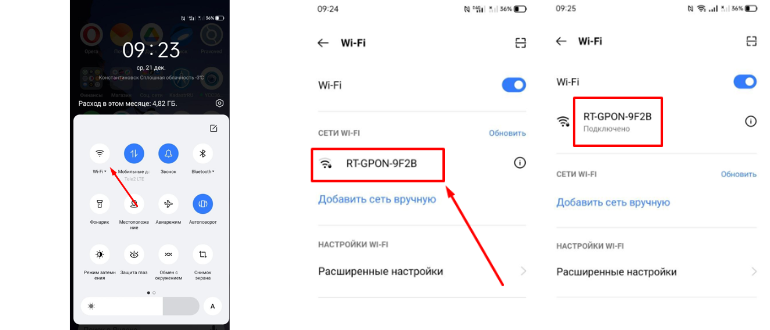
If the smartphone is connected to one of the networks, but you want to switch to another, you must first break the connection with the first. To do this, you need to tap on its name, then the desired button next to the name will appear. Then the user can select another SSID and enter the password.
The devices remember the network data. If your smartphone or tablet has previously connected to a router, and the settings of that router have not been changed afterwards, then after activating the wireless module the connection will be established immediately. This option is convenient because it allows you not to enter a password every time you need to switch from mobile traffic to Wi-Fi.
Configuring connection settings
To configure the connection settings, click "Change connection settings" in the window above when adding a wireless network, or open the Wireless Properties window by clicking on the "Properties in the context menu of the wireless network:
On the "Connection" and "Security" tabs of the "Wireless Network Properties" window, set the connection settings as shown in the figures below:
Check "Remember my credentials for this connection every time I log on" if the computer is used by a single user. If more than one user is using the computer, it is better to disable the setting.
Configure the properties of the protected EAP by clicking on the "Options on the "Security" tab of the "Wireless Network Properties" window:
The network will be added to the list of networks and will become available for connection when the computer is within range of the network.
Connecting to a wireless network
Open the "Connect to Network" dialog box by clicking on the icon in the notification area
The window will display a list of networks within range of your computer:
In the list of available wireless networks, you can see a symbol that shows the signal strength for each network. The more bars, the stronger the signal. A strong signal (five bars) usually means that a wireless network is nearby or there is no interference. You can move your computer closer to the access point to increase the signal strength.
To connect to the wireless network, click on the "Connect" button
To log in to the University network, fill in the user account information, i.e. user name (login) and password, in the suggested window.
For example, the window below is shown for the user with the account beljaevanv:
Once successfully connected, the list of wireless networks will show "Connected" and an icon will appear in the notification area
To disconnect from the network, click the "Disconnect" button:
Read More:
